On Moving and a lot of Small Projects

Moving into a new house tends to create a lot of little projects.  There’s been a few extra in the case of my new home, since it didn’t have any appliances, and was missing quire a few of the small trimmings.  Things like, handles on the kitchen cabinets.  It’s an easy little thing to add, a few measurements and a bit of drilling is all, but it needed done.

There’s also been quite a few larger projects.  Like the appliances.  The fridge and stove pretty much go right in and plug in, though the fridge needed a water line run to it to work the ice maker.  Then there’s the dishwasher, which needed to be hooked up to power, and needed both a water and drain line run to it.  These aren’t that bad either, punch a hole through a cabinet, drop the lines, tap into the existing sink plumbing.  This whole project also involved adding a garbage disposal to the sink however, which itself required the addition of a switch the run the thing.

Little projects.  Like hanging curtain rods on all of the windows.

Or putting in some railing on the front and back stairs, which was something required by insurance.

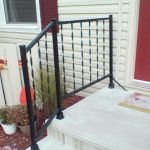
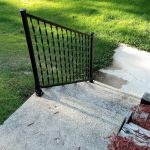
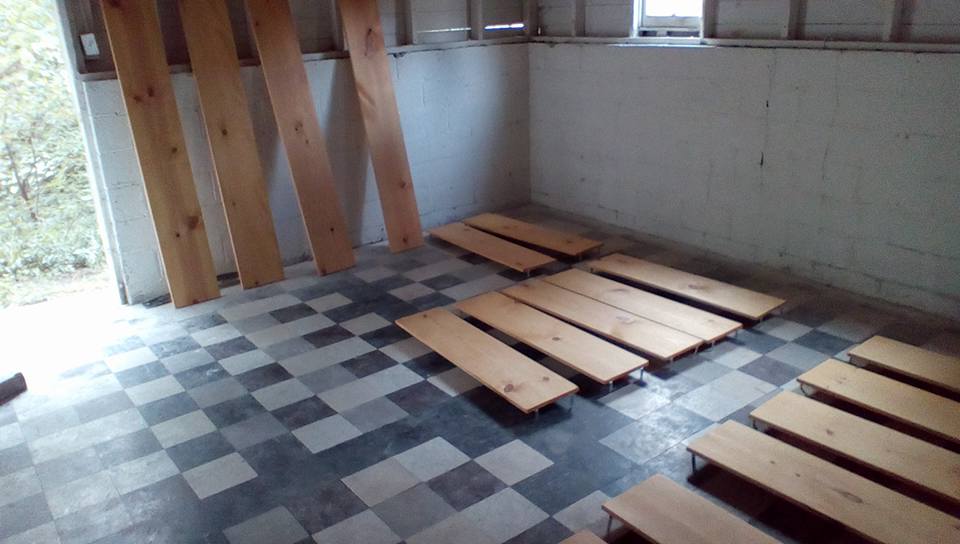
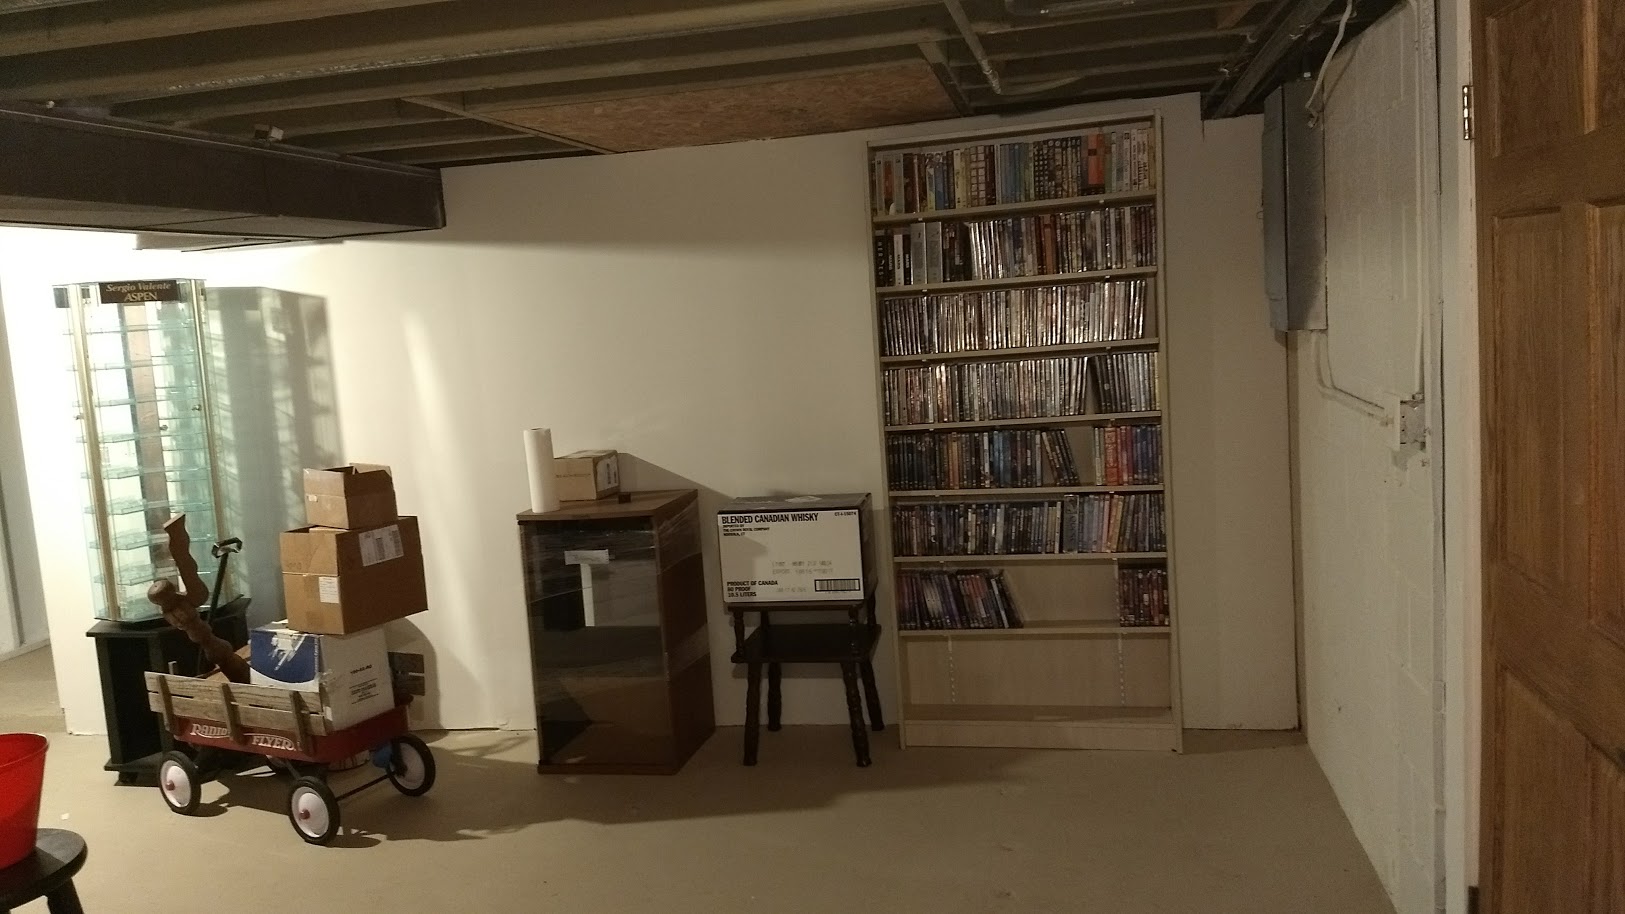
This is of course a little more involved, what with needed to drill into concrete and cut the railing to fit and whatnot.  Then there’s things like hanging decorations and some display racks in my wife’s office.  Or assembling shelving in the basement for my junk, which resulted in a trip to the ER when I dropped one unit on my foot while trying to tip it up, and failing to do so.

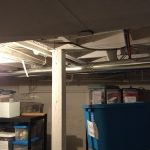
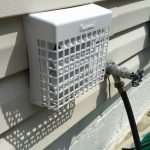
There was also the dilemma of the washer an dryer.  The closet for the laundry appliances was very small, so we had to get some smaller appliances.  The Washer hooked up easily enough, it just hooks to the hot and cold and existing drain.  The dryer was something else completely.  There wasn’t a dryer vent hole, and with the cramped space, there wasn’t a lot of room to add one.  I managed to chop a hole in the wall and go down through the floor tot he open basement, where I added a bit of duct work to go out the side of the house through an existing unused hole where a vent used to exist.

Then there were the issues.  Early on we discovered that the plumbing wasn’t draining properly.  A call to the plumber and we found that the sewer line was blocked, and after an expensive call and some digging, the sewer was fixed.  More recently there was a power issue in the basement area.  I did a bit of checking on all of the junction boxes but ultimately had to get an electrician in.  He tightened a lot fo connections in the breaker box and found a bad wire on the problem circuit.

Speaking of the basement, things are coming along well there as well.  Just before the power issue I was in the process of adding some outlets for the TV and video game corner.  Which will be pretty cool when done.

Basement – My New Space

Since the primary focus of this blog is projects, i thought it would be appropriate to talk about my new space a bit.  Last week, I’ve moved into a new home.  Mostly we wanted a home that was more on one level to accommodate my wife and kids and their mobility issues, but also we moved closer to where I work.  The new house has a pretty nice unfinished basement area, which opens out to the backyard under a deck on the main/upper floor.  Being unfinished, it’s effectively a clean slate to do what I want with.  My son is taking a corner of it for his room, but I’ve been working to plan out the rest of it to accommodate a media area, space for my toys and space for my electronics and computer.

A lot of things will probably flux a bit but I’ve got a pretty good idea of how things are going to lay out.  It may be a bit before any real work gets done, there are other projects that have funding priority over building walls in the basement, but I still wanted to throw out a baseline starting point.  I’ll do some updates from time to time as work is done.

Here’s the primary space, full of boxes at the moment.  The far space in the back will be the space for electronics, my computer, and books.  Essentially, the office space.  I also have plans to set up a little photography space in the corner using a corner unit I built several years ago.  The corner unit has a large top surface I can set up lighting and backdrops on and space underneath that I can store props and diorama parts in for use in photos.

I have some better book cases in storage that will go on the back wall.  The desk will probably continue to stick out int he room the way it is there in the center.  The space to the right where the larger boxes are I intend to build some nice shelving units to contain my collection of toys.

This will be the future media wall.  Its a bit more cleaned up than the other corner, we were without internet and TV for a bit so I pulled all of the DVDs out onto this shelf so the kids could find them more easily.  The main issue here is the lack of any power outlets, however adding outlets will be fairly easy.  The udea int he long run will be to add a second identical book case on the right full of video games, and put the TV in the middle mounted to the wall.  I also want to build or buy some sort of unit to go under the TV that will house all of my various game consoles and their controllers, all ready to be used and played.  We have a couch to go in front of all of this, but there isn’t space at the moment so it’s in the garage.

At this point I’ve mostly been working on sorting and organizing boxes.  Things are at a bit of a stand still until I can retrieve the other book cases and add some power outlets.  I also don’t want to get things too settled until I can add some actual walls in front of the concrete, I’m not a huge fan of that grungy cave look.  The ceiling will likely end up being a drop ceiling so that I can still access the underside of the floor easily.


Building A Cross Platform App with Xamarin

So, I made an app.  A for real, runs on things app.  More accurately, I followed a little tutorial to make an app, as part of the Xamarin Challenge over at Thurrott.com.  The app itself is a little weather app, it even includes location based weather and forecasting.  I know this isn’t particularly impressive but I think it’s pretty neat.

Part of the point of the exercise is that it show off the cross platform ability of Xamarin as a development plaform.  The end app uses the same code and runs on Windows 10, iOS and Android.  Unfortunately, I don’t own a MAC or an iOS device to test the iOS code but I was able to run both the Android and Windows 10 versions of the App.  I even ran the Android APK on my Fire Tablet.

I can’t say I learned a ton about how to actually make apps using Xamarin, though I plan to poke through the code provided more later.  What I learned more of was how to trouble shoot Visual Studio, which seems to be a bit more than buggy.  There is a forum set up for people looking for assistance on this contest and there are a lot of issues that all seem unrelated to each other but all related to issues with Visual Studio.

For example, I had issues getting the location based weather to work, until I went through and updated the Android Emulator files and build an emulator that ran on Android 7.  In a later step I found several of the NuGet packages weren’t installing properly, I never really figured out why but I ended up having to add them individually to each of the app platforms rather than the blanket “Install this on all platforms” system.

In the end, I did manage to get through and the app says everything was submitted and accepted.


A Myriad of Little Projects

I’ve neglected posting much lately, not so much because I haven’t been doing anything but more because I’ve been busy and not really with anything deserving of it’s own post.  I hope to remedy this a bit next year but for now I just wanted to run through some recent projects I’ve been working on.

The All New All the Same Lameazoid.com

Probably the biggest monopolizer of my time has been my other blog at Lameazoid.com.  There isn’t a lot there now, but my intention is to do a relaunch of sorts in 2017.  I’ve managed to keep up with my current regular posting, which amounts to roughly two posts per week, one Weekly Haul post and a recap of Agents of SHIELD.  I want to do much more next year.  I even made up a spreadsheet to plan everything for the year.

I have regular content set up for every day of the week.  The idea right now, is to build up a long runway.  I have the time now to crank out reviews and take photos as needed.  If all goes to plan, I will have content scheduled out through roughly May in every category.  The idea is that this content, while good is a buffer that can be shuffled as needed for NEW content to be inserted on demand.

I’ve also taken steps to try to line up content with related new content.  For example, Logan, comes out on 3/3.  So in the weeks before, for the Marvel Movie Review of those weeks, I’ll do Wolverine and The Wolverine (yeah those names are similar and dumb).  I could also pair this with some Wolverine related Marvel Legends reviews, or maybe some other Hugh Jackman reviews.

I’ve been up to a few new tech related projects lately as well.

Mail-In-A-Box

I’ll probably do a post just on Mail-in-a-Box and my set up experience.  Mail-In-A-Box is a simple install Mailserver for hosting your own email.  I’ve spun up a second VPS and attached this domain to it, since I previously didn’t have any email for this domain.  It was a little tricky but I worked things out.  The hardest bit is that Mail-In-A-Box wants to handle the DNS and core domain, but I’m hosting these things on two separate servers.

I’ve gotten a little extra cozy with DNS lately, but I also had an issue come up because Mail-In-A-Box seemed to be pushing the SSL https domain for BloggingIntensifies.

Encryption Everywhere

You might notice, I’ve enabled HTTPS on this blog.  This came out of necessity since after setting up Mail-In-A-Box, Firefox kept forcing the site to the HTTPS version, which nothing was set up for so it didn’t load.  This is a change I’ve been meaning to make anyway since the launch of LetsEncrypt!  Google is supposed to start penalizing non HTTPS sites at some point plus it’s good practice anyway.  I set up HTTPS for this blog, Lameazoid.com and Joshmiller.net.  Once I am confident in things I’ll set it up for TreasuredTidbits,.com and TheZippyZebra.com as well.

I had some issues with Joshmiller.net though because of the way Cloudflare works.

Cloudflare Integration

I also recently added Cloudflare to all of my sites.  Cloudflare is essentially a DNS provider but it also lets you mask and reroute traffic to help protect your server.  I had to pull BI off of it though to get Mail-In-A-Box to work and apparently Lameazoid.com wasn’t set up for rerouting.  I ended up having trouble with Joshmiller.net when I tried to enable SSL encryption.  Basically, as near as I can tell, the set up was looking at the Cloudflare IP and not the server IP, so things weren’t meshing or hooking up properly.  Everything corrected itself once I removed the Cloudflare rerouting.  I still need to play with this a bit before I set things up on my wife’s two blogs.

Part of why I experiment with my blogs vs hers is that I get way less traffic and I don’t like to irritate her.

Cloud At Cost VPS

I did a post on Cloud At Cost, but I wanted to mention it again as a recent project.  I have two VPSs from them, plus some.  I’m still having issues with the Windows VPS but the Linux one has been running pretty well since I got it up and running.

PLEX Server

My Synology NAS has the ability to act as a PLEX server.  I recently cleaned up a bunch of space on the NAS by throwing some spare drives into an older machine and creating a “Deep Archive” for things that I never need to access that take up a lot of space (read: My 500GB of raw video from ten years of my bi annual DVD making projects).  I also shoved some things like old ISOs and Game Install files onto the Deep Archive.  I then proceeded to start filling this new space with rips of my DVD collection.  I’m still working on the long and arduous ripping process as time allows but the idea is to run everything through PLEX to the two Firesticks I’ve set up on each TV.  This means my family doesn’t have to drag out a huge binder of DVDs to find a movie and it means I can stop worrying about discs getting scratched up and ruined.

It also gives me a nice way to watch all of the home video footage I’ve recorded over the past 10+ years.  This whole project met a bit of a roadblock when I found that I need to pre transcode all of the video in PLEX before it becomes watchable.  The NAS isn’t powerful enough to transcode it in real time.


Next Thing CHiP as a Twitter Bot

twitter-logoThere was a post that came across on Medium recently, How to Make a Twitter Bot in Under an Hour.  It’s pretty straight forward, though it seems to be pretty geared towards non “techie” types, mostly because it’s geared towards people making the bot on a Mac and it uses something called Heroku to run the bot.  Heroku seems alright, except that this sort of feels like an abuse of their free tier, and it’s not free for any real projects.

I already have a bunch of IOT stuff floating around that’s ideal for running periodic services.  I also have a VPS is I really wanted something dedicated.  So I adapted the article for use in a standard Linux environment.  I used one of my CHiPs but this should work on a Raspberry Pi, an Ubuntu box, a VPS, or pretty much anything running Linux.

The first part of the article is needed, set up a new Twitter account, or use one you already have if you have extras.  Go to apps.twitter.com, create an app and keys, keep it handy.

Install git and python and python’s twitter extension.

sudo apt-get install git

sudo apt-get install python-twitter

This should set up everything we’ll need later.  Once it’s done, close the repository.

git clone https://github.com/tommeagher/heroku_ebooks.git

This should download the repository and it’s files.  Next it’s time to set up the configuration files.

cd heroku_ebooks

cp local_settings_example.py local_settings.py

pico local_settings.py

This should open up an editor with the settings file open.  It’s pretty straight forwards, you’ll need to copy and paste the keys from Twitter into the file, there are 4 of them total, make sure you don’t leave any extra spaces inside the single quotes.  You’ll also need to add one or more accounts for the bot to model itself after.  You’ll also need to change DEBUG = TRUE to DEBUG = FALSE as well as adding your bot’s username to the TWEET_ACCOUNT=” entry at the bottom.

Once that is all done do a Control+O to write out the file and Control+X to exit.  Now it’s time to test out the bot with the following…

python ebooks.py

It may pause for a second while it does it’s magic.  If you get the message ” No, sorry, not this time.” it means the bot decided not to tweet, just run the command again until it tweets, since we’re testing it at the moment.  If it worked, it should print a tweet to the command line and the tweet should show up in the bot’s timeline.  If you get some errors, you may need to do some searching and troubleshooting, and double check the settings file.

Next we need to automate the Twitter Bot Tweets.  This is done using Linux’s built in cron.  But first we need to make our script executable.

 chmod 755 ebooks.py

Next, enter the following….

sudo crontab -e

Then select the default option, which should be nano.  This will open the cron scheduler file.  You’ll want to schedule the bot to run according to whatever schedule you want.  Follow the columns above as a guide.  For example:

# m h  dom mon dow   command

*/15 * * * * python /home/chip/heroku_ebooks/ebooks.py

m = minutes = */15 = every 15 minutes of an hour (0, 15, 30, 45)

h = hour = * (every hour)

dom = day of month = * = every day and so on.  The command to run, in this case, is “python /home/chip/heroku_ebooks/ebooks.py”.  If you’re running this on a Raspberry Pi, or your own server, you will need to change “chip” to be the username who’s directory has the files.  Or, if you want to put the files elsewhere, it just needs to b e the path to the files.  For example, on a Raspberry Pi, it would be “python /home/pi/heroku_ebooks/ebooks.py”.

If everything works out, the bot should tweet on schedule as long as the CHIP is powered on and connected.  Remember, by default the bot only tweets 1/8th of the time when the script is run (this can be adjusted in the settings file), so you may not see it tweet immediately.

This is also a pretty low overhead operation, you could conceivably run several Twitter Bots on one small IOT device, with a staggered schedule even.  Simply copy the heruko_ebooks directory to a new directory, change the keys and account names and set up a new cron job pointing to the new directory.