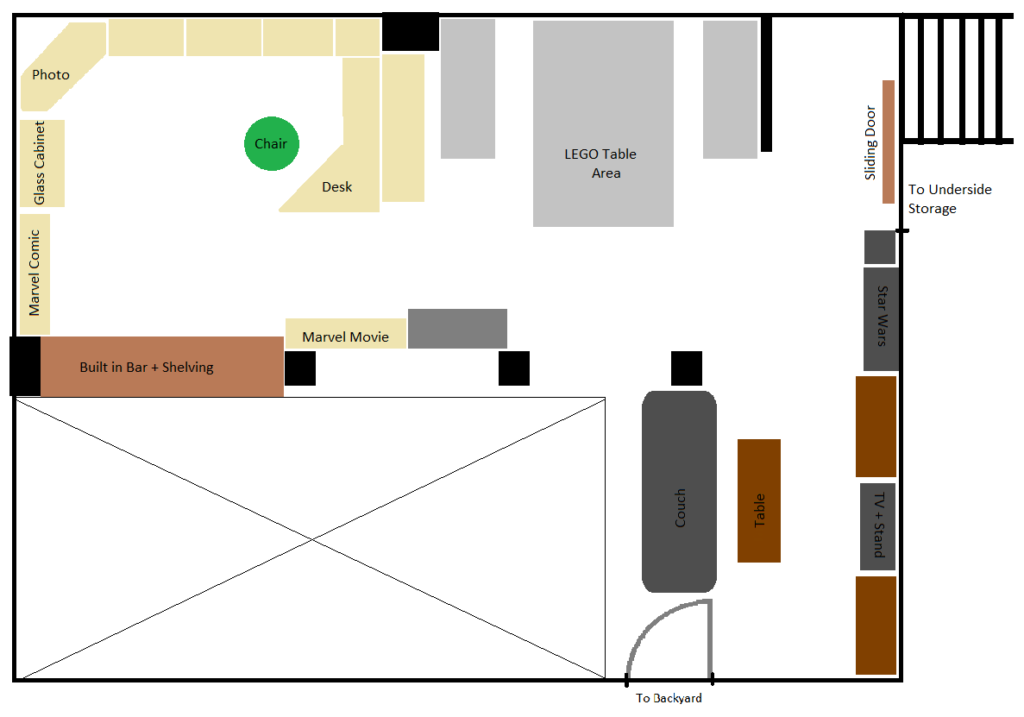
Basement – The LEGO Table

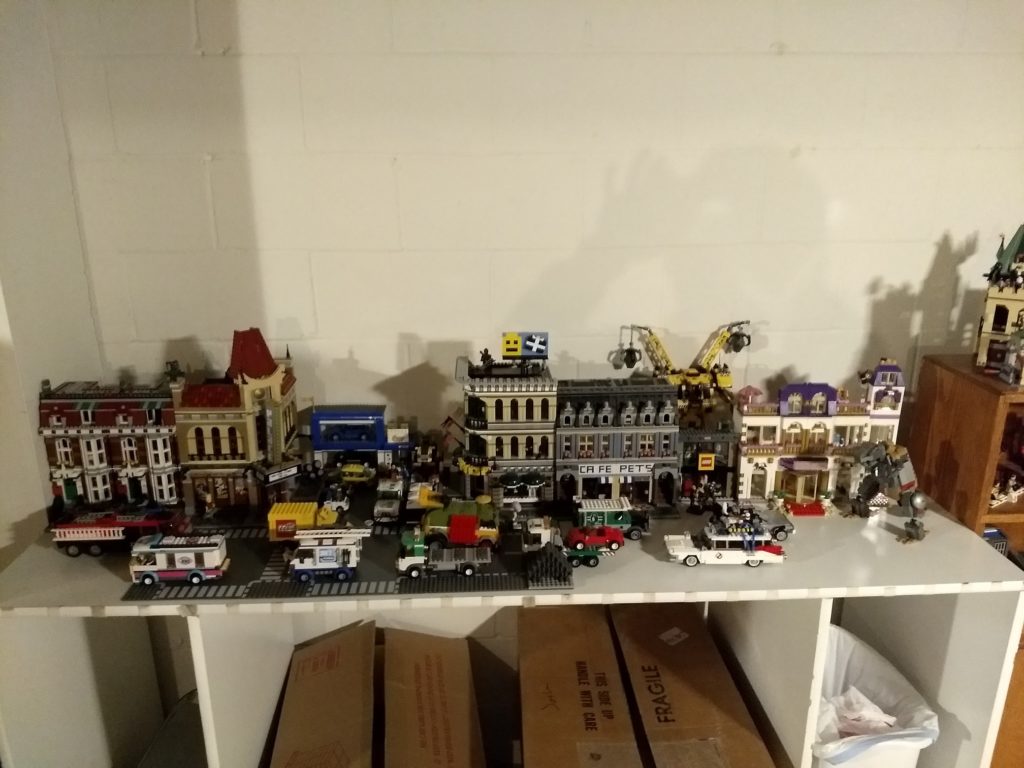
The LEGO Table space in the basement was, for the longest time, the catch all space for anything extra. It was always sort of the last space to get finished up in the basement, though it’s always going to be an ongoing project. A lot of the clean up in this space involved cleaning up other areas first. The initial set up involved a counter sort of unit that I had made years ago, that previously was in my wife’s craft room at the old house. She didn’t need it in the new house, so I inherited it and it was a place to land my LEGO Modulars.

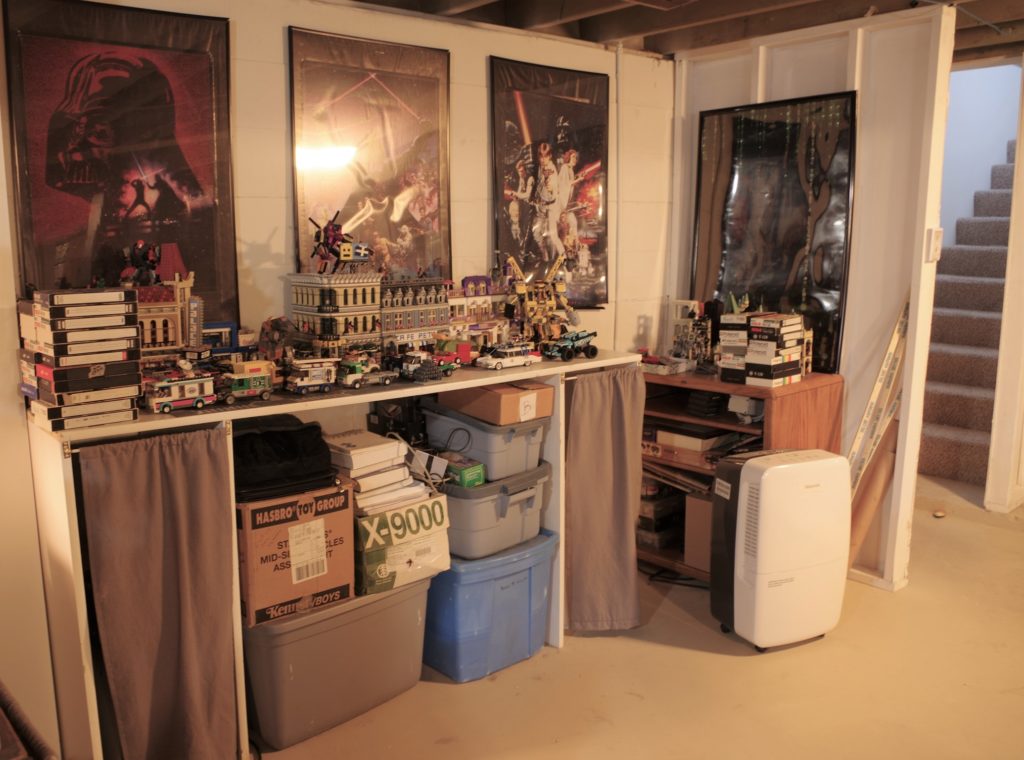
Under was used for storage for most of my other LEGO sets, since I didn’t really have a place to put them yet. They’ve still been in boxes for a few years,

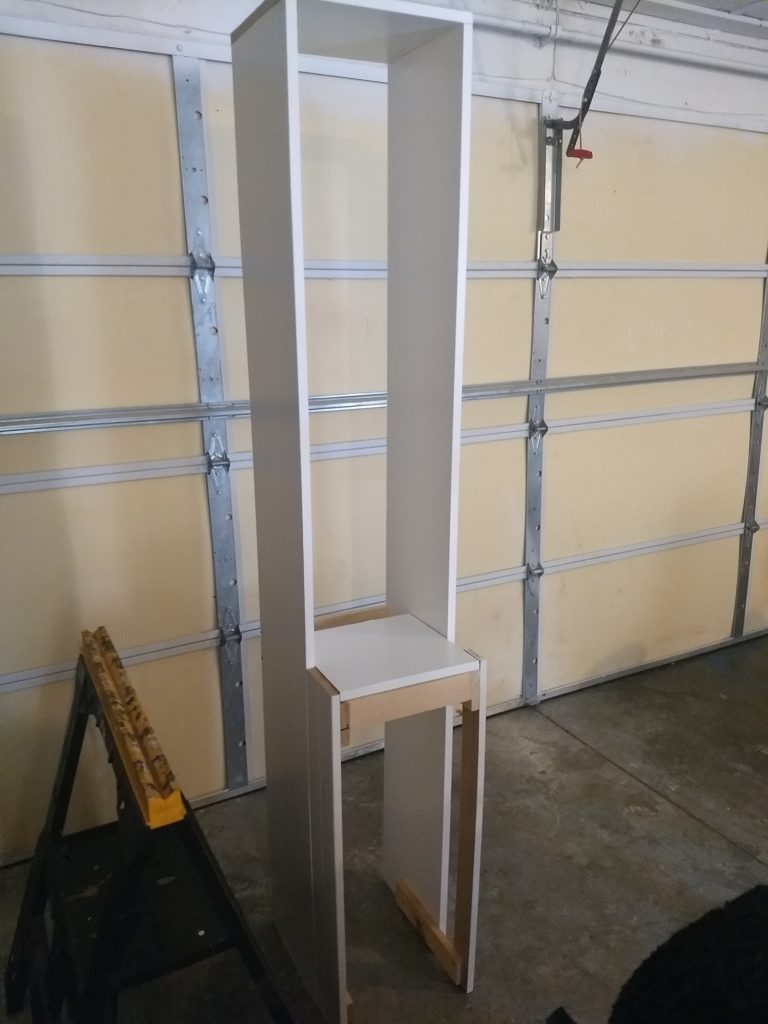
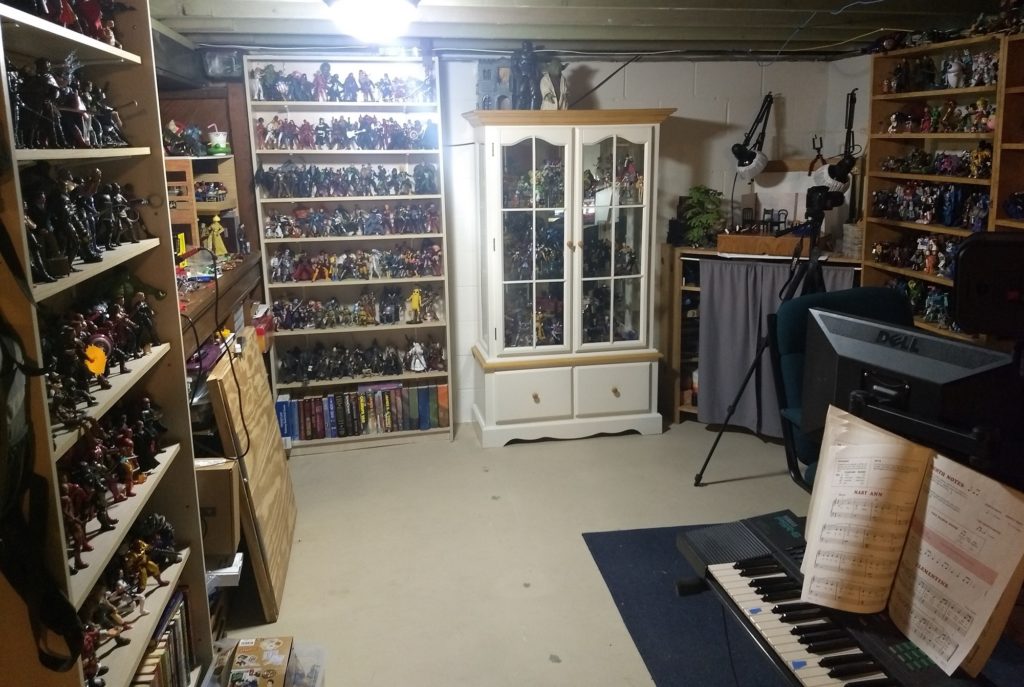
At some point we ended up with some pretty hefty book cases second hand that we were using upstairs for a while, but they were no longer needed. Originally these book cases were going to be used in the basement but they were maybe 4″ too tall, so they ended up in the upstairs space. Since they were available again, I opted to go ahead and trim them down a bit so they would fit in the basement.

This process amounted to marking a line around the top end of the book case, using a circular saw to chop all the way around on the line, then removing the top board from the chopped off scrap bit, and reattaching it to the top of the book case. I also put a fresh new coat of paint on the book cases and shelves, as well as cut a few additional shelves.

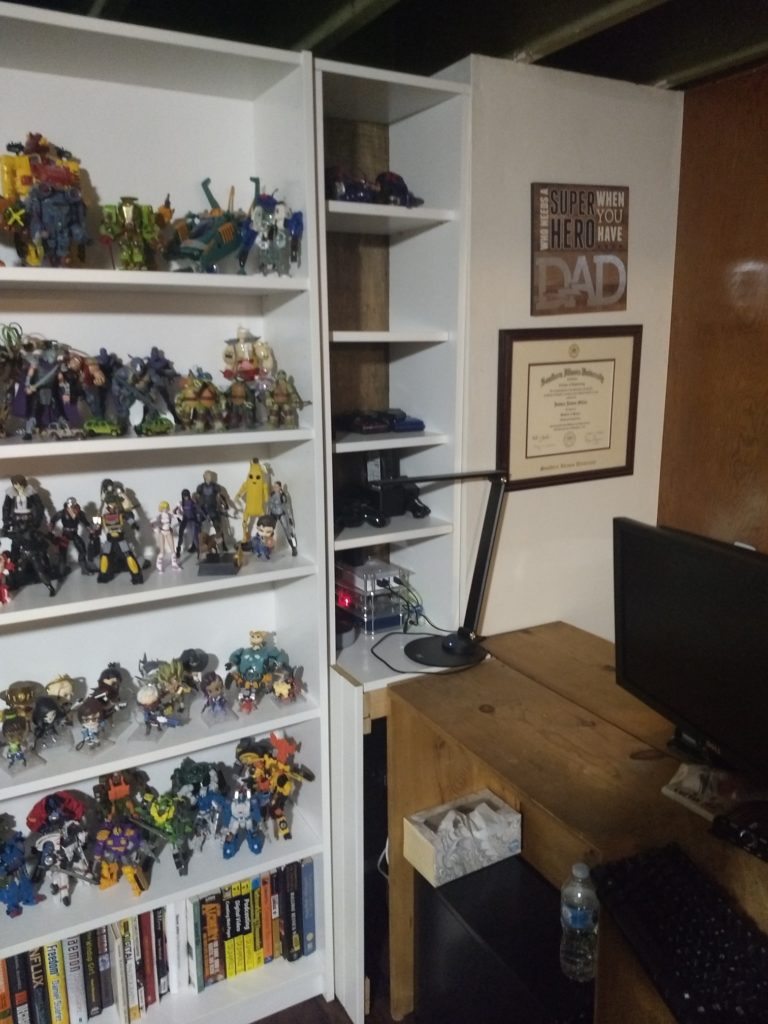
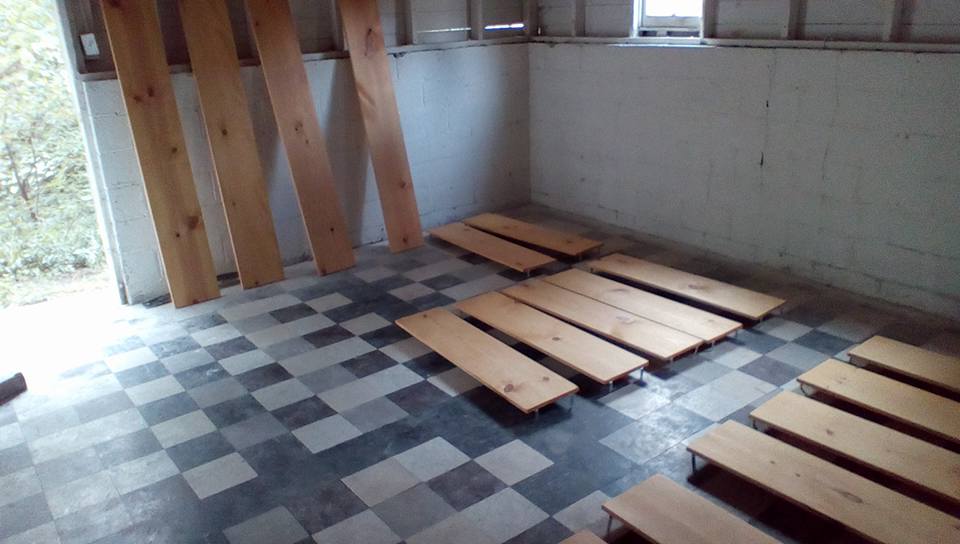
I originally wasn’t sure where these shelves would end up in the basement, but after some measuring, I decided they would work on either side of the LEGO table. This meant turning the LEGO table itself 90 degrees so it sticks out in the room. I also bought some more pre finished shelving boards, like the original table was constructed from, and build what amounted to, a second table, then strapped them together with some braces to double the available surface area.

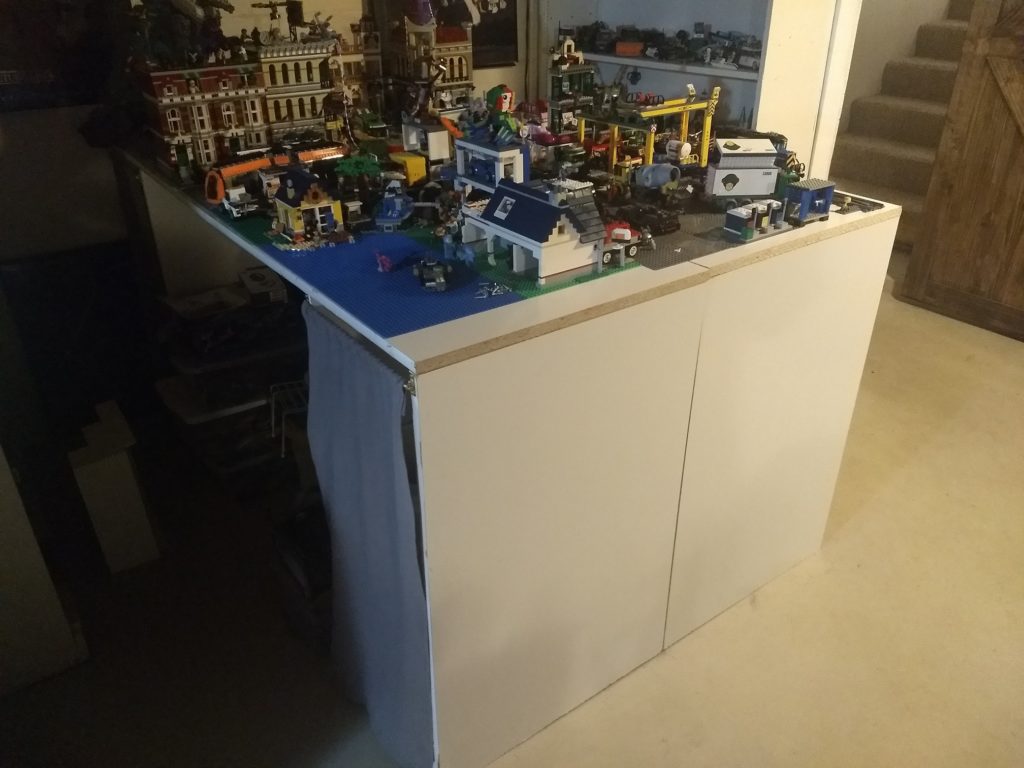
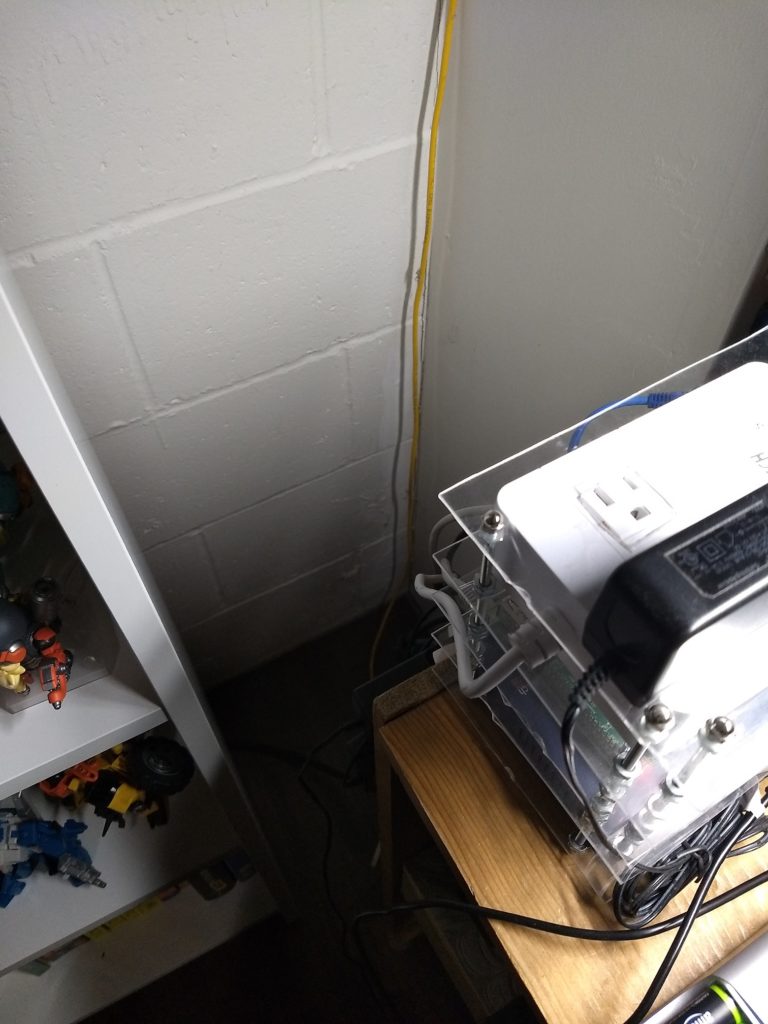
This gave me a lot more room to work with for the LEGO city, as well as shelving on either side to display and store additional sets. Which really cleaned out some of the boxes I had stored under the table. The next part of my plan was to add some additional shelving under the table for storage, which lead me to another idea. Why just add shelving on the sides, when it would be fairly easy to add shelving to the end, for a bit more display space. It also gets rid of this ugly as hell blank white surface.

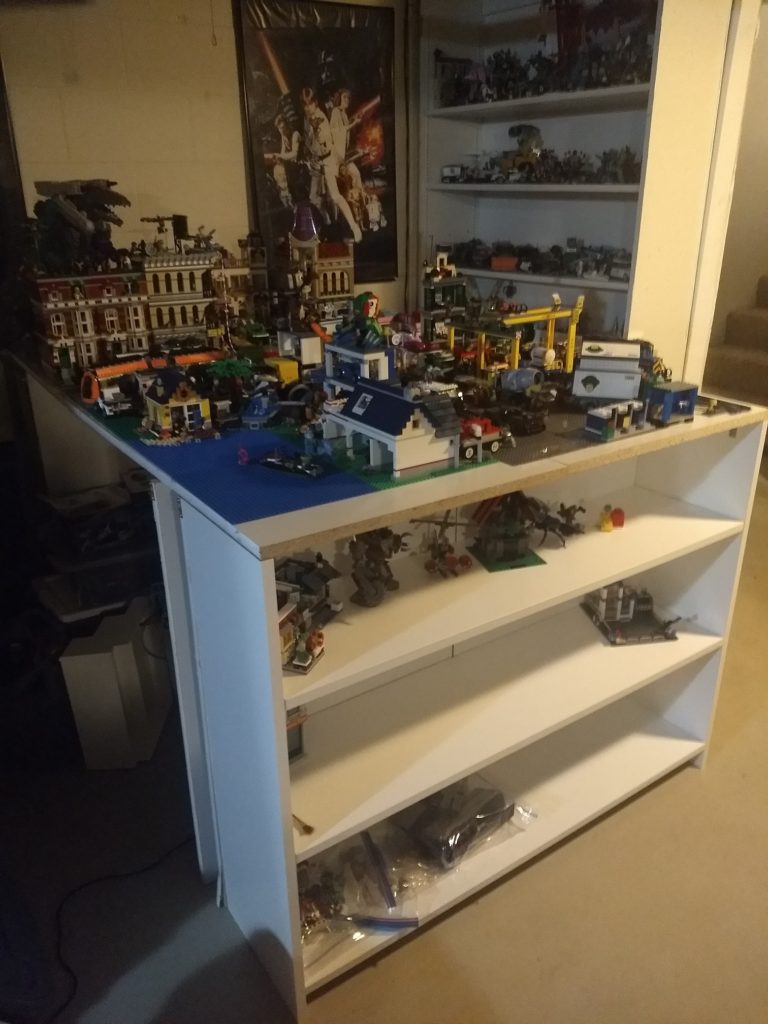
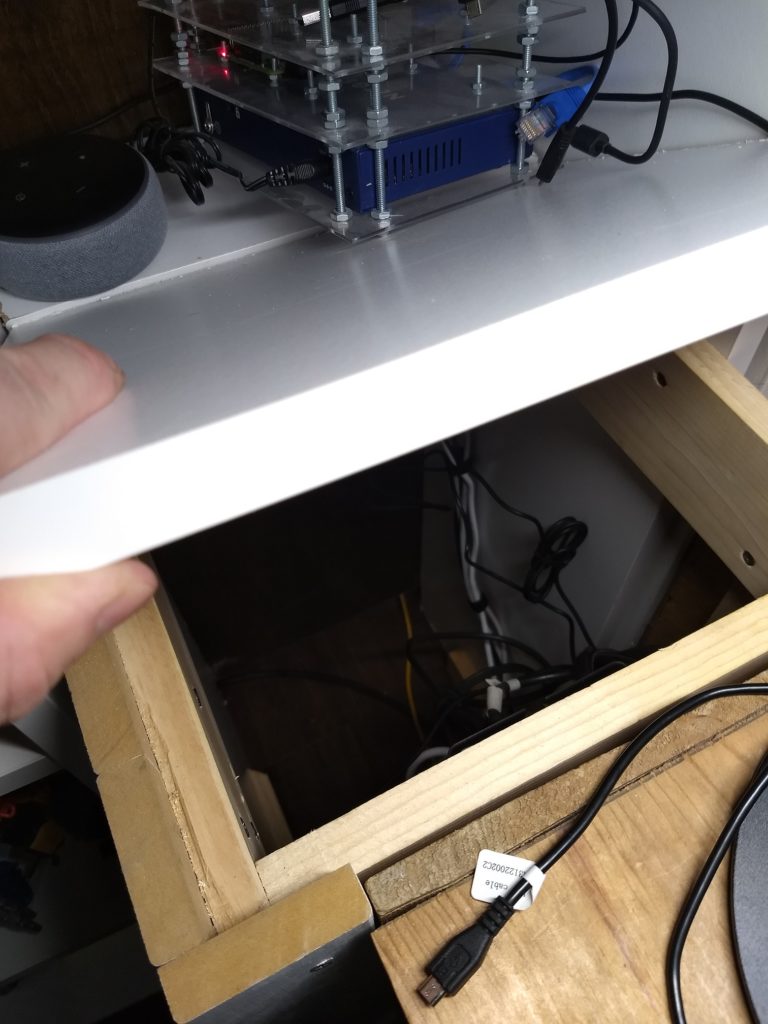
For this process, I separated the two end legs, and shuffled them back the depth of a narrower (8″ I believe) shelf. Then reattached them. I then cut and assembles a smaller shelf unit and attached it to the end of the LEGO table. On the one side, I also adjusted the secondary leg back, as well as the curtain that was there, so I could keep the trash can under the table and out of view as it was. On the opposite side, I simply removed the extra leg.

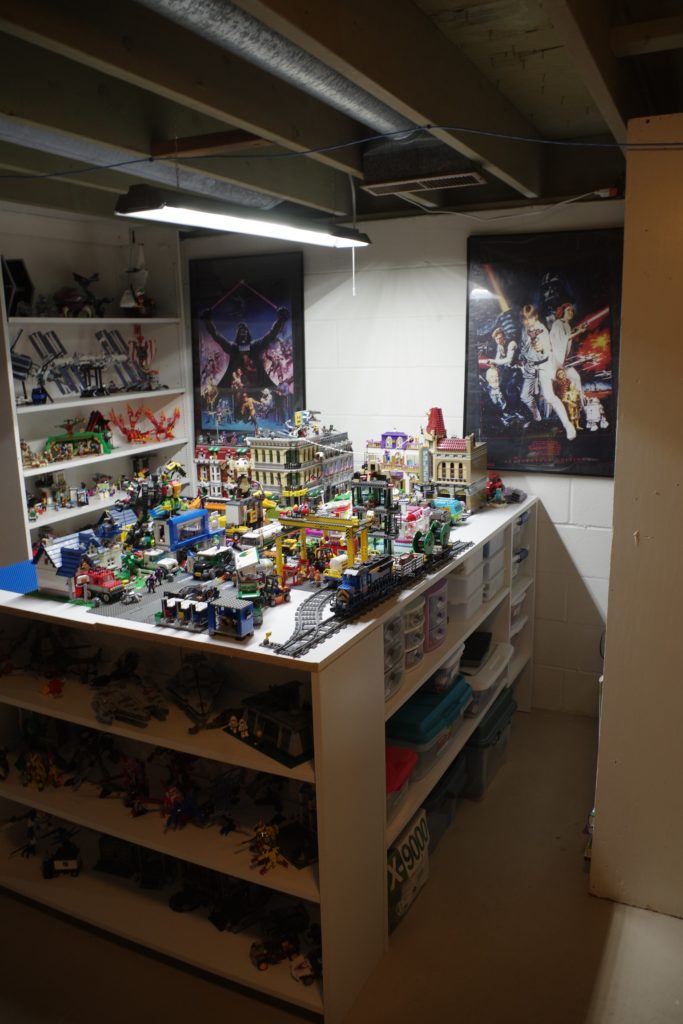
Finally, for now, I cut some more 24″ pre finished shelf boards and attached them using L braces, inside the length of the table, on both sides, so the mess inside could become a much more organized, and useful mess. I also picked up an LED shop light that I hung over the length of the table, because this particular corner of the basement is a little dark. It lights up the entire space much better than I had expected it to.

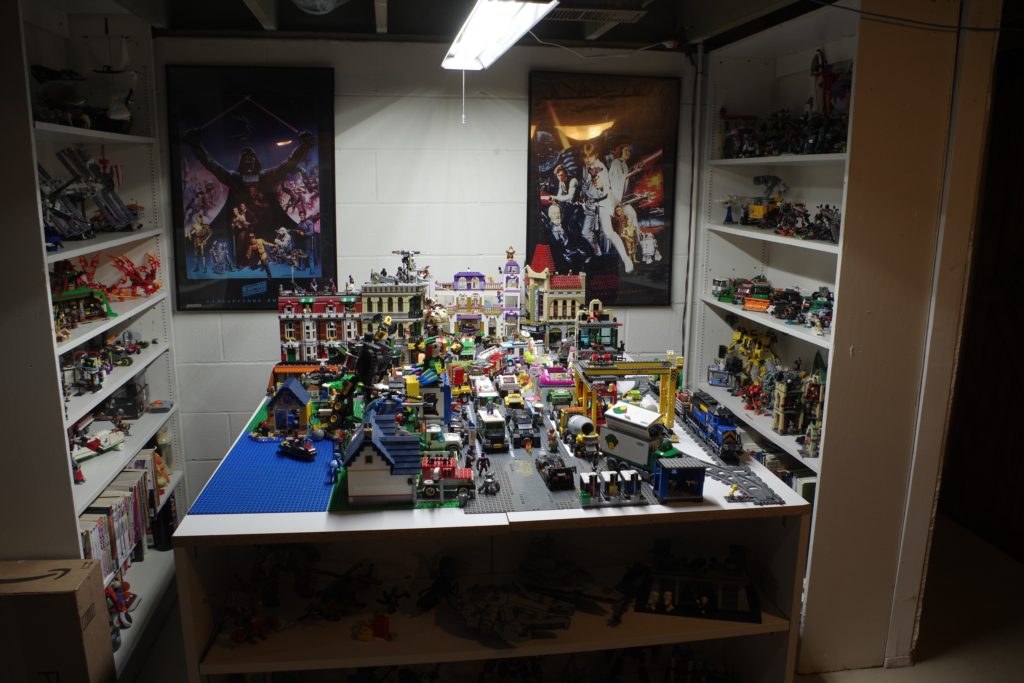
In case you noticed, the Return of the Jedi poster fell off the wall at one point. I want to buy better frames and some fresh posters anyway (these three are like 25 years old now), so I simply hadn’t replaced it on the wall yet.

The next phase of this project is to actually start sorting down the extra LEGO into bins and drawers that will go under the table. I already started this a bit with some IKEA bins but I am going to need more bins than I have and it’s slow going since right now all of the LEGO is just in a giant plastic bin.

Basement – Corner Shelf

Last post I talked about putting in some flooring and shelving as part of revamping my basement space a bit. I ended up with a couple of issues after the initial work, one was sort of previously an issue, one new. The desks don’t quite fill the wall from my Photo Booth to the pillar halfway down the wall. This was, sort of an issue before. The secondary issue, I have this Raspberry Pi Rack that I previously had sitting on a shorter bookcase next to the desk. That bookcase has been relocated, and the new book cases reach the ceiling instead of, four feet or so up, so putting the rack on top is kind of out of the question.

Another potential issue with this space involves the cats. While they have not done it yet, it’s kind of the perfect sort of space for them to sneak in and start peeing on the floor.

Basically, it needed to be filled.

My original plan was to make a super basic little table that was the same height as the desk to fill in the hole. When I started planning it out, I realized that there wasn’t really any reason that the shelf could not be taller, so I opted to make it the same height as the new book cases.

There are some other challenged in designing this shelf. I didn’t want it to be deeper than the book shelves, at least not up top, but the end of the desk doesn’t reach the front of the book shelves. So the new unit would need to be slightly “L” shaped. Another problem was the power strip hanging off the end of the desk. While the basement has water issues in places (that I’ve been working to resolve), it’s never flooded anywhere near the desk and flooring area. I’ve still taken the precaution of making sure there isn’t anything electronic on the floor, so the power strip is strapped to the end of the desk.

Part of the purpose of the new unit was to also hide this wiring mess. But I still need it to be accessible. When the shelf was just going to be a short table, this was easy, make the top removable. Since I was making the shelf taller, I had to redesign things a bit so the middle shelf was removable instead.

After sketching out the general idea of what I was going for, I purchased some white pre-finished boards from Menards and set about cutting and assembling the new shelf unit. I used pre-finished boards so it would match the IKEA shelving.The base of the unit is pretty straight forward. It’s a square box. For the removable shelf, I built in a square of support blocks and cut a piece to fit. Since the unit sits flush against the one wall, I opted to leave the vertical gap on the right side open. This gives a place to reach in and pick up the removable shelf, plus a path to slip cables through for anything that’s temporarily plugged in. For the more permanent connections like Network cables going to the switch in the Pi rack, I later drilled a hole in the fixed back half of the middle shelf.

For the more permanent connections like Network cables going to the switch in the Pi rack, I later drilled a hole in the fixed back half of the middle shelf. The back half being fixed in place also means that I don’t have to completely remove the Pi Rack and Alexa anytime I want to open up and get to the Power strip.

After adding a stained piece of backing to the shelf, I went up and drilled some shallow holes to add shelving. I ended up liking these small shelves much more than I expected honestly. I can put some of my tech stuff on one for easier access and I really like the additional mini display areas for some of my more favored figures.

After putting the shelf in I found I needed to make a few last bit touch ups. Firstly the front was more exposed than expected, so I added a vertical board to fill in the space. I also need to get some white paint to touch up the tops of the front vertical pieces.

Overall though I am really happy with the result.

Basement – Old Floor, New Floor

Last year, we had all the floors in the upstairs main part of the house replaced. When purchasing the flooring, the store we purchased from was running a tiered rebate deal. Essentially, we could buy $500 worth of additional flooring than we needed for the upstairs, and tier up to the next rebate level, which was $500 additional savings. My point is, we basically ended up with a pile of free bonus flooring. The plan was to put some of it down in the basement. It wouldn’t be enough to cover the entire basement, or even half, but it would be a start.

Upstairs has doors and counters, and all sorts of things that make flooring tricky. The Basement, not so much. The basement is essentially just a square with some pillars in it. It’s also a basement, so it doesn’t need to be super perfect. I have put in some similar flooring a few houses ago when we converted the garage to a family room. I could easily do this.

This flooring job also has been sort of the kick off of actually doing a LOT of major work and rearranging to the basement. So I figured it might be useful to have a little map. The basement, essentially has 4 “areas”. My “Office area”, in the upper left quadrant. The “LEGO area” in the upper middle. There is the “TV Area” in the lower right corner of the map. Lastly, my son has an area that constitutes his room, though there aren’t any actual walls there. It is segmented off on one side by a build in bar/counter space and a couple of shelving units in the middle of the room against the support pillars.

FWIW, my son it an adult and spends more time living with his friends elsewhere than he does actually living in our house. Before anyone gets on my about shoving my kid off in the corner.

Also, the basement actually has two halves, one half is used for storage and isn’t particularly finished out in any real great way, which is why I installed the door.

The first step of this project actually wasn’t the flooring, technically. The first step was obtaining some IKEA shelving. I’ve wanted to get some Billy shelves for several years now but I don’t have an IKEA in the area. When I finally was ready to get them, I discovered that IKEA doesn’t deliver over long distances. Which wasn’t helped by well, the current Pandemic. Things seemed to be getting better as far as the Pandemic however, and a month or so ago, I had taken a vacation day to take my wife to a Doctor’s appointment, which got rescheduled. So we opted to drive down to St Louis and go to the IKEA store.

She really liked IKEA herself, being an organizing junkie.

Another step I needed to take before the flooring was prepping the floor itself. There were a handful of nail things sticking out of the concrete, presumably from some previous wall or floor that was once in the basement. Also around each of these was a divot int he floor. I took a chisel and busted off the nails and then filled in the divots with some concrete filler. You can see these spots in the before photo above, where the dark gray spots are on the floor.

The other large step was clearing out my collection so I could move the furniture around. Despite having quite a lot of room in the basement, I did a lot the shelf clear out while installing the floor. I put a lot of the more durable stuff (Transformers) carefully into a large plastic bin, and then places a lot of the other figures on a long folding table. Another minor issue, my son basically decided he was going to come live with us again, the same day I was starting to do my work. So my original plan of putting up more tables in his space didn’t really work out.

Basically, I started at the back wall, unloading everything to a table or a tote, and moved the shelf, glass cabinet, and photo station out 3-4 feet. I did a final clean and mop of the floor, then laid several rows of the flooring down. Once I had enough flooring, I pushed those furniture pieces back and stacked stuff onto them from the other shelves, so i could move other pieces of furniture.

I also assembled and stood up the 3 IKEA shelves as I went. The other purpose for shuffling the future this way was to help hold the flooring down. I don’t really have an easy way to add trim on the concrete basement walls. So the furniture around the perimeter is what I’ve got.

After everything was finished, I started reassembling my displays over the next few days. I also found that I needed to add a short 3′ extension piece to the power strip feeding my PC, because the new shelving is a little wider than the old combination, and the cord didn’t reach far enough behind the shelves. Other minor electrical change, the Glass Cabinet has a light in it, but the cord switch is a pain to use. I also have an Alexa compatible power outlet I don’t really have a use for. I set up this power outlet so I can tell Alexa to “Turn on the Display Light” and light up the cabinet.

I am pretty pleased with the end result. It’s not perfect but it’s a bit nicer than it was. This has also spawned several additional projects which I’ll blog about in the future.

Basement – Sliding Door Project

So, I’ve been doing a fair number of projects, but writing about them isn’t one of those projects. Some of it has been improving the basement a bit. Part of the slowness of the basement work is because it occasionally floods a bit. Not really “standing in water” flooding, but “there is a puddle that keeps coming” flooding.

It’s annoying, but I’ve been working to fix it. The house originally didn’t have any downspouts on the gutters, I added those. I’ve added extensions to the gutters to direct water away. I added a new downspout near the area where the water seems to come from to help direct it away more. I cut out some drywall in the underside storage area and pulled the bottom step off of the stairs to fill in some ugly crack-ish spots in the area where the water comes from. At this point, I am waiting for more heavy rain to see if some of this has made any real difference. So far the cement fill seems to have done the best. It’s tricky to describe but basically, the water still came in, but it came in waaaay less and in a slightly different place. So I’m getting there.

I’m not really here to discuss the flooding though. It has affected some decisions on how to make the basement nicer, like I am not going to add Drywall walls like I wanted to. And no carpet, though that was out anyway, because the cats are assholes (We also replaced all of the upstairs carpet with vinyl plank flooring).

One fairly simple project was adding a door. In this case, I put in a sliding barn door style door. My wife wanted to put in a real door but I wasn’t keen on that since there isn’t really a good place for it to open to. The door itself had a couple of motivations behind it.

One, the basement is divided into two halves. One half is semi finished and “nicer” and it’s where I keep my computer and collection of stuff and there is a TV and couch with game consoles and my son has a corner that is his bedroom area when he is around. The other half is under the “original house”, it’s rough, the ceilings are a little low, and there is more duct work and such hanging from the ceiling. We use it for storing all sorts of stuff. It’s really great for that.

The “underside” half is ugly though. I wanted the door to be able to block it out, mostly for aesthetic reasons.

The other purpose of the door is to be able to lock the cats in the basement when we have guests over. My parents and my wife’s parents are all allergic to the cats. We lock some of them in bedrooms, we also lock some of them in the small sunroom/office area upstairs. Sometimes we would lock them in the basement by blocking the stairs with a giant cork board we have that doesn’t really have a home.

Now, we can use the door. It slides between the two openings, stairs and underside storage to block off either one.

One concern was air flow from the storage area, so the door can also be positioned in the middle, which is where it usually sits, so air can flow in and out both sides. It also lifts off easily if I needed to remove it.

The door itself isn’t anything complicated. I could have built a door but I opted to just buy one, though the door was pretty pricey since it needed to be extra wide. The roller kit is a low profile barn door kit, easy enough to install and it nestles up into the floor joist ceiling. The tricky part was that the floor joist didn’t reach the edge of the opening, so I had to screw a couple of 2×4 stand offs to the floor joist to get the door to sit int he proper place. This also meant adding some 2×4 lifts under the stand off to support the immense weight of the door.

I also ended up with an issue of the door rolling slightly. I am not sure if it’s the house or if the rail is a little off (probably a little of both) but the door slides towards the stairs on it’s own. Not very quickly, but it does move.

I solved this with magnets, at the suggestion of my uncle. I didn’t really want an ugly latch that would also potentially end up in the way of the door sliding or people walking. I bought some block magnets and some double sided Gorilla tape (I originally used Command Strips but they were too weak). I stuck a larger magnet to the wall, then two smaller magnets on one end and the center of the door. This allows the door to hold it’s position when blocking the stairs or when positioned halfway.

This project isn’t quite done. I may also add an L bracket of some kind in the center of the door, to hold the door from being leaned outwards, and I want to add a roller on the backside to the whole action is smoother. the way things are, if the cats get determined, they can push the door enough to get it to release from the magnet and escape from the basement.

I also need to adjust that network cable because it’s kind of just there and ugly.

On Moving and a lot of Small Projects

Moving into a new house tends to create a lot of little projects.  There’s been a few extra in the case of my new home, since it didn’t have any appliances, and was missing quire a few of the small trimmings.  Things like, handles on the kitchen cabinets.  It’s an easy little thing to add, a few measurements and a bit of drilling is all, but it needed done.

There’s also been quite a few larger projects.  Like the appliances.  The fridge and stove pretty much go right in and plug in, though the fridge needed a water line run to it to work the ice maker.  Then there’s the dishwasher, which needed to be hooked up to power, and needed both a water and drain line run to it.  These aren’t that bad either, punch a hole through a cabinet, drop the lines, tap into the existing sink plumbing.  This whole project also involved adding a garbage disposal to the sink however, which itself required the addition of a switch the run the thing.

Little projects.  Like hanging curtain rods on all of the windows.

Or putting in some railing on the front and back stairs, which was something required by insurance.

This is of course a little more involved, what with needed to drill into concrete and cut the railing to fit and whatnot.  Then there’s things like hanging decorations and some display racks in my wife’s office.  Or assembling shelving in the basement for my junk, which resulted in a trip to the ER when I dropped one unit on my foot while trying to tip it up, and failing to do so.

There was also the dilemma of the washer an dryer.  The closet for the laundry appliances was very small, so we had to get some smaller appliances.  The Washer hooked up easily enough, it just hooks to the hot and cold and existing drain.  The dryer was something else completely.  There wasn’t a dryer vent hole, and with the cramped space, there wasn’t a lot of room to add one.  I managed to chop a hole in the wall and go down through the floor tot he open basement, where I added a bit of duct work to go out the side of the house through an existing unused hole where a vent used to exist.

Then there were the issues.  Early on we discovered that the plumbing wasn’t draining properly.  A call to the plumber and we found that the sewer line was blocked, and after an expensive call and some digging, the sewer was fixed.  More recently there was a power issue in the basement area.  I did a bit of checking on all of the junction boxes but ultimately had to get an electrician in.  He tightened a lot fo connections in the breaker box and found a bad wire on the problem circuit.

Speaking of the basement, things are coming along well there as well.  Just before the power issue I was in the process of adding some outlets for the TV and video game corner.  Which will be pretty cool when done.