Maker

Arduboy FX

I recently picked up a neat little device called an Arduboy FX. It was a bit of an impulse buy after someone posted about getting one on Threads. It turns out it’s not actually particularly new, the community goes back quite a few years, but it’s still pretty cool none the less, and I am happy with my experience with it.

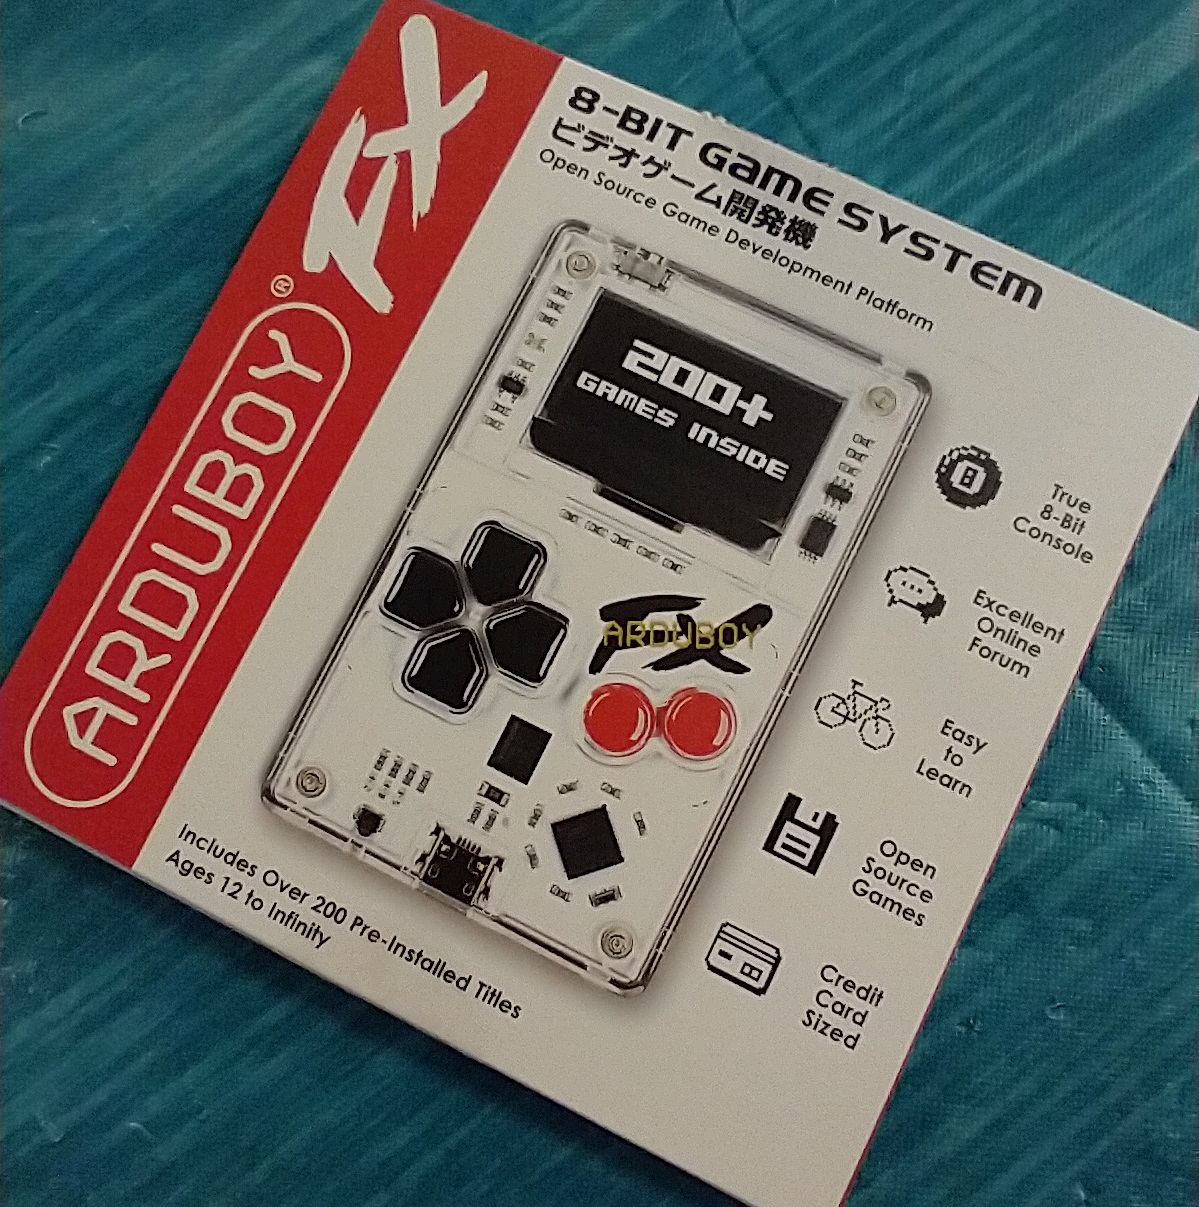
So what is it? It’s a small credit card sized handheld based on the Arduino. On a related note, it’s “credit card sized” in footprint, not so much in thickness. I wouldn’t trust putting this in a wallet at all, because I feel like my fat ass would snap it if I sat on it. The form factor is worth mentioning though. Traditionally for handhelds, I prefer the “larger options”. I had the full sized 2DS, and the XL 3DS and the large wide Retroid, and I just like, more hand real estate. Despite the Arduboy’s pretty small size, it’s still surprisingly comfortable and I don’t have any problem using it.

Also, the platform itself is open source, so one could buy components and just, build their own, if desired.

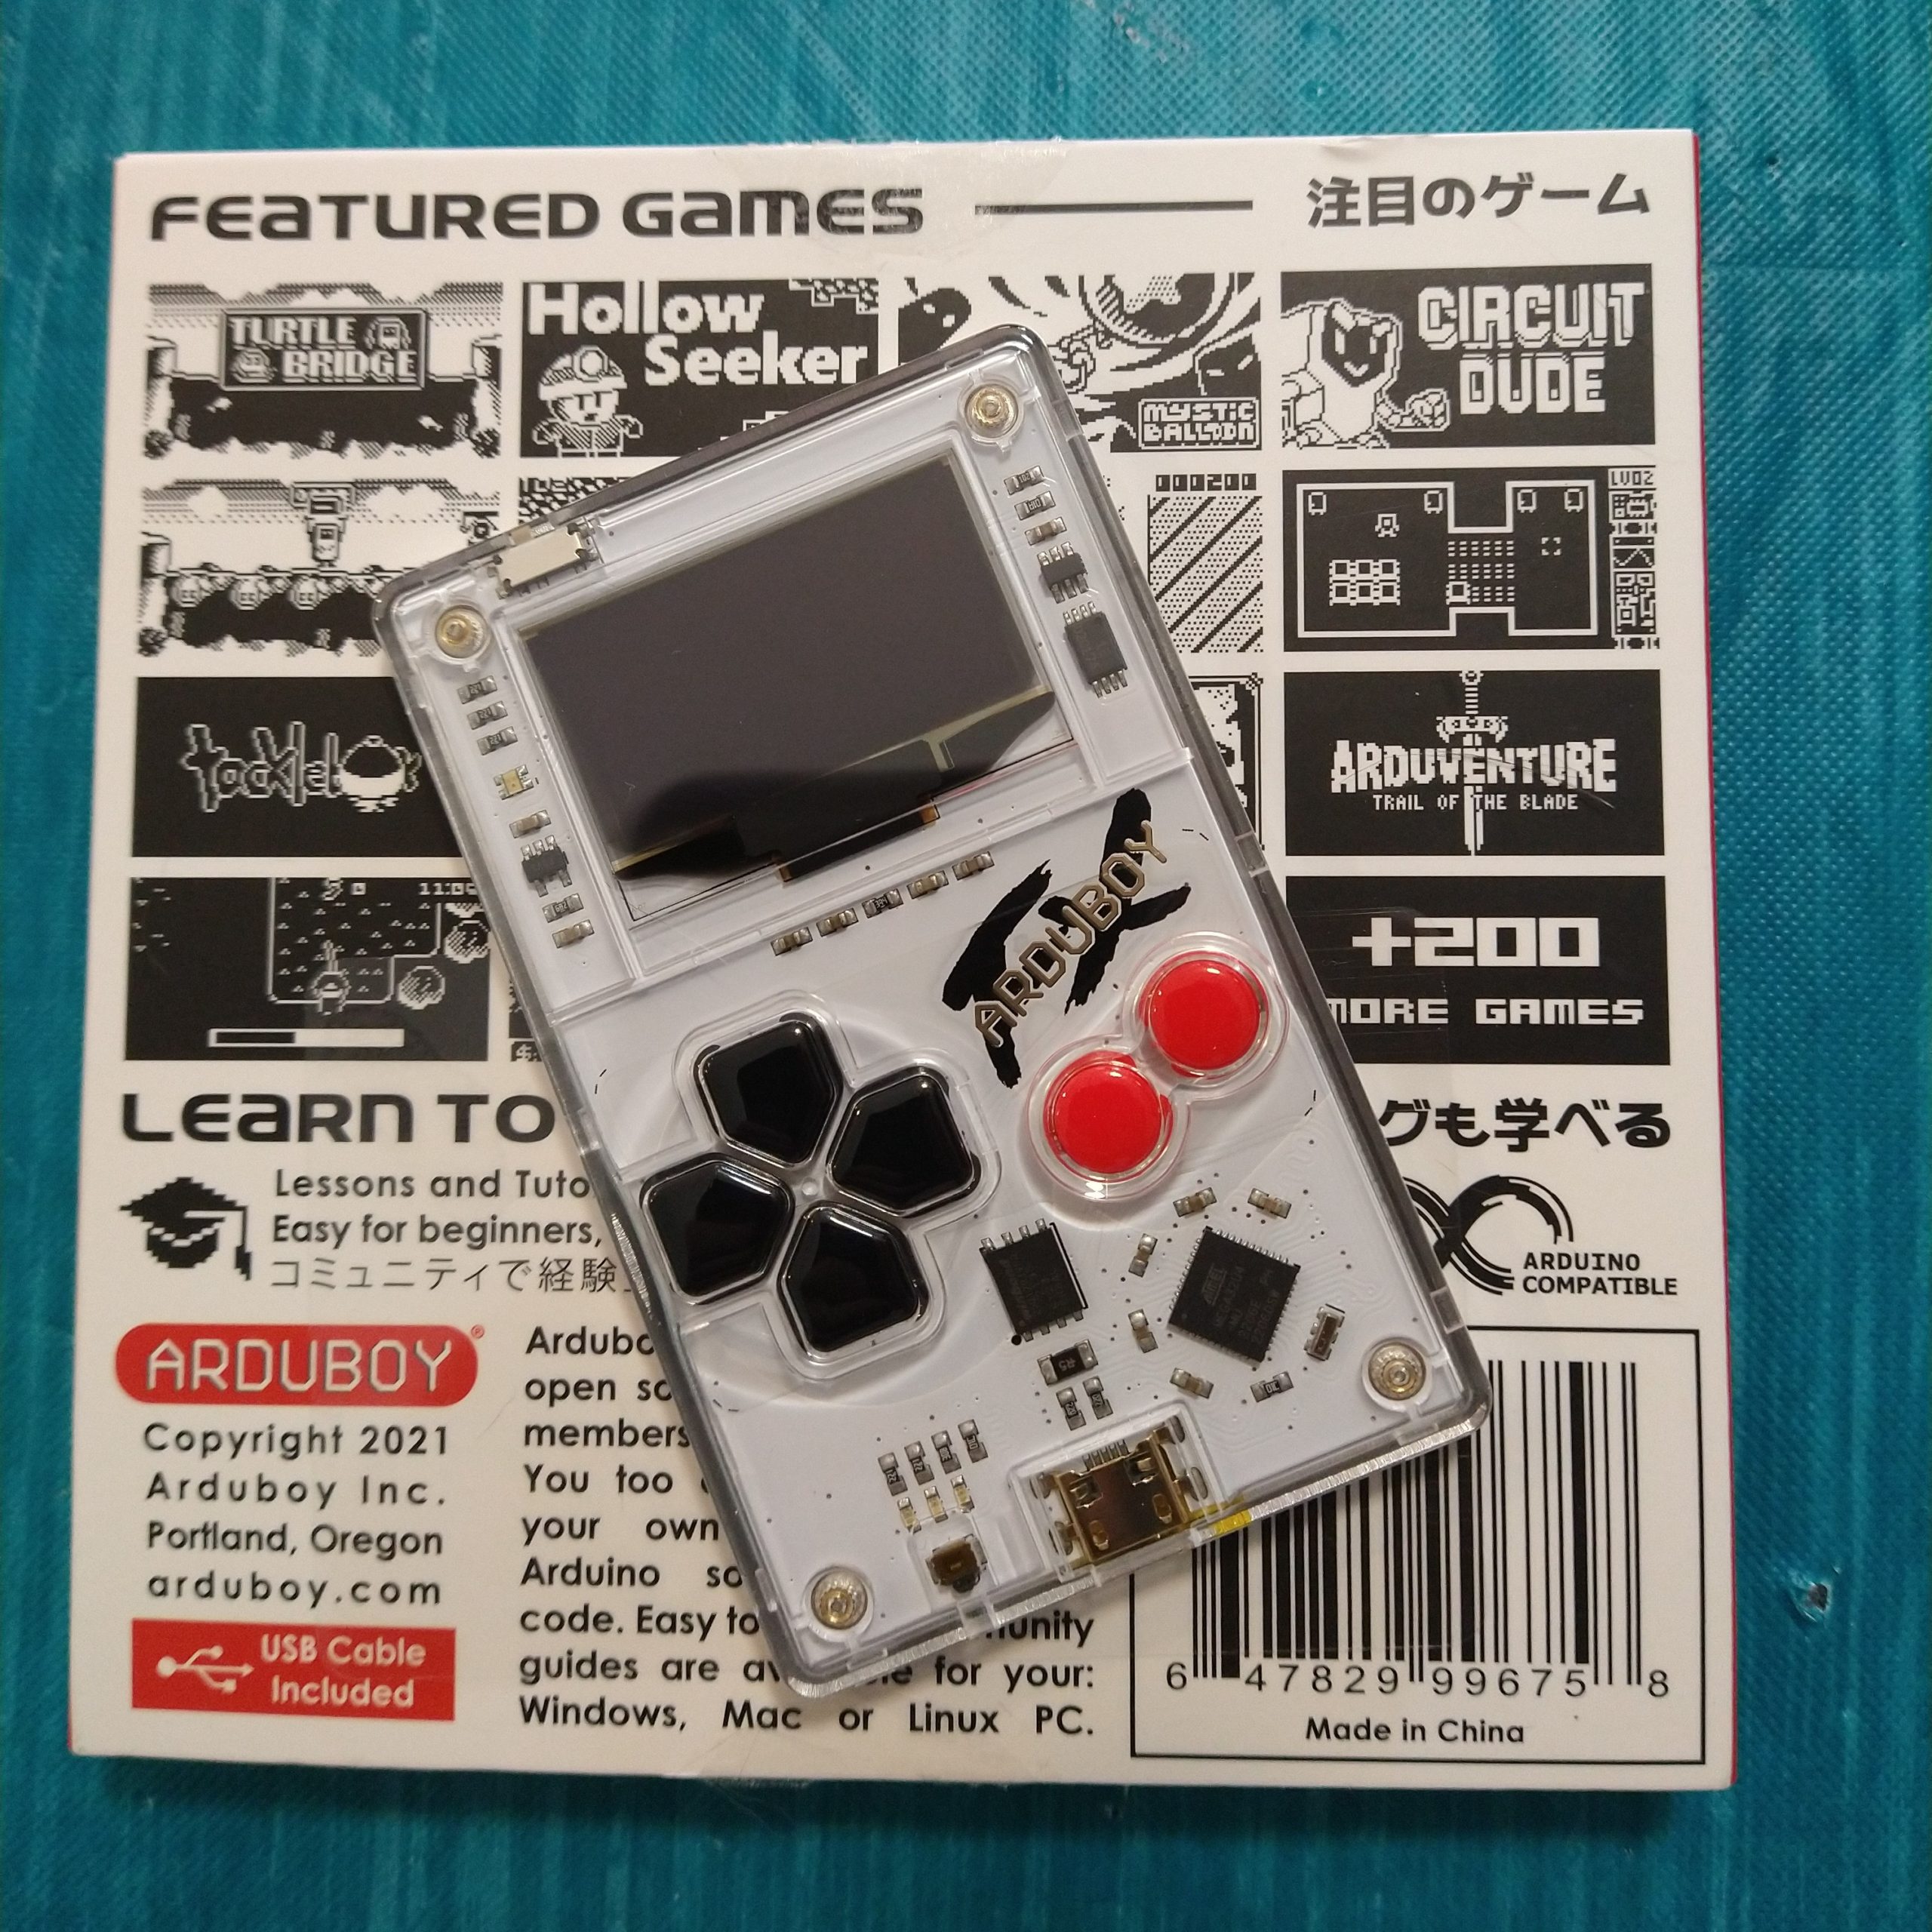
This specific version, the Arduboy FX, is different from the older original release, simply called the Arduboy. I believe the main (and possibly only) difference is that the FX includes an add on FX chip and has 200+ built in applications and games. When I ordered mine, I noticed that they sell just the FX part as an add on for the original Arduboy. They both play the same games, but the original can only play one game at a time, whatever is loaded onto it from the Arduino software. You can still load custom games to the Arduino FX.

One thing I want to mention, because it was the first question I had. What happens to the default games when you load a custom game. the answer is, they are all still there. When you upload a custom game or code from the Arduino software, the new game will load, unless you select a game from the included games list. If you choose and load another game, it will overwrite the custom game. I believe there ARE ways to overwrite the original 200 games firmware, but the standard method of upload through the Arduino IDE, does not.

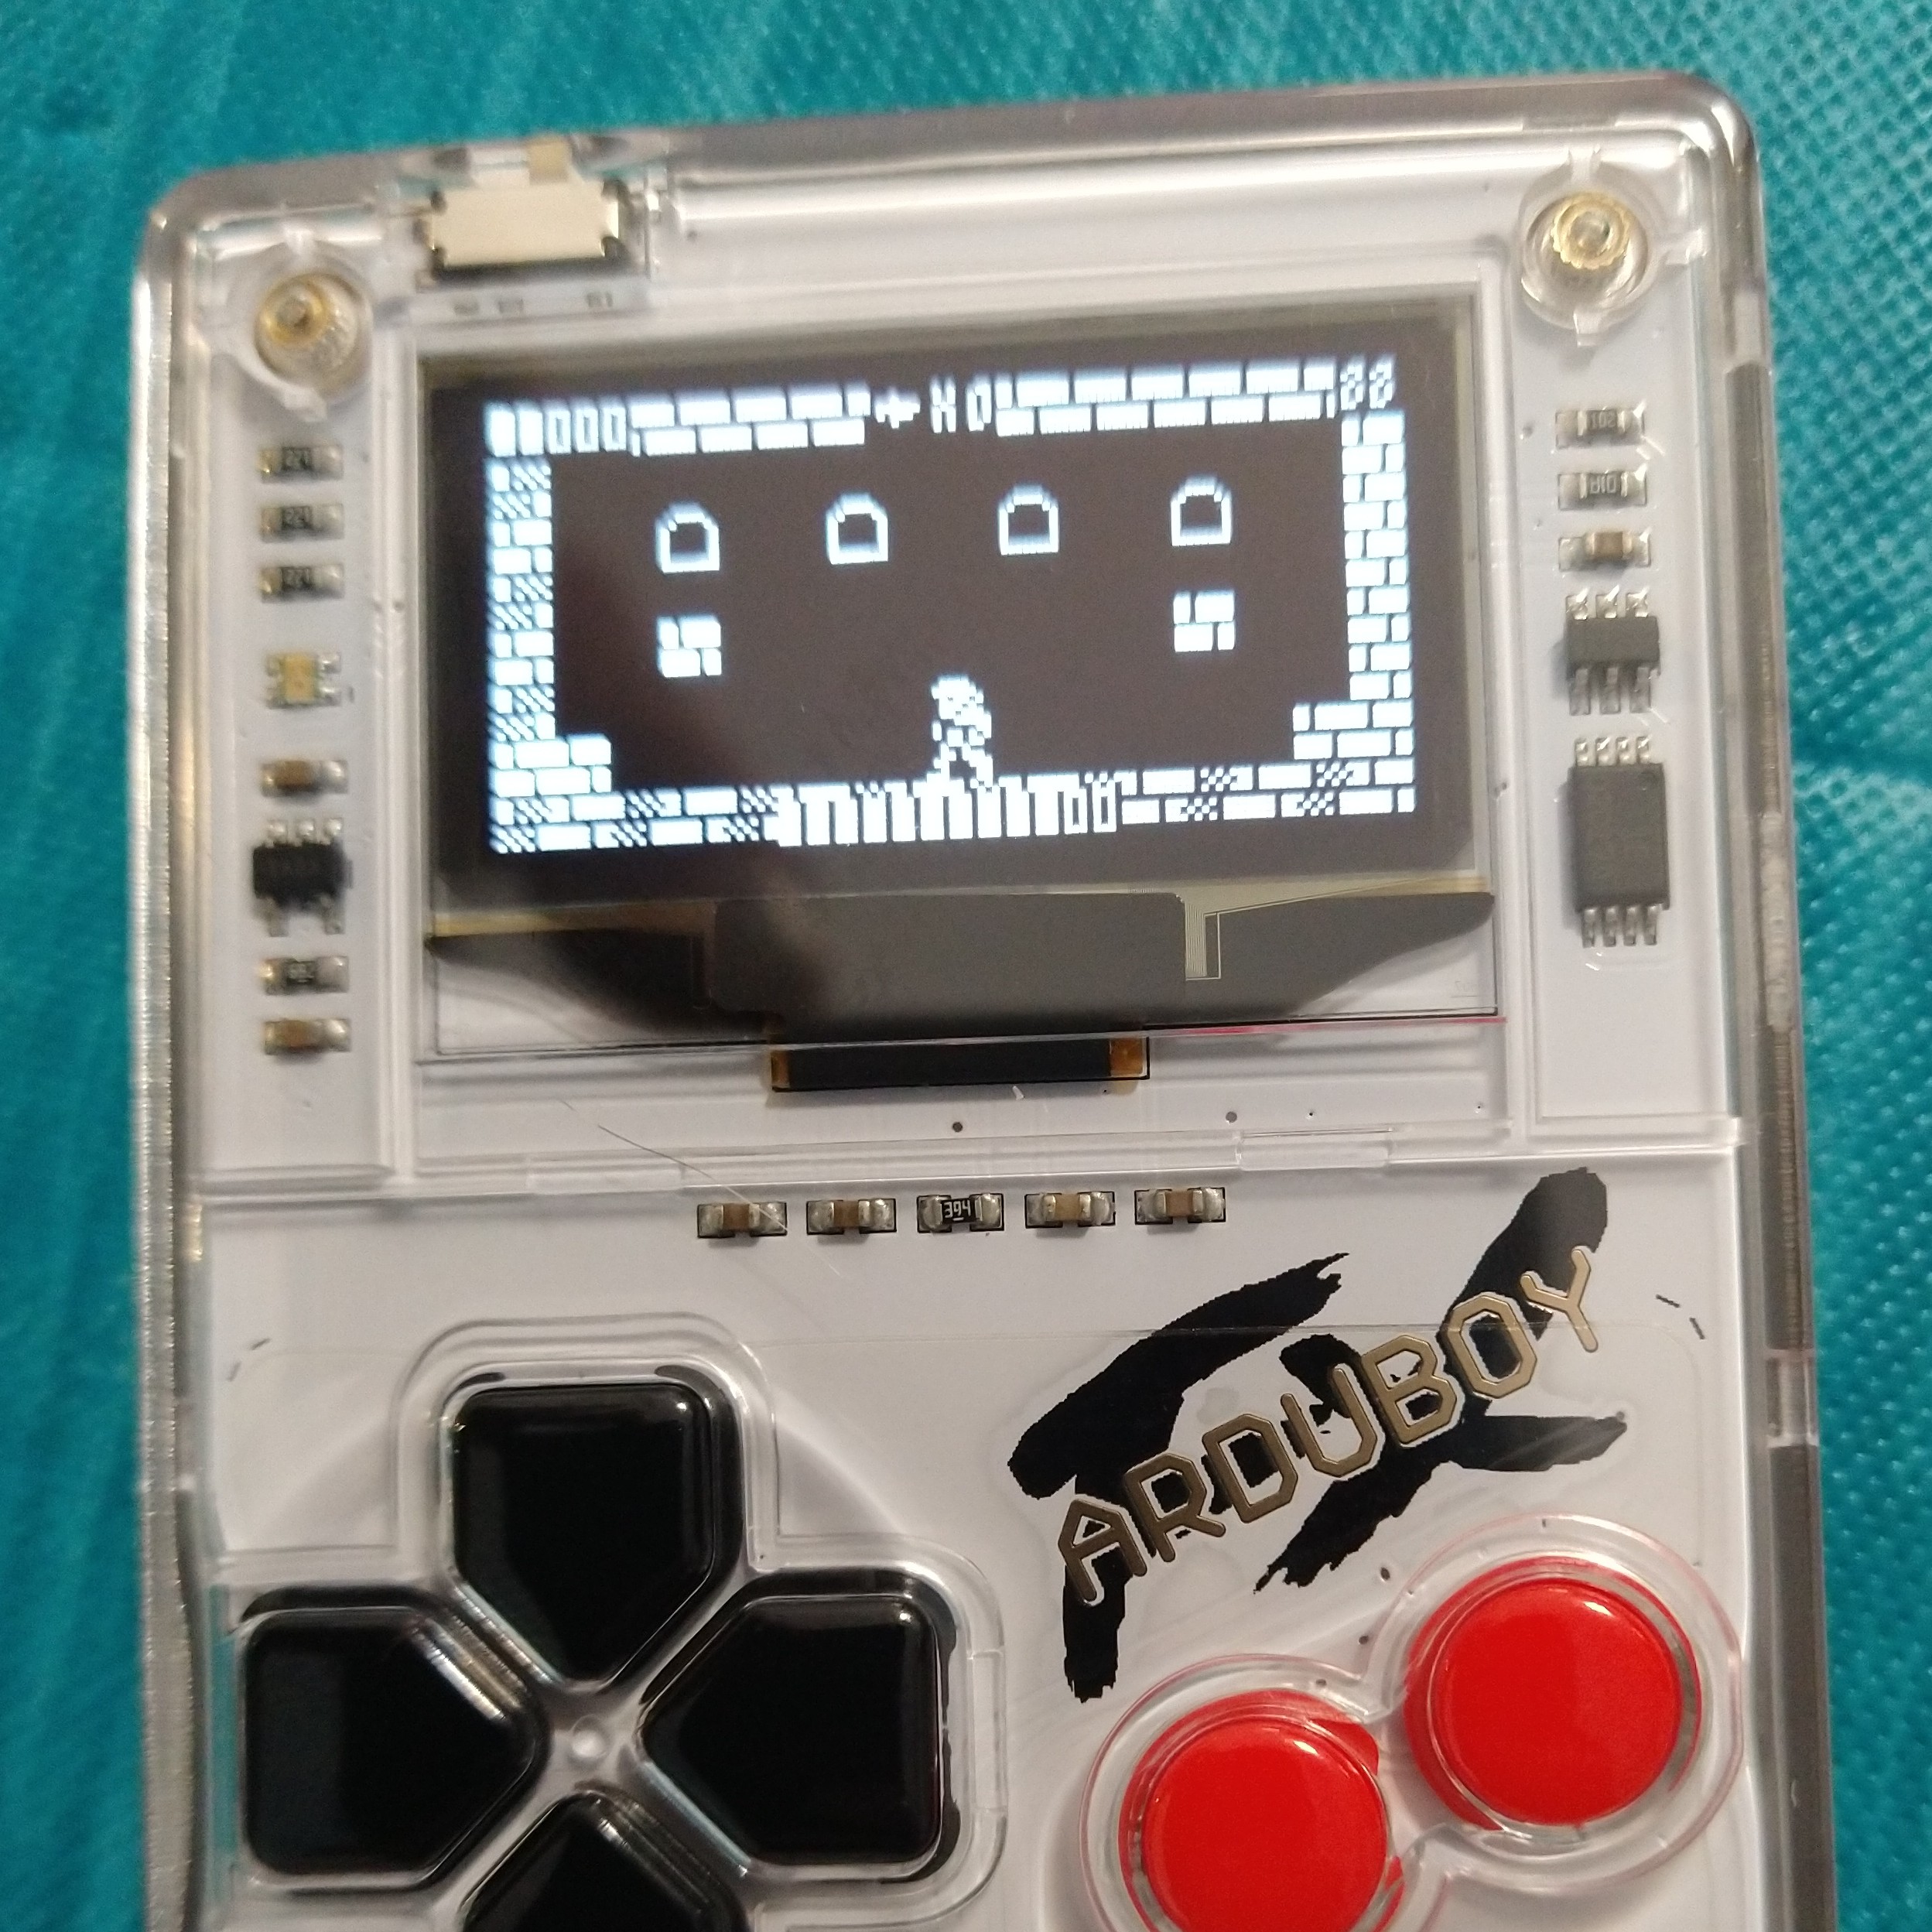
As far as I can tell, most of the worthwhile available games are pre loaded on the Arduboy FX. Basically everything about this is open source in nature. I’m not going to cover any real specifics of the games here, I may do that later over on Lameazoid.com though.

The fun part here is developing games. There is a great multipart tutorial available here, though the last two parts to build Dino Smasher are not complete. The Arduboy is based on C and C++ like the Arduino is. It uses a special library to work the Arduboy functions for button presses and graphics. The tutorials are good and could be done by someone who has no programming experience, though I’ve had pretty extensive experience at this point and they were a nice refresher for my C/C++ knowledge, which I have not used in almost 20 years.

I don’t recommend the other tutorial path though, for the platform game. I’ll be blunt, its presented as beginner-ish, but it’s quite a few levels above the first set of tutorials. It introduces a lot of much more abstract coding concepts. It’s probably good information, but it’s kind of beyond a basic level and many of the comments in the community expressed as much. I was a bit worried when right out of the gate it’s starting with various types of int (integer) variables which can be used. I mean, that’s all great to know, but for the purposes of anything made here, just using int, is going to be fine.

I went through the first tutorial set myself, and built the Pong Game. This is the second time I’ve made Pong funny enough, the first being in Python. After finishing the tutorial, I went through and added a bunch of additional features. Most were things done by other commenters, but rather than pick through their code, I just made a list of ideas and added them all in. I’d recommend it for anyone looking to test their ability a bit beyond this Tutorial, especially if you have some coding ability and want to flex yourself a bit. Here is a little list of suggestions.

  • Add a pause option (easiest is when pressing A during a game)
  • Add a more complex Title screen and End Screens
  • Add a “net” line down the middle.
  • Add an ability to adjust the paddle size (this will probably also require adjusting the AI sensitivity to make the game winnable)
  • Add the ability to select how many wins are needed to win
  • Make the game a bit better by offsetting the ball starting location after scoring.
  • Make the game a bit better by starting the paddles in the middle (The AI tends to miss the first 2-3 shots right out of the gate otherwise)
  • These last couple will need to be added to the title screen.

Anyway, My finished code can be found here.

I’m pretty happy with the result. I’m looking a bit into how to embed these games into my website here, or on my Github.io page. Until then you’ll need an Arduboy to actually run the code.

I’m not sure what I want to do next yet. I may make a go at building a simple Tic-Tac-Toe game, from scratch, just to have a simple project to test my coding chops without using a Tutorial as a base. After that, I am thinking of remaking one of the first games I ever made, a simple text based RPG I had made back in High School called Dragon Quest.

Dragon Quest was vaguely based on Dragon Warrior, which at the time, I didn’t know was actually called Dragon Quest in Japan. The game itself wasn’t actually anything LIKE Dragon Warrior though, it just, was fantasy based, and had Dragons, and the name “Dragon Warrior” was taken. (and like I said, I didn’t know at the time Dragon Quest was ALSO taken, by Dragon Warrior). That game, would be well suited to remake for the Arduboy though as it too was for a simple 2 color platform, I had built it on my TI-85 Calculator. Unfortunately, I don’t have any of the code from it. A lot of people in school had gotten copies of it on their own calculators, and Iw ould get copies back after school forced my calculator to be wiped for tests, to prevent cheating. Also, my calculator is 25 years old now, so the memory has more than wiped itself. I did eventually get a TI-85 data cable, but not in time to save my RPG game code. But I still have a basic idea of how the game worked.

I may try to make the “first game”, which was just a loop of battling and healing in town, with two monsters and an end boss. Then expand it to be more like the second game which was similar, but added equipable items, more monsters, and just more complex game play. If that works out, I can try to add in the map system I had planned to use for a 3rd iteration, written in C, that I had never finished. I do have the code for that floating around.

Project – Record Shelf

Since I’ve actually taken an interest in vinyl records, One thing I really wanted to do was build a simple little record shelf. This would serve two purposes basically. One, it looks cool. Two, it gives me another way to decorate the basement a bit. The concrete block walls are a pain to work with, especially the outside wall where all my music stuff is. The temperature changes mean nothing sticks to it long term. In other areas I’ve hung frames from the rafters using small chains. For this space, I’ve got a nice shelf I can use and swap out what’s on display as I get more records.

It wasn’t an overly complicated project, but it took longer than planned since my wife had the garage full of garage sale stuff and I couldn’t really reach any tools. Also it’s been blazing hot out, and I don’t care to work outside in that much heat. On the problem of the heat, probably sometime int he fall, I’ll drag the shelf and the lower shelving out and stain and seal it. Neither plays very well with the heat either.

The shelf itself is a handful of 1×4 pine boards. It’s a bit more complicated than it might seem at first. For starters, I like the look of inset joints over just using metal L braces, so I went and inset and glued the shelves inside the sides. This was a bit tricky because I don’t actually own any bar clamps. I also added the little back catch pieces under each shelf, so the albums wouldn’t be resting on the wall itself. This was slightly complicated because there is a power conduit running down this wall i had to work around. The shelves themselves are notched around the power conduit as well. I also only have so many clamps large enough to glue these, so it took like a week of “clue one piece then come back.”

Each shelf also has an angled groove cut along the length so the albums sit slightly down in the shelf and are more secure. The whole thing is screwed to the rafter above for support. In fact the whole thing is much sturdier than I thought it would be. My main worry is that the albums would tumble off, damaging the records, but now that it’s up, I actually am not worried about that at all. Everything is very stable.

Also, my original plan was to stick the CD holder I had been using back on the lower shelf, in front of the new shelf. I immediately hated this look. But I also realized that there was a small gap near the bottom, so I added one more smaller shelf to put (most of) the CDs on. I really liked this end result. Plus the board I used here was a different type of wood that was just around, and it’s a much sturdier type of wood than the pine, so I didn’t end up needing to add a center leg like I had worried I might need to do.

I suppose it’s also worth noting the equipment itself. The entire set up is pretty minimal. Everything is centered around this small mixer and amp combination.

I originally bought the mixer for use at my PC, I wanted to be able to play games on one machine, and watch a video on another machine, and merge the audio out one headset. That didn’t really work out to be as useful as I had hoped, but instead I get to use the mixer for my music instead. The amp I bought to go with some nice JBL speakers I had, that needed 2 wire connections to work, also connected to the PC originally. Except I never ever use anything but a headset on my PC, so it was a waste.

Connected to the Mixer are the input options. They can be played all at once, since it’s a mixer not a switch, but I’m not sure why you would want to. There is a Raspberry Pi hidden under the little shelf that connect to my music library and can be controlled remotely via a webpage. I have this kind of mediocre CD player that I’ll probably replace one day with something better, but still compact. Even a portable CD player would probably work better. There is also an Amazon Echo connected, but since Amazon jacked up their music service, I don’t use it as much. I also have an aux cord hanging off for connecting to a phone.

Lastly is my record player, which I bought at a garage sale. It works pretty well for my needs though. It’s an Audiotechnica AT-LP60, nothing fancy.

Lastly I have this recently acquired audio switcher. Right now I just have the one set of speakers, but at the very least, it will be easy to add a second set outside so I can listen to music while out on the deck or porch under the deck out back. The output selector will make this much easier to accomplish and it’s something I’d thought about getting at some point before, then I came across one at an estate sale.

Code Project: Fresh RSS to WordPress Digest V 2

A while back, I talked about a little simple project that I build that produces a daily RSS digest post on this blog. This of course broke when my RSS Reader died on me. I managed to get Fresh RSS up and running again in Docker, and I’ve been slowly recovering my feeds, which is incredibly slow and tedious to do because there are a shitload of feeds, and i essentially have to cut and paste each URL into FreshRSS, and select the category and half the time they don’t work, so I need to make a note of it for later checking and it’s just… slow.

But since it’s mostly working, I decided to reset up my RSS poster. I may look into setting up a Docker instance just for running Python automations, but for now, I put it on a different Pi I have floating around that plays music. The music part will be part of a different post, but for this purpose, it runs a script, once a day, that pulls a feed, formats it, and posts it. It isn’t high overhead.

While poking around on setting this up, I decided to get a bit more ambitious and found out that, basically every view has it’s own RSS feed. Previously, I was taking the feed from the Starred Articles. But it turns out that Tags each have their own feed. This allowed me to do something I wanted from the start here, which is create TWO feeds, for both of my blogs. So now, articles related to Technology, Politics, Food, and Music, get fed into Blogging Intensifies, and articles related to toys, movies, and video games, go into Lameazoid.

I’ve also filtered both of these out of the main page. I do share these little link digests for others, if they want to read them, but primarily, it’s a little record for myself, to know what I found interesting and was reading that day. This way if say, my Fresh RSS reader crashes, I still have all the old interesting links available.

The other thing I wanted to do was to use some sort of AI system to produce a summary of each article. Right now it just clips off the first 200 characters or so. At the end of the day, this is probably plenty. I’m not really trying to steal content, I just want to share links, but links are also useful with just a wee bit of context to them.

I mentioned before, making this work involved a bit to tweaking to the scrips I was using. First off is an auth.py file which has a structure like below, one dictionary for each blog, and then each dictionary gets put in a list. Adding additional blogs would be as simple as adding a new dictionary and then adding the entry to the list. I could have done this with a custom Class but this was simpler.

BLOG1 = {
    "blogtitle": "BLOG1NAME",
    "url": "FEEDURL1",
    "wp_user": "YOURUSERNAME",
    "wp_pass": "YOURPASSWORD",
    "wp_url": "BLOG1URL",
}

BLOG2 = {
    "blogtitle": "BLOG2NAME",
    "url": "FEEDURL2",
    "wp_user": "YOURUSERNAME",
    "wp_pass": "YOURPASSWORD",
    "wp_url": "BLOG2URL",
}

blogs = [BLOG1, BLOG2]

The script itself got a bit of modification as well, mostly, the addition of a loop to go through each blog in the list, then some variables changed to be Dictionary look ups instead of straight variables.

Also please excuse the inconsistency on the fstring use. I got errors at first so I started editing and removing the fstrings and then realized I just needed to be using Python3 instead of Python2.

from auth import *
import feedparser
from wordpress_xmlrpc import Client, WordPressPost
from wordpress_xmlrpc.methods.posts import NewPost
from wordpress_xmlrpc.methods import posts
import datetime
from io import StringIO
from html.parser import HTMLParser

cur_date = datetime.datetime.now().strftime(('%A %Y-%m-%d'))

### HTML Stripper from https://stackoverflow.com/questions/753052/strip-html-from-strings-in-python
class MLStripper(HTMLParser):
    def __init__(self):
        super().__init__()
        self.reset()
        self.strict = False
        self.convert_charrefs= True
        self.text = StringIO()
    def handle_data(self, d):
        self.text.write(d)
    def get_data(self):
        return self.text.getvalue()

def strip_tags(html):
    s = MLStripper()
    s.feed(html)
    return s.get_data()

# Get News Feed
def get_feed(feed_url):
    NewsFeed = feedparser.parse(feed_url)
    return NewsFeed

# Create the post text
def make_post(NewsFeed, cur_blog):
    # WordPress API Point
    build_url = f'https://{cur_blog["wp_url"]}/xmlrpc.php'
    #print(build_url)
    wp = Client(build_url, cur_blog["wp_user"], cur_blog["wp_pass"])

    # Create the Basic Post Info, Title, Tags, etc  This can be edited to customize the formatting if you know what you$    post = WordPressPost()
    post.title = f"{cur_date} - Link List"
    post.terms_names = {'category': ['Link List'], 'post_tag': ['links', 'FreshRSS']}
    post.content = f"<p>{cur_blog['blogtitle']} Link List for {cur_date}</p>"
    # Insert Each Feed item into the post with it's posted date, headline, and link to the item.  And a brief summary f$    for each in NewsFeed.entries:
        if len(strip_tags(each.summary)) > 100:
            post_summary = strip_tags(each.summary)[0:100]
        else:
            post_summary = strip_tags(each.summary)
        post.content += f'{each.published[5:-15].replace(" ", "-")} - <a href="{each.links[0].href}">{each.title}</a></$                        f'<p>Brief Summary: "{post_summary}"</p>'
        # print(each.summary_detail.value)
        #print(each)

    # Create the actual post.
    post.post_status = 'publish'
    #print(post.content)
    # For Troubleshooting and reworking, uncomment the above then comment out the below, this will print results instea$    post.id = wp.call(NewPost(post))

    try:
        if post.id:
            post.post_status = 'publish'
            call(posts.EditPost(post.id, post))
    except:
        pass
        #print("Error creating post.")

#Get the news feed
for each in blogs:
    newsfeed = get_feed(each["url"])
# If there are posts, make them.
    if len(newsfeed.entries) > 0:
        make_post(newsfeed, each)
        #print(NewsFeed.entries)

Re-mulching and other Activities Outside the House

I have been slacking on my posts, though technically still doing better than I had been. It’s a combination of being busy and just being generally meh overall. One think keeping me busy was re-mulching the flower beds around the house. Not just throwing down new mulch though, I mean raking up the old and putting down new weed barrier. This meant going around the existing plants and the little metal stakes to hold the weed barrier down were a pain because there is a ton of super packed rock in the area that makes them hard to insert into the ground.

In the case of the tree out back, it also meant digging up the ground around the tree to add a new flower bed space completely. We added a lot of new plants to the area as well, though most in pots for ease of use.

Then my wife put all her decor out again.

We also started working on the basic garden set up for the year. In the past we’ve had issues with trying to garden at this house because there is a lot of wildlife that comes around that eat or dig up everything. Right now it’s in buckets, though I plan to put legs on these wooden boxes we have to put the buckets into. Which is part of what the pile of wood behind the garden plants at the bottom is for. We also may use the stairs as a tiered herb garden. It’s all wood that was salvaged from my parent’s deck which they recently had replaced.

Anyway, here are some photos of the completed set up.

Here is a random bonus of the backyard from when I was mowing recently.

Code Project – JavaScript Pixel Camera

Sometimes I do projects that end up being entirely fruitless and pointless.

Ok, maybe not entirely fruitless, but sometimes I get caught up in an idea, and end up essentially just sort of, reinventing the wheel, in a complicated way. For starters, I got caught up with this little tutorial here: https://thecodingtrain.com/challenges/166-image-to-ascii . It uses JavaScript, to convert the input from your webcam, into ASCII art. It’s a nice little step by step process that really explains what is going on along the way so you get a good understanding of the process.

And I got it to work out just fine. I may mess with it and add the darkness saturation back in because it helps bring emphasis to the video but the finished product is neat.

I then decided I wanted to see if I could modify the code to do some different things.

Specifically, Instead of ASCII characters, I wanted it to show colored blocks, pixels if you will. I managed to modify the code, and the output is indeed a pixilated video, but it’s not video, it’s constantly refreshing text. The problem is, it’s writing out a page where every block, is wrapped in a <font> styling tag, which means it’s writing out a ton of extremely dense HTML code and pushing it out, so it’s a little weird and laggy and pretty resource intensive to run.

I also image, there is a way to simply, downsize the input resolution, and upscale the video, to achieve the exact same effect.

One variant I made also just converts images to single page documents of “pixels”. but, ugly font based pixels, to achieve an effect you can get by resizing an image small then large.

Like I said, kind of fruitless and pointless, but I got caught up in the learning and coding part of things.

I also may go ahead and do some additional modifications to the code to make things a bit more interesting. I could try using it to make my own Game Boy Camera style interface, for example. Then make it output actual savable pictures. I found a similar project to that online but it would be cool to code my own up and give it an actual interface.

Anyway, here is the code for the jankey video JavaScript, sketch.js first then index.html after. Also a Demo is here, though I may remove it int he long run, especially if I make an improve project.

let video;
let asciiDiv;

function setup() {
  noCanvas();
  video = createCapture(VIDEO);
  video.size(48, 48);
  asciiDiv = createDiv();
}

function draw() {
  video.loadPixels();
  let asciiImage = '';
  for (let j=0; j < video.height; j++) {
     for (let i = 0; i <video.width; i++) {
      const pixelIndex = (i+j * video.width) * 4;
      const r = video.pixels[pixelIndex + 0];
      const g = video.pixels[pixelIndex + 1];
      const b = video.pixels[pixelIndex + 2];
      const pixelColor = "rgb(" + String(r) + "," + String(g) + "," + String(b) + ")";
       // console.log(pixelColor);
//      const c = '<font color=rgb('+r+','+g+','+b+')>'+asciiShades.charAt(charIndex)+'</font>';
      const c = '<span style="color: '+pixelColor+';">&#9724;</>';
      asciiImage += c;
    }
    asciiImage += "<br/>";

  }
  asciiDiv.html(asciiImage);

}

index.html:

<!DOCTYPE html>
<html lang="en">
  <head>
    <script src="https://cdnjs.cloudflare.com/ajax/libs/p5.js/1.6.0/p5.js"></script>
    <script src="https://cdnjs.cloudflare.com/ajax/libs/p5.js/1.6.0/addons/p5.sound.min.js"></script>
    <link rel="stylesheet" type="text/css" href="style.css">
    <meta charset="utf-8" />

  </head>
  <body>
    <main>
    </main>
    <script src="sketch.js"></script>
  </body>
</html>