Project – Puzzle Board

I wanted to take a brief moment to talk about a fairly simple project I’ve done making a few Puzzle Boards. Though at the moment, wood prices are kind of nutty, so it’s a good project to do later. I’ve made something like 4 or 5 of these now in various sizes, for use by my family both at my house and extended family. They could be a bit fancier as well but the same concept applies.

Basically, we do puzzles as a group sometimes. Often these puzzles take several days to complete, which means they are often in the way. We also have cats, who like to destroy things because they are cats. This is where the Puzzle Board comes in, it’s a simple flat board with an edge and a cover, to protect the puzzle while it’s being worked on.

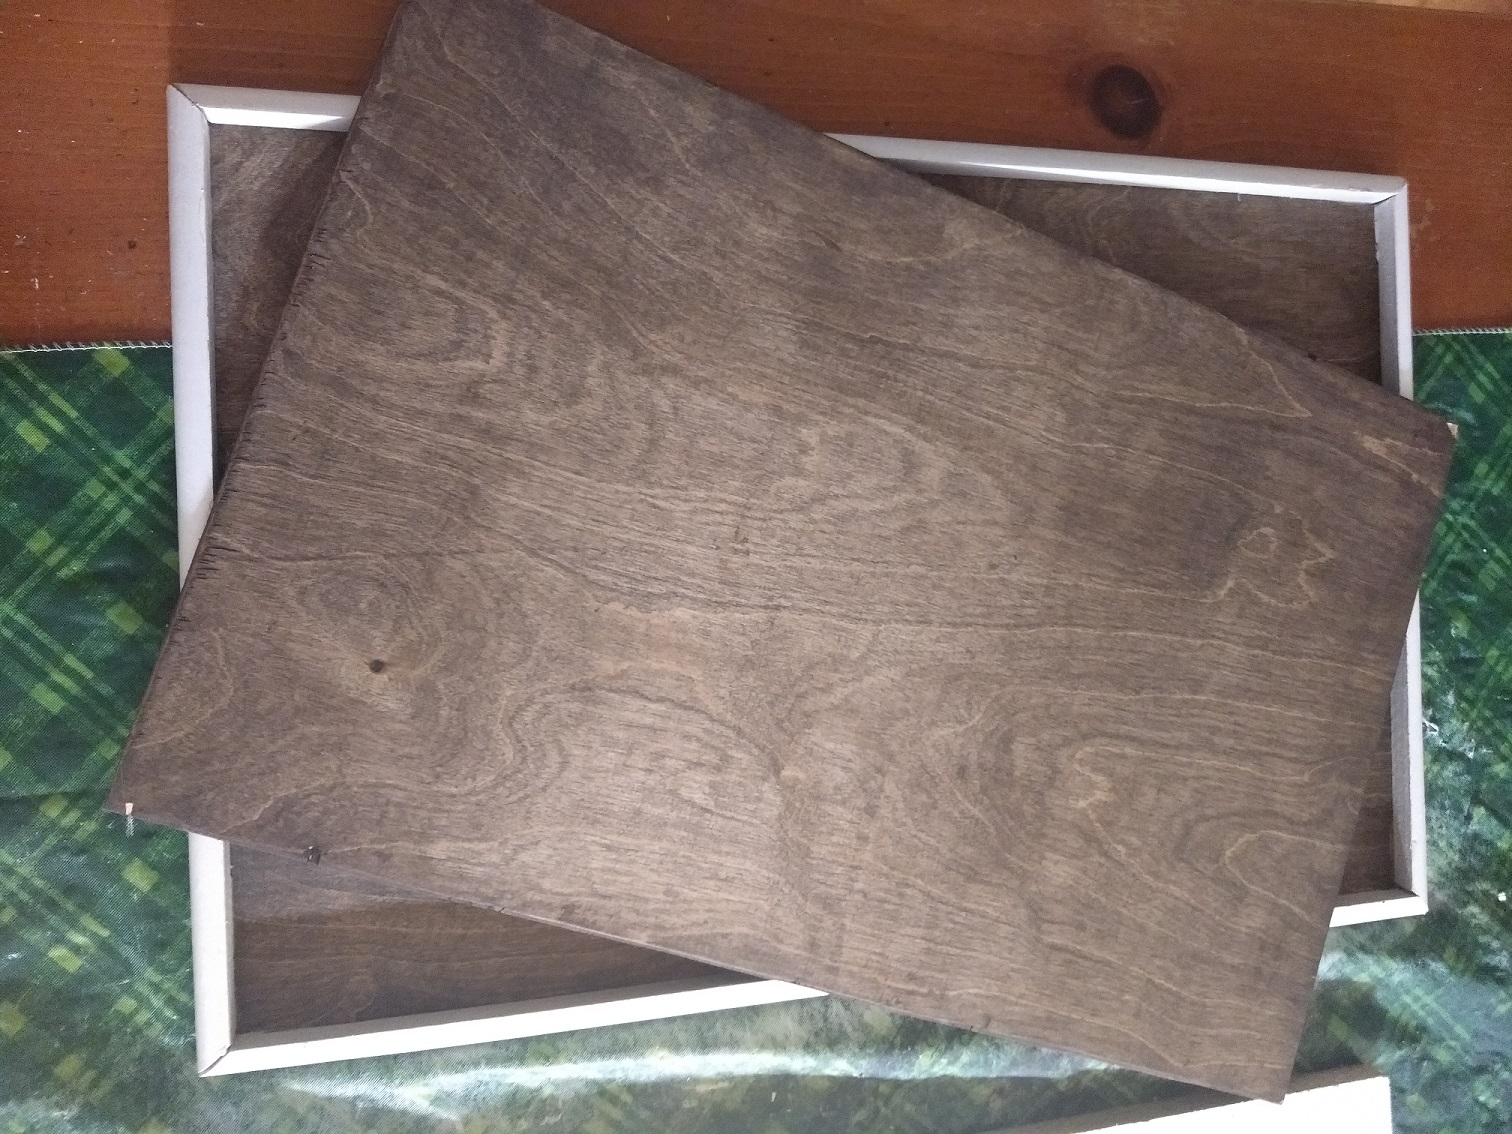
It’s extremely simple to make, though it’s best if you have a decent saw and some clamps. For these boards, we bought some medium sized sheets of thin wood. The size depends on how large you want the board to be, the one pictures was likely roughly a 4′ x 4′ sheet. Selecting the type of wood is fairly important and it may cost a bit more than a basic sheet. A lot of flooring or plywood (4′ x 8′ sheets) is too thick, it will make the thing super heavy. Some of the cheaper wood though is too flimsy, it needs to be reasonably stiff, tough the sides will add to the stiffness.

You also need some sort of trim piece. I used 3/4″ pre finished Quarter Round, but you could use something fancier. How much depends on the length of the sides of your board, but unless you are making something absolutely massive, 1-2 8 foot pieces should work. for smaller lap sized boards you’d only need one.

The top cover board is roughly 2 inches smaller than the bottom board, to account for the edge size. So, for example, if you had a 4′ x 4′ square of flat board, you would cut it in two just over half way at 25″ wide. Four feet is 48 inches, half would be 24 inches. Cutting at 25 inches gives you a piece 25 inches wide and a piece 23 inches wide. the 23 inch wide piece will need a couple of inches trimmed off one end, but then it should sit just inside the 25 inch wide base.

For the edges, trim them with a 45 degree angle so the outer side is the same length as the base of the puzzle board. Int he example above, these would be 25 inches and 48 inches, with the 45 degree angles all pointing “in”. It’s best to visualize each piece before cutting and how it will lay, because it’s easy to accidentally cut it incorrectly and then the corners won’t line up.

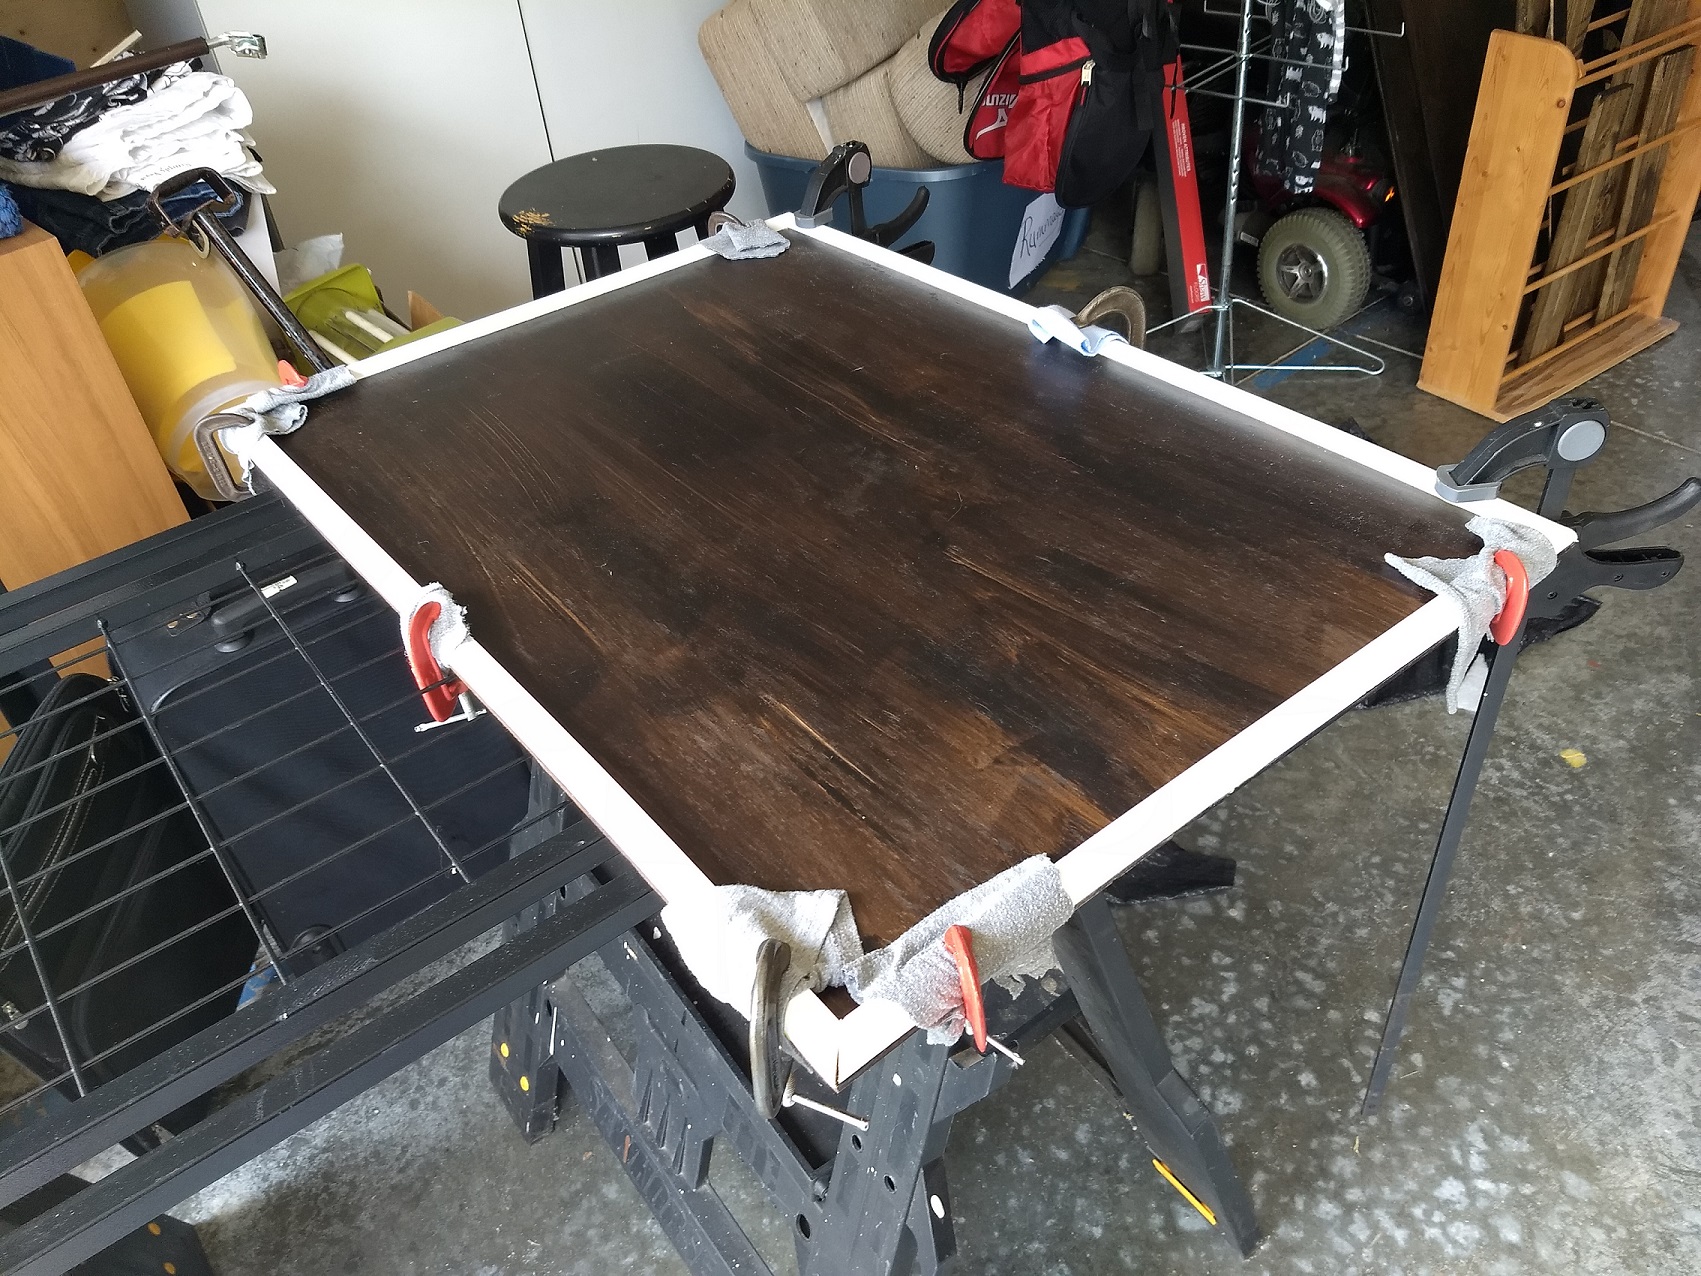
Once the base and sides are cut, you can stain or paint the base and top (and sides if they are not pre finished) to the desired color. It may also be a good idea to lay things out just to make sure the top board fits and doesn’t need trimmed down any as well. If you are really ambitious you could also potentially attach some sort of mat or fabric to the base piece at this point as well.

Next use some wood glue and glue the sides on carefully, keeping them as straight as you can along the sides of the base piece. Use clamps to hold the side pieces in place as they dry to avoid things coming loose. I also would recommend using an old sock or rag between the clamp and wood, to help keep the clamp for marring the finish. All four sides can be done at once, or a few at a time, depending on how many clamps are available. If you are careful you could also simply place everything on a flat surface (like a table or the ground) and balance something heavy like some large books on top if no clamps are available. Just take care that things don’t slide around. If you re doing this, it may be helpful to use some scrap pieces so the books (or whatever) sit “flat” instead of at an angle (where they will be applying some small sideways force).

Once every thing is dry, that’s it. It’s done. Construct your puzzle on the base, when you’re taking a break, cover it with the cover piece. When not in use you can store the cover in the frame and store it wherever you have room. The basic concept can easily be resized as well. I’ve made smaller lap sized versions of these as well, for single person use in a chair.

Migrating Mail-In-A-Box to a New VPS

A few years ago, I started running my own mail server using Mail-In-A-Box. Four years or so actually, if the age of my old server was accurate. I have several different email addresses, mostly to better segment out content. I have done this with Reddit, and Twitter, and TT-RSS, and probably other things. In my Mail-In-A-Box I run email for 3 domains, two of mine, one for my wife’s. Overtime I may eventually migrate all of my email to it, at this point, I am a little worried about being blacklisted, so I mostly use it for secondary, receive only, email aggregation.

For a while I’ve been putting off migrating the system to a new VPS. It’s been running on Ubuntu 14.04 since it was created. Newer MiaB won’t run on 14.04 and I can’t distro update the machine. The only choice is to roll a new VPS and migrate the mail.

I use Digital Ocean for my online services, feel free to sign up with the link in the side bar if you want, I get a little kickback if you do. It’s easy to use and affordable. Plus in cases like this, I can spin up an extra VPS, then easily destroy it and spin up a new one, when I discover that MiaB only works up through 18.04, so 20.04, which I used initially, won’t work. Also having the extra server just means a temporary bump in my billing for the month.

The basic process for migrating Mail-In-A-Box is here, in the official documentation. I had a few hiccups along the way but I got them ironed out.

First step was creating the new machine. I mentioned above, I first made a 20.04 machine, but found that doesn’t work, so I killed that and made a new 18.04 machine. Before anything else, I did a few security based housecleaning tasks. The server was creating with Shared Keys log in set up, but it only had a root account. So I created a new user and made them a sudoer. I also copied the SSH keys from root to the user.

adduser Username
usermod -aG sudo Username
cp ~/.ssh /home/Username
chown Username:Username /home/Username/.ssh -R

Next step was to add the new user to the SSH users and secure up that access.

sudo pico /etc/ssh/sshd_config

Then edit:

#Port 22

To a custom port and change:

PermitRootLogin no

Finally add:

AllowUsers Username

Lastly restart the ssh server with sudo service sshd restart. Then test the connection using the regular user. If that works, then disconnect from the root session and continue on the regular user.

I was doing an upgrade but the fresh install guide is here. All I needed was the set up line really, which takes a minute to run but does an initial set up of Mail-in-a-Box.

curl -s https://mailinabox.email/setup.sh | sudo -E bash

The next part was the trickiest bit. I linked the migration article above but I ended up trying to simplify things a bit. On the old machine, I stopped the mailinabox service, so no new mail would come in, then ran the backup python script as described int he article above. I found it was easiest to just connect to the server using Filezilla using SSH FTP, which meant importing my keys to Filezilla. It’s in the settings under SFTP. Something to keep in mind if you set a custom port is you’ll need to add sftp:// before the IP address.

Things are a little tricky here, since root owns the backup folder. I ended up doing a sudo copy into my user home directory, then a chown on the folder to give my user account access to the folder. This meant Filezilla could see the folder and download it to my local machine. There are way to directly transfer between the new and old server, but between custom ports and SSH keys and permissions, I found it was easiest just to download to my local laptop. Afterwards, I connected with SFTP to the NEW server, and pushed the backup folder to the new server. You need the whole folder with the “secret_key” text file and the encrypted folder and files. Basically, this is all the settings and emails.

Next step was to ssh into the New Server, go to the freshly uploaded backup directory, and import the old files, as described in the link. This is two commands run, separately.

export PASSPHRASE=$(cat secret_key.txt)

sudo -E duplicity restore --force file:///home/Username/backup/encrypted /home/user-data/

This takes a minute to run. The next step listed is to rerun the mailinabox set up with “sudo mailinabox”.

I had trouble here. Nginx would not restart. After sound troubleshooting I found it was an issue with SSL. Basically what seemed to happen was the restore, pulled the old SSL certs. Or maybe it was looking for the old SSL certs. Whatever the case, the fix was this process.

rm -rf /home/user-data/ssl/*

The fix was to delete the SSL certificates. then run “sudo mailinabox”. Everything started up. I verified I could log into the control panel and the mailbox using the UP address of the new server. I verified that all my custom DNS records existed, these are needed since the Glue Records point to the Mail-In-A-Box machine but because I host my websites on a separate machine, I have to have DNS records set up appropriately.

One thing I noticed was the SSL Certificates seemed to be wrong, which meant things worked, but would cause annoying security messages. I am not sure if this was related to deleting the certs above, or just that it was still looking for the old IP address. Whatever the case, I did a manual update with certbox for my MiaB Subdomain using

sudo certbot certonly --force-renewal -d Subdomain.Domain.comHere

Another minor issue I ran into, doing this needs to drop a file either in the webroot folder, or spin up a temporary web server to host it’s own file. I couldn’t find the webroot for the custom MiaB set up (it was not /var/www/html) so I temporarily ran “sudo service nginx stop”, then ran the above certbox command, using a temporary webserver option, then “sudo service nginx start” to restart Nginx. NGinx had to be stopped since otherwise it is using Port 80, and the temporary server can’t start to runt he certificate verification process.

Another note, I am not sure if the –force-renewal option is needed above. It didn’t throw out any errors and it fixed the issue, so I left it.

The final step was to go to my Domain Registrar and update the name servers and Glue Records to point to the new Server IP. After a short bit of waiting, eventually the mail server URL connected to the admin and web consoles. I did some test send and receive of emails between my server and gmail to verify everything was working properly. One nice bit, the newer MiaB has a different interface for Roundcube webmail, so I could easily tell if I was going to the new or old server.

Once everything was satisfactory, i went back to Digital Ocean and powered down the old server. If everything is still working in a few days, I will destroy the old server, so I don’t have to keep paying upkeep on it. One thing to keep in mind, both the old and new servers require a specific hostname, so they will be named the same, so double check that you are powering down and deleting the correct server. some easy ways to verify are IP address, or server age. The old server is several years old but the new server is several days old.

Roll Your Own OpenSIM with Digital Ocean

os_doOk, so starting off, there was a bit of trial and error involved here and a bit of backtracking.  I’ve done what I think is a good job of backtracking through my steps though to get all of the actual steps listed.  TWO!  I’m not going to vouch for this being 100% accurate anytime after posting.  My experience with OpenSIM is that every damn time seems to be completely different for SOME reason.  That said, it should still be mostly a good guide.

For the uninitiated, OpenSIM is basically an Open source, user controlled Second Life server instance.  It can be connected to other sims via the hypergrid protocols.  This guide does not cover anything involving Hypergrid or connecting to other grids.  It is for creating a private accessible from anywhere OpenSIM instance using Diva on Digital Ocean.  Diva is a pre configured OpenSIM stack deal and Digital Ocean is a Virtual Private Server (VPS) host.

The rest of this post is behind a cut…

Read More

Automatic Updating of New Podcasts with Radio DJ

That has to be one of the lamest topics I’ve ever made for a blog post but it’s at least descriptive.

This is a short guide for users of the Free RadioDJ software who want to automate the process of adding new podcasts to the rotation.  This is mildly complicated but not overly so and it does require the use of outside programs to make it work.  For this example, I’ll be using the NoAgenda podcast.

The first thing you’ll need is a pod catching program.  I use gPodder but if you have a preferred alternative you can use whatever you like.  The key here is that the program needs to download the files into one regular location that you can reference with some batch files.

For those who are less familiar with the old school DOS environment and batch files, basically, a batch file, or .bat is a file which contains command line commands which will be executed in order.  It’s similar to making scripts in Linux only for Windows/DOS.  For simplicity, I recommend making a single .bat file for each show you want to run and naming them something like renameSHOW.bat.  I keep mine in the c: Root directory but you can put them in a folder somewhere if you’d like.  It’s probably better to try to keep all files in folders without spaces since DOS and the command line can get funny when spaces are involved.  This goes for your downloaded Podcasts as well.

To change the default download directory in gPodder, right click a Podcast and change the name description to one without spaces.  For example, if the default picked up is “No Agenda”, change it to “NoAgenda”.  For other programs you’ll have to figure this out on your own.

Next, create a batch file.  If you have file extensions turned on you can right click in the c: directory and do a “Create new –> Text File” then name it, for example “renamenoagenda.bat”  Alternately, simply open up Notepad, then save as “renamenoagenda.bat” in the appropriate directory.

Edit the file with Notepad or any preferred basic ASCII editor.  Add the lines shown below.

if exist d:PodcastsNoAgendanoagenda*.mp3 del d:PodcastsNoAgendanaradio.mp3

rename d:PodcastsNoAgendanoagenda*.mp3 naradio.mp3

You’ll want to replace the paths in this manner. “d:PodcastsNoagenda is the directory where the Podcasts are stored.  This will be dependant on your program and settings.  I have a second drive in my Pc where I store all the music RadioDJ uses.

“noagenda*.mp3” is the generic name of what’s downloaded by gPodder.  Each episode is something like “Noagenda-Episode-Date-Whatever.mp3.  They ALL start with “noagenda” and all end with “.mp3”.  using this will pick any episodes in the directory.

The file “naradio.mp3” is the file used by RadioDJ.  It is a generic file that RadioDj has in it’s list and it is of the type “Variable Length Audio”.  This will make RadioDJ get the length when it goes to play this file.  i use this format “radioXXXX".mp3” for simplicity.  For example, I’m also rotating FLOSS Weekly, which is called “radiofw.mp3”.  The key here is that the file CANNOT have the same starting name as the downloaded podcasts.  If I were to call it “noagendageneric.mp3” for example, then it would be picked up by the “noagenda*.mp3” call which would screw everything up.

Now, the essense of what this file is doing. 

if exist d:PodcastsNoAgendanoagenda*.mp3 del d:PodcastsNoAgendanaradio.mp3


This line says “if there is a file named noagenda*.mp3*, then delete the generic file.  I had trouble originally because I simply had the .bat delete the generic file.  This presents and issue if a Podcast has not been updated and there is not a new file to replace it.

rename d:PodcastsNoAgendanoagenda*.mp3 naradio.mp3

This line says “Rename noagenda*.mp3 to the generic file.”  This will create the new generic file that Radio DJ will use.  Also of note, this will “consume” the new episode.  This whole process requires that there is only one new episode.  if you’re clever this script COULD be adopted to create a series of rotating episodes.  I’m not going to get into that detail here however.  Essentially it would be a series of scripts that run daily.

Which brings up the next step.  You’ve created a batch file, now you need to schedule it to run using Windows task scheduler.  Simply set it up to run as needed.  For example, i run new episodes at 7PM, so i run the file at 6:30 PM on the day it’s needed.  The changes are essentially instantaneous so i could run them as 6:59 if I wanted.  I also have a short new segment which runs hourly.  This one runs at 4AM.

The thing that will sort of break this is if the downloaded new episodes do not use a regular file name.  Also if your Podcast feed isn’t updated in time.  The result hwoever will be that the generic file won’t change and an old episode will run in it’s place, so at least something should run.