Porting Playlists With Python
I had a brief sting last year where I was using Spotify, but I dumped it, mostly for financial reasons, but also because as much as I like the ability to just, listen to whatever, I kind of dislike the whole “Music as a service” aspect. I can still find new stuff via Youtube and then add it to my list of “Albums to maybe buy eventually”.
One thing I lost though was my Playlists. I was worried they were just gone, soon after logging in, I swear they hd just vanished, but checking now, they seem to all be there again. Whatever the case, I wanted a backup copy.
This is of course, an arduous thing to do, particularly my large “play random tracks” list, which has 1200+ songs. I don’t have time to type all that out, or to search and find all these tracks on Youtube. There are services, but they tend to be limited unless you want to pay, which is more annoying than anything.
Exporting from Spotify
Thankfully, i can use Python. I needed a script that would pull down my playlists and dump them to simplet text files. I actually had originally asked Perplexity to build this script, which it did, but the API method it used didn’t match the one I had previously used during my Python class, to make a Plylist generator for Spotify.
Instead of doing what would probably be the easier thing, and figuring out whate OAUTH method the Perplexity script uses, I just, rebuilt things using the Spotipy library, which is what I had used previously. So this script is one I made, for the most part.
It connects and gets a list of all the playlists you have, then loops through that list, and on ech playlist, pulls down all the track names, and writes them to a text file, in the format Artist – Album – Track Name.
The credentials go into a file int he same directory called auth,py with the following format of your Spotify Developer credentials. Keep the quotation marks.
SPOTIPY_CLIENT_ID = "YOUR CLIENT ID"
SPOTIPY_CLIENT_SECRET = "YOUR CLIENT SECRET"
SPOTIPY_REDIRECT_URI = "http://localhost"
SPOTIFY_USERNAME = "YOUR USER ID NUMBER"
import requests
import os
import spotipy
from auth import *
from spotipy.oauth2 import SpotifyOAuth
sp = spotipy.Spotify(auth_manager=SpotifyOAuth(client_id=SPOTIPY_CLIENT_ID,
client_secret=SPOTIPY_CLIENT_SECRET,
redirect_uri=SPOTIPY_REDIRECT_URI,
scope="user-library-read",
cache_path="token.txt"))
def get_all_playlists():
playlists = []
limit = 50
offset = 0
playlists = sp.current_user_playlists(limit, offset)
return playlists
## https://stackoverflow.com/questions/39086287/spotipy-how-to-read-more-than-100-tracks-from-a-playlist
def get_playlist_tracks(username,playlist_id):
results = sp.user_playlist_tracks(username,playlist_id)
tracks = results['items']
while results['next']:
results = sp.next(results)
tracks.extend(results['items'])
return tracks
def save_playlists_to_files(this_list, listname):
if not os.path.exists('lists'):
os.makedirs('lists')
# Sanitize filename for filesystem
safe_name = listname.replace('/', '_').replace('\\', '_')
filename = f"lists/{safe_name}.txt"
with open(filename, 'w', encoding='utf-8') as f:
f.write(f"Playlist: {listname}\n")
f.write("Tracks:\n")
# Optionally, you can fetch and list track names here
for eachtrack in this_list:
f.write(f"{eachtrack}\n")
playlists = get_all_playlists()
#print(playlists)
for each in playlists['items']:
this_list=[]
#print(each['name'])
listid = each['id']
ownerid = each['owner']['id']
#print("\n")
mytracks = get_playlist_tracks(ownerid,listid)
for eachtrack in mytracks:
trackentry = f"{eachtrack['track']['artists'][0]['name']} - {eachtrack['track']['album']['name']} - {eachtrack['track']['name']}"
this_list.append(trackentry)
#print(trackentry)
save_playlists_to_files(this_list, each['name'])Everything gets output to a folder called “lists”.
Importing to Youtube
But what to do with these lists? It’s going to be a bit more complicated to try to get Python to build them from my private music collection. I have a LOT of the tracks, I don’t have all of the tracks, I also would need it to scan through well, it’s a fuckton, of music files, some tens of thousands, maybe more, decide on a file, and add it to a winamp or VLC playlist.
What I can do though, for now, is make a big ass YouTube Playlist.
I have no experience with the Youtube API, so I just asked Perplexity for this script, specifically:
“create a python script that will take a text file list of sings, as an input, one song on each line, formatted “artist – Album – Song title” and search Youtube for the artist and song, and add the first result to a new playlist named after the name of the file”
It did some thinking, then gave me a script and instructions on how to set up OAUTH credentials on Youtube. I then did a test run of the script on one of the shorter list files and, sure enough, it worked perfectly. I have included the script below.
You need to create an app here, and create OATH Credentials, and download the file, place it int he folder with the script below, renammed to “client_secret.json”.
The script requires the following dependencies.
pip install google-auth-oauthlib google-auth-httplib2 google-api-python-clientSomething not mentioned by Perplexity, that I found a solution for on Stack Overflow, after getting an error, you need to add users. On the App page (you should be sitting there after creating the app), Select the “Audience” tab on the side bar, then a bit down, add a “Test User” by email address, which is the email address associated with your Youtube Channel that you want ot attach the playlists.
import os
import argparse
from googleapiclient.discovery import build
from google_auth_oauthlib.flow import InstalledAppFlow
SCOPES = ["https://www.googleapis.com/auth/youtube.force-ssl"]
def create_playlist_and_add_songs(file_path):
# Authenticate and build service
flow = InstalledAppFlow.from_client_secrets_file("client_secret.json", SCOPES)
credentials = flow.run_local_server(port=0)
youtube = build("youtube", "v3", credentials=credentials)
# Get playlist name from filename
playlist_name = os.path.splitext(os.path.basename(file_path))[0]
# Create new playlist
playlist = youtube.playlists().insert(
part="snippet,status",
body={
"snippet": {
"title": playlist_name,
"description": f"Auto-generated from {playlist_name}"
},
"status": {"privacyStatus": "private"}
}
).execute()
playlist_id = playlist["id"]
# Process songs
with open(file_path, "r") as f:
for line in f:
parts = line.strip().split(" - ", 2)
if len(parts) != 3:
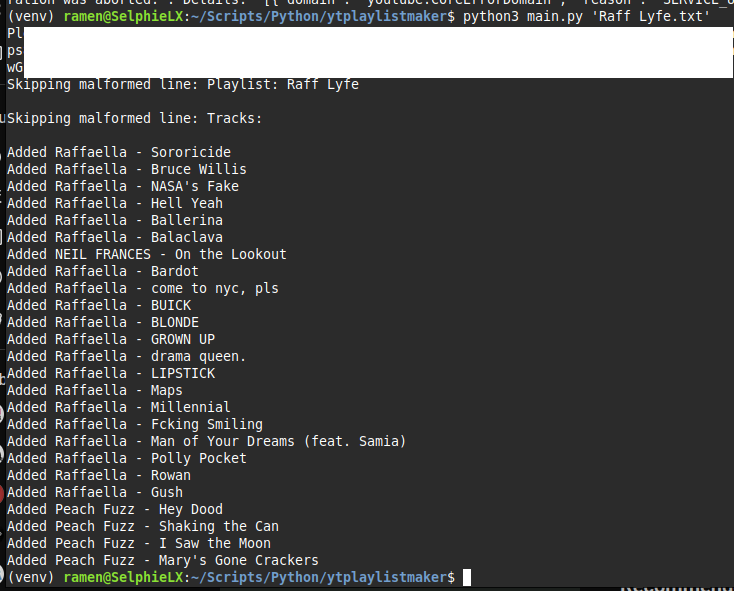
print(f"Skipping malformed line: {line}")
continue
artist, album, song = parts
query = f"{artist} {song}"
# Search for video
search_response = youtube.search().list(
q=query,
part="id",
maxResults=1,
type="video"
).execute()
if not search_response.get("items"):
print(f"No results for: {query}")
continue
video_id = search_response["items"][0]["id"]["videoId"]
# Add to playlist
youtube.playlistItems().insert(
part="snippet",
body={
"snippet": {
"playlistId": playlist_id,
"resourceId": {
"kind": "youtube#video",
"videoId": video_id
}
}
}
).execute()
print(f"Added {artist} - {song}")
if __name__ == "__main__":
parser = argparse.ArgumentParser()
parser.add_argument("input_file", help="Text file containing songs")
args = parser.parse_args()
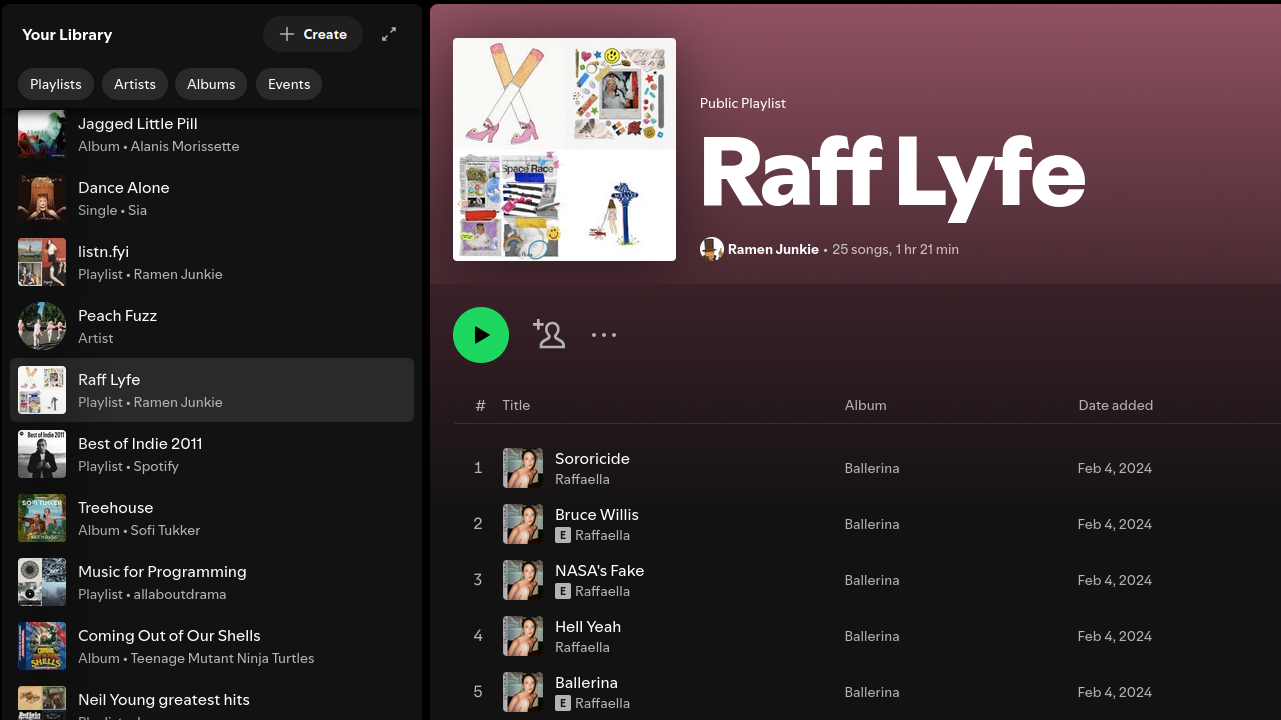
create_playlist_and_add_songs(args.input_file)And here is the final imported version of my Raffaella playlist from Spotify.
Josh Miller aka “Ramen Junkie”. I write about my various hobbies here. Mostly coding, photography, and music. Sometimes I just write about life in general. I also post sometimes about toy collecting and video games at Lameazoid.com.