Sorting Out all My Writing

Coding Python isn’t the only project I’ve been working on recently, though it IS the major one.  Another project I’ve been working on, that is at least tangential to “modernizing how I code” is organizing all of my writing.  I write a LOT.  I sometimes list “writing” as a hobby, but I almost never list it as a “Primary Hobby” but it’s arguably the one hobby I have done the longest, even longer than collecting toys, and that I would like to think I do, pretty well.  Ok, no scratch that, I’ve been a “Gamer” since before I could really write.  Actually, it seems like all of my “major hobbies” started when I was like 5-10, so I guess those “formative years” really do matter.  My first programming was on the family’s old Franklin PC with two 5/25 floppy drives, writing BASIC that my dad had taught me.  He had been going to college for Computer Science at the time.

Anyway, writing.

I write, a lot.  I write about all sorts of topics.  Sometimes I write technical write ups, sometimes I write (purposely) shitty Final Fantasy VII Fan Fiction. I write casual blog posts about music, and movies and toys, I write detailed instructions for work or FAQs for Video Games. They aren’t all “winners” but I have gotten a lot of compliments of the years for my writing style and methods.  i also save everything.  I mean, literally EVERYTHING I create.  There are a few things I no longer have and I still think about them sometimes, and wish I had copies.  A few years ago I even started transposing some of my old paper journals and stories into digital text.  

The end result is that I have a lot of files in a lot of formats. Some are text files, some are Word Files, some are exported XML archive files.  A few are PDF based exports as well as some olf “Windows Live Writer” files.

As part of my personal journey to “level up” a bit on my computer skills (which are already pretty great), I have been working on getting more accustom to using Markdown.  Markdown is essentially “Fancy Text Files”. They are plain text files, with special symbols inserted occasionally to make things look prettier in a Markdown reader.  The thing is, this means they are very compact in size and can still be read by even the most basic reader (albeit with the random symbols inserted sometimes).

Most of this effort involves a LOT of copy and pasting.  I’ve converted a bunch of Word Docs I had over to Markdown files. Text docs aren’t generally huge to start with, but the Markdown files mean files that are sometimes 1/4th the file size.  When we are talking hundreds to thousands of files, this is significant savings.  So far, I’ve been skipping reviews if they have embedded images, but I already have those images saved elsewhere, so I may revisit that concept.

This also means finally sorting through some other “to sort” boxes.  For example, for a while, I was posting blog posts with Microsoft’s now discontinued “Windows Live Writer”.  The shitty part is, it used a proprietary format that even Word can’t open.  Fortunately, there is a open source alternative, “Open Live Writer”.  I don’t use it to post, but I can open those old Live Writer Files and convert them to useful Markdown Files.

One fun thing I did was export all of my Reddit Posts, and pull out anything over 500 characters as a “Journal Entry”.

Another source is old WordPress Exports. I have used my newfound l33t Pythonista Skills to build a sweet little script that takes a WordPress XML export, and parses through it for dates, titles, and content. Next, it cleans up the post content a bit (it’s not perfect sadly), and spits it all out to a series of files in the format I want.This script could easily be modified to work with other similar data exports like Reddit)

That code can be found over on Github. It’s probably buggy, but it works for the most part.

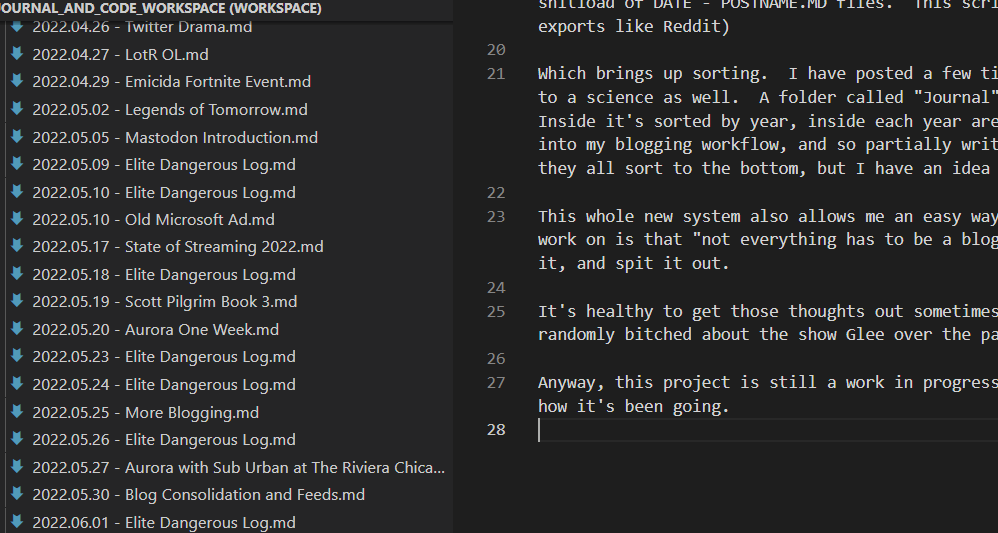
Which brings up sorting.  I have posted a few times about digital organization, and I’ve gotten the text down to a science as well.  A folder called “Journal” in my One Drive, which syncs to several PCs and my NAS.  Inside it’s sorted by year, inside each year are files in YYYY.MM.DD – TOPIC.md.  I’ve also incorporated this into my blogging workflow, and so partially written posts in the current year get X_ added to the front, so they all sort to the bottom, but I have an idea of when I had the idea.

This whole new system also allows me an easy way to just Journal occasionally.  One thing I’ve been trying to work on is that “not everything has to be a blog post”.  Sometimes it’s good to just, write, for myself, date it, and spit it out.

It’s healthy to get those thoughts out sometimes. For example, would you like to know how many times I’ve randomly bitched about the show Glee over the past 10-15 years?  Because it’s more than is probably healthy.

Anyway, this project is still a work in progress, but I’ve made a LOT of progress and I’m pretty happy with how it’s been going.

Organizing Digitally – Backups

Backups are the real key and benefit to digital media. It’s also best to have a multi layered plan for back ups. Specifically, i like the 3-2-1 plan that is often pushed. Three copies, Two different storage devices or media, One copy off site. I would like to add that it’s best if at least one of these is automatic. Ideally, you should have some sort of versioning, in case the backup becomes infected or locked by malware, but that tends to be more costly to do, and it’s kind of overkill unless your data is absolutely mission critical.

Old Backup Methods\

I wanted to touch on some old back up methods I’ve used over the year before going on to my current set up. Many of them were alright, but often had pitfalls. Though I am sure my current system has holes as well, it works well enough, for now.

The classic “oldest” would be CD-Rs. And an extension of this with DVD-Rs. I have not really relied on this method for something like 15-20 years but it’s one of the easiest methods of doing back ups of important data. Burn the data to disc, label the disc, store it away, A plus is that if you date the discs, you can also end up with redundant copies easily, in case one disk is damage or fails. Basic DVDs do have a shelf life, though which is a downside. There are long lasting archival discs available, and I’ve actually considered adding these into my Backup workflow again. I have since pulled all of my old archival DVDs and CDs forward to more modern solutions and sorted the data.

For a while I used a large capacity USB drive. It was something like 500GB, which was huge at the time. Eventually, unfortunately, this drive failed. I had also failed to have a second copy of the data, it was just an archive of data, so, while I managed to recover a lot of the data, I lost some family photos files.

For a while I used Amazon Photos as a backup. This worked fairly well, I get unlimited storage with Amazon Prime for photos. There were still several problems with this method. One, it was unlimited for Photos ONLY, which meant videos absolutely had to be sifted out since other files were limited to a measly 10GB. Eventually support for the automatic part that worked with my NAS was ended as well, so that pretty much killed that as a reliable backup. It also was flaky when deleting files. My wife had sorted out out photos and deleted fuzzy or duplicate images, and many returned and were re-synced from the cloud copies. To get around this I had to disable and disconnect the backup, purge out everything int he cloud, then let it re-sync entirely up after she finished sorting files. Not ideal.

Google photos has similar problems, coupled with Google’s new policy removing unlimited photo back ups. There also isn’t an automatic API based sync on my NAS for Google Photos.

One Drive

After shopping around on several different systems compatible with my NAS, I went ahead and chose One Drive. Specifically, Office 365 Family. I’ve considered subscribing since Office 365 was launched and based on quick rough calculations, for the same cost of something like Amazon EC2 or Glacier or Backblaze, or whatever (I can never keep all these names straight honestly), I decided I could get Office 365 Family instead, which effectively gives me 6TB of storage to work with. O365 Fmily gives 6 accounts 1 TB each. I also have 5 members in my family, all of which use Office to varying degrees (currently using an outdated copy I purchased for cheap through a work program). Except none of them are ever going to really use a lot of that 1TB, so I could easily create connections as needed through the NAS to sync backups to each account.

For now, most of the data sits in two accounts, mine, and a new account created solely for core backups. The fun part is, I could even manually push data up to one of the other accounts occasionally (say, yearly), as a slow backup if I wanted. The Core Backup has all of the Family Photos and Videos and a folder of important documents like taxes and bill statements etc pushed to it. My Onedrive has a copy of my personal document archive and personal photos archive.

The nice bonus is I can now access my documents more easily from anywhere. One Drive sharing also allows me to access the backup drive, using my main account. It also all syncs automatically, even though primary access to these files is all done over network shares. Plus it’s more reliable than Amazon Photos.

I also dumped Dropbox in favor of One Drive, with this new storage available. I had mostly been using Dropbox as a sync for “working files” between my laptop and desktop. Now I just use One Drive.

Flash Drives and Regular Drives

But hey, 3 copies right? More can be better though. I bought a couple of large capacity flash drives that I dump all of the family photos and important files to on an annual basis. These go in the fire safe.

Three Copies, Two (Three) different media types, One off Site.

I also have an external USB adapter for SATA Drives, and a pile of drives in storage. For general “data security”, I basically never throw out old hard drives. When I donate an old PC, I will always strip out the drive and dump it into storage somewhere. These are not always large drives, but they do usually still work. Hard Drives also have a longer shelf life than Flash Drives, so occasionally I will make a sort of “Deep Archive” copy of the data to a spare Hard Drive, that gets wrapped in a static bag and stored away.

The entire point of all this, is basically to avoid ever losing data again, like when my old USB drive crashed. It’s not 100% bulletproof, but it’s good enough that little damage could easily be done. If there were some sort of ransomware attack, I always have the drives backups, even if it got synced to One Drive. If the house burns down, there is always the cloud.

Organizing Digitally – Photos

On the surface, it seems a little goofy to separate Photos from Videos, but the reality is, both of these formats really deserve separate handling. For one, when backing up Photos, a lot of solutions will give you unlimited photo storage, but not unlimited video storage. Which makes automatic backup tricky.

Video is also rather massive compared to photos, from a file size perspective. A side effect of this is that having videos mixed with photos can dramatically increase load times when browsing photos later, since it takes more for the file system to chug through a video for thumbnails etc.

I have effectively two sorting systems for photos, depending on what the photos are. Also, unlike the videos, my wife does a lot of the actual sorting of Photos, at least the family photos, since she uses them for scrapbooks and such.

Family Photos

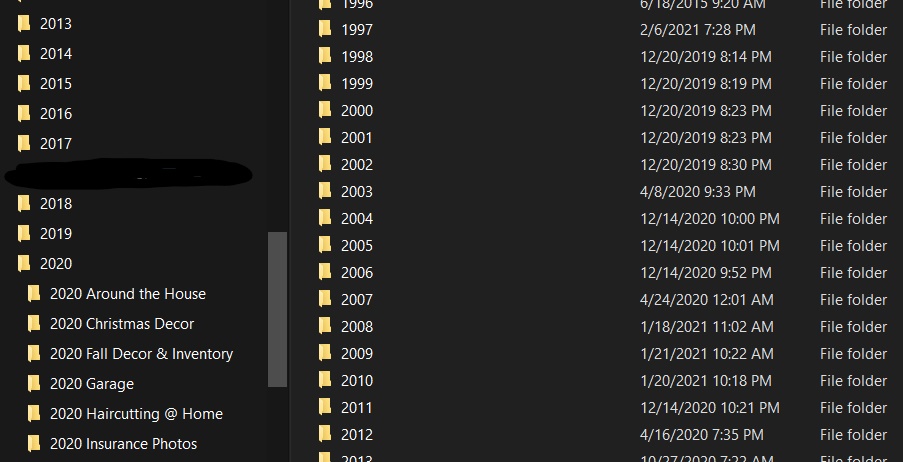
Similar to videos, I sort family photos by year, in one large blob. The difference is, I also sort them into folders by “event”. For example, there might be a folder, “2019.12.25 – Christmas at Home”. The extra details are helpful, because there might also be, “2019.12.23 – Christmas at Josh’s Parents” and “2019.12.26 – Christmas at Tina’s Parents”. (NOTE: I use the actual names of our parents). One minor mistake I made early on when I was doing all the sorting, was labeling them things like “Christmas at My Parents”. I changed all of those to be my parent’s names. I might also use “Christmas at Home with Josh’s Family”.

These folder names allow for easy sorting by date, and it allows a quick, at a glance description of who might be in the photos. I have tried several different Photo Organizing software solutions, and frankly, nothing beats just using the straight file system folders. The nice thing is a lot of software solutions will use the Folders as a way or sorting, so using these folders means the photos can easily and quickly be imported.

Each year also may have some more generic folders. These are catch all folders such as “2018 Cat Photos” or “2012 Kids School Artwork”. There might also be folders like “2014 Misc”, which is where less eventful photos might go. This would be things like, 1-2 lone photos at a local fair event, or single photos of weather or something at the house. They don’t deserve an entire folder, but they are still in the correct year.

Other Photos

I labeled this as “other photos” but it’s mostly just my photos. I take a lot of random photos of my toys and electronics projects, and random crap that is mostly unimportant. I keep these photos separate from the Family Photos, mostly because it’s just clutter my wife doesn’t care about, but because they are just different in their core nature.

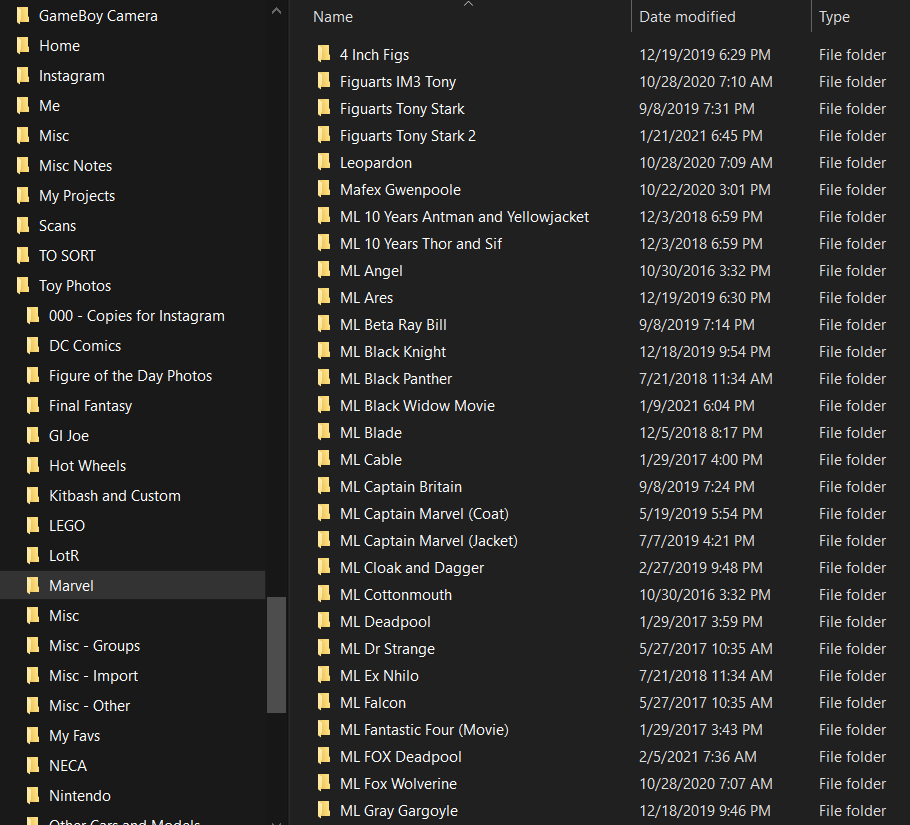
These are sorted instead by type. For example, I might have folders for “Toys” then inside, “Transformers”, “Marvel”, “Imports”, “LEGO”, etc. Within those folders, I often will break it down further by lines, or individual figures, since I (used to) take little galleries for use in reviews. Other folders are broken down the same way, photos of projects, photos of electronics, photos of random scenery, sorted down and categorized.

We also use a similar set up for eBay photos, though I don’t really take any of those. I have a shared folder JUST for eBay photos, so my wife and daughters can keep everything sorted and together for the work they do selling on eBay and other online store fronts.

Not Photos

I do something similar with images that aren’t photos as well, though I don’t later back any of these up. Because I am a digital pack rat, I save a ton of random memes and images from the internet. I have a monthly reminder to clean my phone off. These files all dump onto my laptop in a folder named for the year and month, then these images are manually sorted down based on what they are. I’ve honestly gotten better about not just saving piles or random images lately.

Regular Consolidation

Speaking of the Monthly reminders, this system works best if it’s kept up regularly. I have a monthly reminder to offload my phone files, but this only works if I actually DO the sorting, which I make a point of doing.

We have also started regularly dumping everyone’s phones once a month. Though not necessarily removing the files, that’s up to everyone individually, everyone in my house is an adult at this point. But we still consolidate photos as needed for events or activities, since it’s not uncommon for say, my daughter to be taking photos at Christmas, that my wife may want to use in a scrapbook.

Old Photos

I have not gotten as far as I’d like in this project, but I have also started work scanning and archiving older printed photographs. It’s nice to have these digitized since it means they can be archived and backed up and even reproduced for scrapbook albums or whatever. My wife has made scrapbooks for each of our three kids, generally for each year (sometimes two) and so she often uses multiple copies of the same photograph.

Consolidation

The other good part of having everything together is it makes it way easier to keep backed up. I plan to do an entire separate post on the overall backup process, but having things consolidated, makes it way easier to manage and ensure everything is being captured and saved.

Organizing Digitally – Videos

While I have been pretty diligent about organizing my Digital Photos, for the longest time I have severely neglected my Digital Videos. Partially because I didn’t really have any good/easy way to watch them, partially because they were just… sort of a pain to deal with.

That isn’t to say that I don’t know how to work with video files. I have worked in the technician back end of the broadcast and cable television industry for over 15 years now, and I have done end to end production (recording, editing, mastering out) of some local events in the past. Granted, I’m not adding tons of graphics or after effects, but I do know what I am doing. The real issue is that it’s super time consuming, on top of the thankless part mentioned above, of no real convenient set up to watch them.

VHS Tapes

In 2020, I decided it was time to fix this problem. It sort of started with my wife asking if I could digitize all of her mother’s old VHS tapes of family events. This actually ended up being slightly trickier than expected. First off, I sort of had an old VCR, but it died halfway through the process, which is why it was a “sort of” to begin with. I borrowed her mom’s VCR to finish the task. The second issue was the input to the PC. I have 3 or 4 different types of digital capture devices that take RCA and cable input, but getting Windows 10 to recognize these is extremely hit and miss, even with the correct drivers.

At one point we were going to set up my daughter to do the recording part, so she could review them as she recorded them. After trying for too long, I simply could not get her laptop to recognize any of the capture devices. In fact, I could not get any of the laptops to recognize them. Using numerous different drivers, including pulling the drivers from my Desktop (where it does work) off. Even my desktop only ever manages to work with one of these devices and occasionally requires a reboot to get it to show up at all.

I’m not sure if it’s old hardware in the Capture cards or just old technology.

The second issue is recording software. There are a fair number of older TV tuner software packages out there, but as near as I can tell, most of them are also not particularly compatible with modern operating systems. What I did find worked well though was OBS, or Open Broadcast Software. It was a simple matter of adding the capture device in as a source, it basically shows up as a web-camera, then using OBS’s record function. I’d already been doing something similar doing screen captures of some concerts, so that workflow was already there.

This all leads back into the “It takes a lot of time” aspect of the original issue. There isn’t any quick way to digitize a VHS tape. You stick it in, hit record, and wait for however long it plays out. I also didn’t want stray sounds showing up in the recording (despite setting up OBS to only capture the VHS input, I just didn’t trust it), plus I didn’t want to accidentally create any heavy lead moments that might glitch the recording, so recording also meant not actually using the PC during this wait.

Digital Videos

I also had a ton of digital videos piled up and semi sorted, and somewhat renamed. I’ve used at least half a dozen cameras over the past 15+ years of recording family videos, plus probably another dozen of phones from old flip phones to cheap androids, to better androids. Each includes it’s own file naming scheme and slightly different file format.

One problem I came across as I started compiling everything into the Synology Video server, was that not every format was compatible for playback. This meant finding a format that DID work, and converting everything to match. I kept an archive on an old drive of the originals “just in case” but I set about using FFMPEG to convert everything to a compatible, size efficient mp4 format.

I did this on my secondary project server, which has a ton of storage for temporarily holding a lot of video, and a convenient command line interface for running the conversion. It takes a long time for the conversion, but it’s something I can easily run through Screen over SSH, then leave to run for a few days, while it chugs through a year’s worth of video. The command I used was:

for i in *; do ffmpeg -i "$i" "${i%.*}-c.mp4"; done

For each file in the directory, run ffmpeg on it to convert it, then name it [Original Filename]-c.mp4.

The -c added tot he file name was for “converted”, and it prevented the program for stopping if it came across a file that was already .mp4, which would produce a “do you want to overwrite this” prompt. I didn’t want to overwrite the originals, because I often just kept the original files, but sometimes I still wanted to convert them, in case there was a significant file size savings.

One key step here that I almost forgot was renaming the files BEFORE the conversion. I use a pretty standardized convention when sorting digital files of YYYY.MM.DD – File Description.

For example: “2007.07.04 – July 4th”.

The renaming needs to be done before the conversion, because often I am pulling the date from the file metadata on the original file. Ffmpeg is creating a new file, so all of the NEW metadata is inaccurate. The Date Created, Date Modified, etc, is all based on the day the conversion was done. Sometimes you can still pick the date out from the original file name, for example, one of the phones would make files like “VID_20070704_193606_001” which would be cone for something like “VID_Date_Time_Filenumber”, so I could still find the original date after conversion, but often they are just “IMG4089.AVI”. Which is just a sequential number of which file was created.

Combining Videos

Another step I took during the sorting of the videos was to combine video segments into meaningful, single videos. This also meant deleting out short nothing videos of the floor, or a restless crowd while waiting for a school function. It also meant cutting down some of the cruft around the edges. Part of the motivation for doing this was, after getting the Synology Video set up going, it was clear that playing a series of single videos such as:

2015.05.20 - Concert Band Concert 01.mp4
2015.05.20 - Concert Band Concert 02.mp4
2015.05.20 - Concert Band Concert 03.mp4
2015.05.20 - Concert Band Concert 04.mp4
2015.05.20 - Concert Band Concert 05.mp4

Was incredibly cumbersome. Often when recording kid’s school programs, I would record the opening, then stop and restart for the first song or act, then break in between songs for band or chorus. Sometimes it would just be a series of short, but related events, like videos of people sledding.

I took these individual videos, dumped them into Adobe Premier in order, trimmed them up, then exported them out as a single video, for example:

2015.05.20 - Concert Band Concert.mp4

Cat Videos

We have had a total of something like 15 cats, and currently have 7 cats. Everyone loves recording videos of the cats. When getting to the end of the process, it became clear that the cat videos needed to be pulled out into their own folders, so that if someone wanted to just watch cats, they could do so, and someone wanting to watch family videos, could just see family videos.

Youtube

I have several mostly neglected Youtube channels. As I finished up videos, I selected some that I’ve been slowly uploading to Youtube, on my “Personal Channel“. I’ve been trying to sort of “get into” the idea of actually doing some more produced videos, and this is mostly a push to try to motivate myself to do so. In case you were wondering, I also have a more popular channel that’s basically for Lameazoid.

Process Flow

The overall process flow started with renaming the original “Home Movies” folder on the NAS to “Home Movies to Convert”, then copying all of the files to a folder on my secondary server titles “Home Movies Originals Backup”. The copy, as you might expect, took a very long time, as it was 341 GB of video files.

The next step was to move the files out of each yearly folder to a different folder on the File Server. this also meant watching each video, at least a little, to rename the ones that needed renamed. Afterwards, i would run the ffmpeg conversion on the folder and wait.

Once the videos were converted, I would set about combining them in Premier and rendering the files out. In some cases the video didn’t need edited and was already a single file.

Often while working in Premier, which took a few days and sessions to get through a year, I would start the next batch of conversions for the next year.

Once the videos were converted, or not if not needed, I would dump them all back into a new Home Videos folder, named for the year of those videos.

Each video is named per the convention above, with “YYYY.MM.DD – Description”, chosen because it means everything always sorts in chronological order by name, and the videos are sorted into folders by year, or “Cats”, then by year. The VHS videos are sporadically placed across the 90s, so they are simply in a folder together titled “VHS”.

The End Result

The final end all of this work was two fold. One, I wanted it to be usable in DS Video on the Fire TV. Second, I wanted it backed up in One Drive.

One of the biggest secondary benefits of this process was file size savings. The end result was that the new Home Videos folder is a mere 133GB in size, over 200GB less. It doesn’t seem like a lot, but it helps. Some of the original videos, particularly the ones I had recorded on my Panasonic DVC camera, would clock in at close to 25GB in a single file.

the nice thing is that going forward, keeping this up to date will be easy. Most of the newer videos we as a family record, are compatible with the Video Station software by default. So no need to convert them all. Also, all of my kids are out of school. So I will be producing way less videos in that regard. Basically around 2017 or so, you would think all the kids transformed into cats. This was around the time they were all done with school events and the time they all got modern cell phones. The number of kid videos dropped to almost nothing while the number of Cat videos skyrocketed.

Organizing Digitally – The NAS

I want to do a sort of series about how I have my digital world organized but I was sort of trying to decide the best place to start. I wanted to run down some file structure methods, and I want to run down Office 365 use, and previous backup methods, but ultimately, the core of everything, is my NAS.

So this is also sort of a followup to that last set of articles about my Synology NAS. I am sure there are other ways to do a lot of what the Synology does, but there are a lot of simple to use built in features that are nicely integrated into my workflow. It’s a little pricey to set up initially, with the box and the drives, but the reality it, any good solution will be.

Features I Use

These aren’t in any particular order, but I wanted to touch on the aspects of the NAS that I use pretty regularly.

  • OpenVPN – I used to go to a lot of hassle opening up firewall ports on my home network to different devices and machines, so I could access web cams or SSH to different servers and blah blah blah. This is a bit of a security problem, since it means lots of open target points as well. I’ve long since dumped that in favor of OpenVPN, which is built into the NAS. I connect through my laptop or my phone to my home network, then I connect to whatever network drive or SSH connection I need to. It works perfectly and requires way less hassling with the firewall.
  • Download Station – This is essentially a Tor downloader, though I think it can handle a lot of other url types. I don’t really directly interact with this, I keep a folder for incoming files that I occasionally sort and a watch folder for Torrent files that it pulls from. The fun part is syncing the watch folder using One Drive, so I can dump Torrent files to it from anywhere. And for what it’s worth, I don’t use this for piracy, primarily I use it for downloading Humble Bundle purchases. A bundle often has 20+ items, so I will bulk download the torrents (to save HB some bandwidth) and then dump them into the watch folder.
  • Video Station/DS Video – I tried running Plex for watching digital movies from the NAS but it was flaky as hell since there isn’t an official Synology app and Plex is increasingly pushing their subscription nonsense instead of just being a client/server self hosted application. Fortunately, there are Synology Apps for Fire TV (Which I use for streaming on both TVs). So I’ve sorted all of my home movies into the Videos folder and (for a future blog post) encoded them to be easily accessible and compatible.
  • Photo Station – Ok, I don’t actually use this… yet… but I want to revisit it going forward. I want to do a separate post on photos with more details, but basically, I wasn’t using the Photos folder for backup purposes, and that situation has changes recently.
  • Audio Station – I have a ton of music from different sources compiled and sorted together. It’s not my primary GoTo for music, but I want to get more organized playlists going so I can more easily use this for playing my music. For the most part, I am fine with just sticking music ON my phone though.
  • Mail Station – I don’t use Mail Station for actually sending emails, but I did set up the Mail Station server and I use it as a deep archive of emails. I essentially have all my email I have ever sent, going back to the 90s, pulled forward through various email clients, and now it’s all dumped into a Mail Server in a sorted, searchable archive.
  • Cloud Sync – Cloud Sync lets you hook your Synology to various cloud drive services and sync them to your local drives. I’ve got several Dropbox accounts that I have used in the past (Personal, server syncing, each family member) and now a couple of One Drive accounts for backup and personal document sync all linked. It even does Google Drive.

Features I Stopped Using

There aren’t a lot of features I have stopped using, but there are a couple.

  • Web Station – The Synology comes with an optional Webserver and a weird WordPress system that can be enabled. This has been weirdly buggy since day one and I already have plenty of experience managing LAMP stack servers. I recently disted off one of my older Pis, set it up with WordPress and moved the primary use I was using the Synology Web Station for to the Pi. Mostly, It was just a WordPress Archive of all of my old blog posts from various blogs. The links were weird and didn’t work properly because it didn’t quite understand subdirectories or something. The images were present but they didn’t always work because they pointed to old URLs and working the SQL system to change them always came off as wonky. Basically, I didn’t need this archive to be on the NAS and it was an easy thing to just offload to another device.
  • Cloud Station Server – This is a back up system for devices and computers. It will sync specific local folders to a folder on the NAS as a backup. Maybe I was doing something wrong but it always felt really flaky as well, so I just sort of stopped using it. I had it on every laptop in the family for a while but as laptops were replaced, then things started getting weird and getting others to grok how to pull back their files wasn’t super easy either. The better solution I have found is to just give everyone a shared folder specific to them that they can shove files they want to keep into. For my personal use it was just redundant because my entire workflow for years has essentially been cloud based with Dropbox or One Drive keeping everything backed up by default.
  • Surveillance Station – I still sort of use this, but all of my webcams died except one, which doesn’t have night mode anymore. So, it exists and I would use it, but I don’t really use it much anymore. Also. frankly, there was never anything worth seeing on the recordings.

Workflow

The real workflow from the NAS comes from shared folders. Everyone has access to the Family Photos folder mapped to their laptops. I created a shared folder for all of the Blog graphics my wife was using for her blog work that everyone can access since my daughters both helped her with that. They use a shared drive for all of the Ebay and Mercari photos they work on.

I keep folders for photos, and videos and ebooks. I keep folders for important family documents like Tax Returns. All of this can easily be synced to a backup in the cloud and I have a couple of USB keys and loose drives that I do periodic manual backups to, that get stuck in a fire proof safe.

It also lets me map other network drives in as well, for shuffling files around. I have a whole second Linux box set up that has another 4TB or so space in it across several drives, that I use to store less important files like Installable programs and games, ISOs, temporary files for video editing projects, a mountain of internet memes and images saved over the years, music concerts I’ve downloaded, etc. Plus I can map things like, the web root for my Raspberry Pi, or set up a one way(ish) SSH tunnel to my Webserver for pulling backups through.

The box itself sits behind the TV upstairs, and if there ever was a fire or something, it’s likely one of the things I might try to grab on the way out the door, but I’d like to thing my system is robust enough that even if it were lost anything important would be recoverable.