Ive not been using AI a lot, frankly, I find it to be pretty lame for the most part, the images are almost always weirdly uncanny and ugly, and the writing is just bland. I’ve heard it’s pretty good at coding though, and I have not tried using it for code at all. So I decided to give it a go. Specifically, I wanted to use it to augment an existing project from when I was taking that 100 Days of Python course. Specifically, Day 18, the Hirst Painting Project.
The full original code is here:
import colorgram
from turtle import Turtle, Screen
from random import choice
turtle.colormode(255)
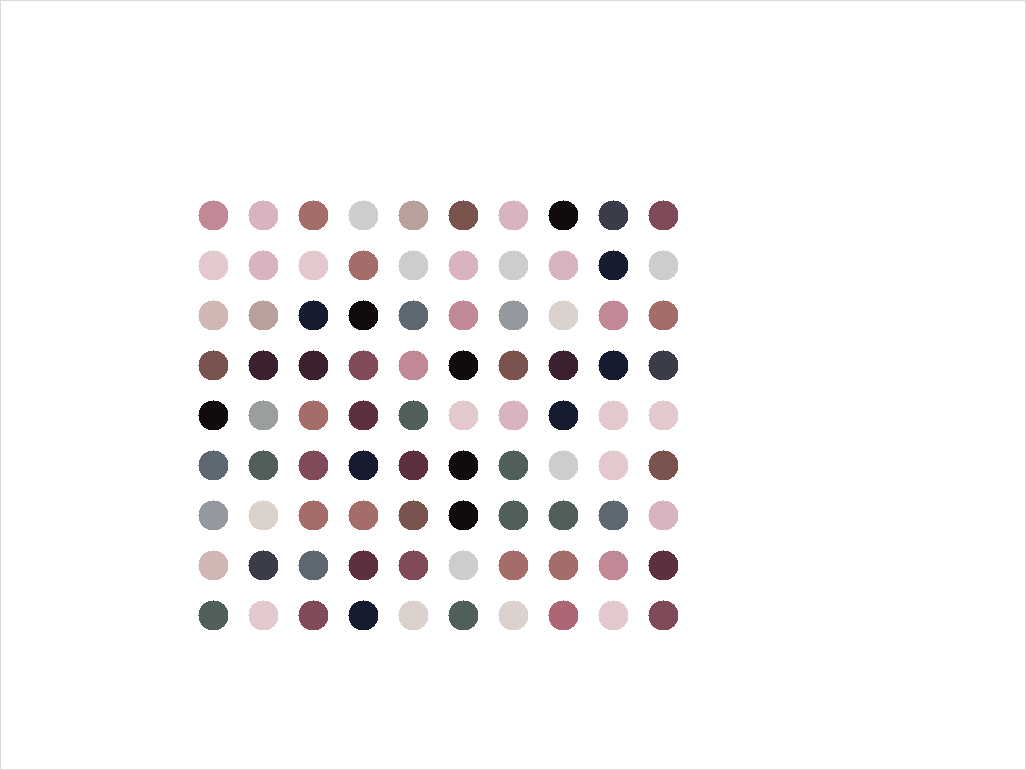
#Sample image, cover of CHVRCHES Every Open Eye Album
color_extracted = colorgram.extract("image.jpg", 20)
color_choices = []
for i in color_extracted:
color_choices.append((i.rgb.r, i.rgb.g, i.rgb.b))
# debug print(color_choices)
#color_choices = [(193, 137, 150), (128, 74, 88), (22, 28, 47), (59, 32, 48), (219, 210, 206), (184, 161, 155), (17, 11, 11), (174, 101, 116), (217, 179, 189), (148, 152, 159), (94, 47, 60), (93, 104, 114), (227, 201, 206), (154, 159, 156), (122, 83, 78), (209, 183, 180), (203, 206, 202), (164, 109, 105), (81, 95, 91), (59, 60, 74)]
marker = Turtle()
marker.speed(100)
marker.penup()
marker.hideturtle()
for y_coord in range(1,10):
for x_coord in range(0,10):
marker.setpos(-300 + x_coord * 50,-280 + y_coord * 50)
marker.pencolor(choice(color_choices))
marker.dot(30)
screen = Screen()
screen.screensize(600, 600)
screen.exitonclick()
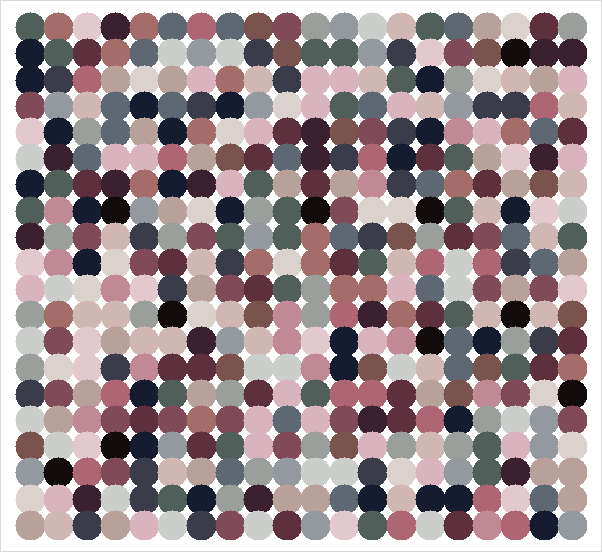
This code, which is also on GitHub with the sample, image, but any image will work, will read the color pallet of a file, “image.jpg”, then draws a simple series of dots in the style of a painting by Damien Hirst. I didn’t pick the theme, it was part of the course, but I do think the result is simple and quite neat.
I have for a while, wanted to make a few updates to this simple program, and sort of tried to a few times, but this time, I let AI do the work. I really wanted two main features.
- The ability to open any file, instead of having to put a file in the folder and rename it image.jpg
- The ability to export the result to an image file
I chose Perplexity AI for my assistant. I wanted to use it as a sort of, accompanying tool, rather than letting ti write all the code. I already have the simple drawing code.
I started by asking it for a simple request:
Can you create a python script that will open a turtle graphics window, 1024x768 in size, draw a circle of 5 pixels thickness, diameter 100 pixels, and include a button that will export the canvas to a png or jpg file
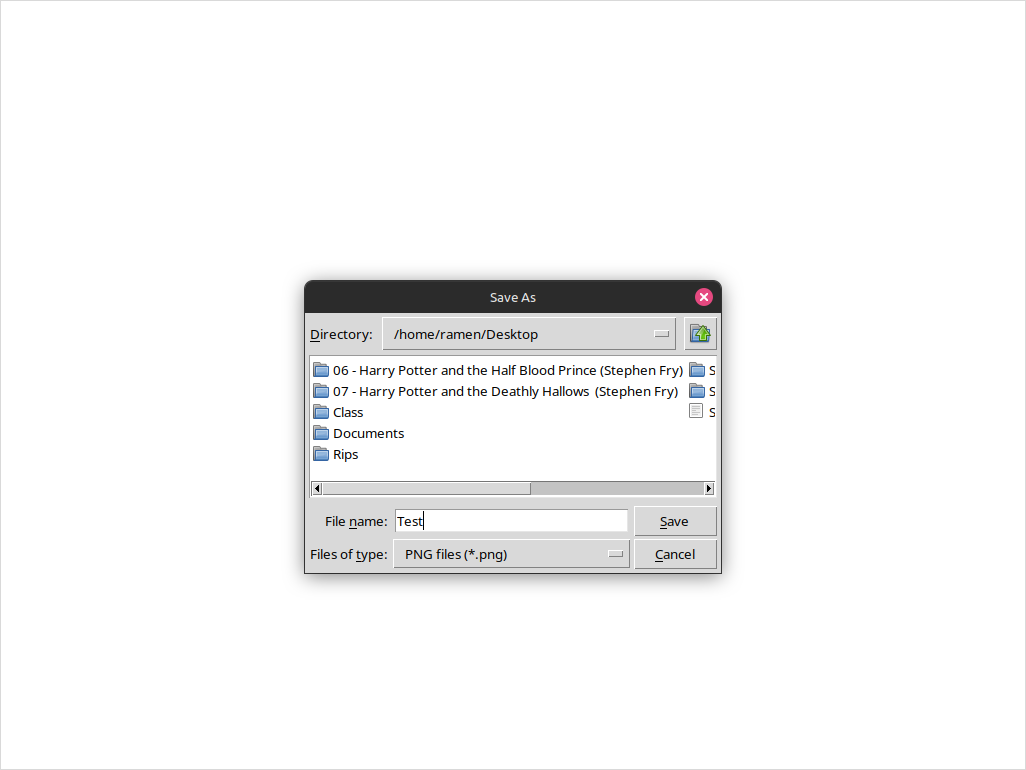
Which it did, I could run the code, it would draw a circle, then I could click a button and save an image of a circle. Though, I did come across an issue I never quite fixed.
It would save the dialogue box along with the canvas. It’s basically just, taking a screen shot.
The solution at the moment is to make sure I drag the dialog box off to the side before saving.
Next:
Can you add a "file Open" button at the bottom that passes the file in as a variable and does not draw anything until a file as been selected
Initially, I wanted to make sure it wouldn’t draw an image until the file was loaded, so the file select box doesn’t actually do anything. Later I changed it to allow for drawing without selecting an image, it just defaults to the ‘Every Open Eye’ color set in my original code.
This worked out as expected as well. Now I had the basic structure to slip my existing code in. I had a file as a variable and a mechanism that drew something (currently, a circle). The code it was giving me though, used a class structure though, which is fine, but my existing code doesn’t. I managed to insert my dots drawing code fine, this required renaming some variables to align, specifically, all of the ‘marker’ variables became “self.pen” at the appropriate location. I had trouble though getting the colormode to work properly. I wasn’t sure where to put it in the code, as relating to the class structure.
I have to say, I probably had it correct, but I also realized later I was having some virtual environment issues between VS Code and my venv and the system. Despite VSCode showing that the imports were resolved, when running things, I got not found’ errors. I ended up just running the code from a venv sourced terminal outside of VSCode. It”s a problem to be fixed later.
The first problem that came up here though, Perplexity had added a function that would display the loaded image, as a backdrop behind the dots. This is not the functionality I wanted.
I just found the function and stripped it out manually.
Then I found it again, because it loaded the image as a backdrop when opening a file, and then again when drawing the dots.
Something also notable here. At one point, I took my working code, with the draw dots, and fed it back to Perplexity, telling it, ‘I added some code, please make this the new baseline.’ This worked out, perfectly. Going forward, it worked off my updated code. Even more surprisingly, it detected the new function of the drawing, to draw dots, instead of a single circle, and it renamed the internal references ON ITS OWN.
I was pretty impressed with that.
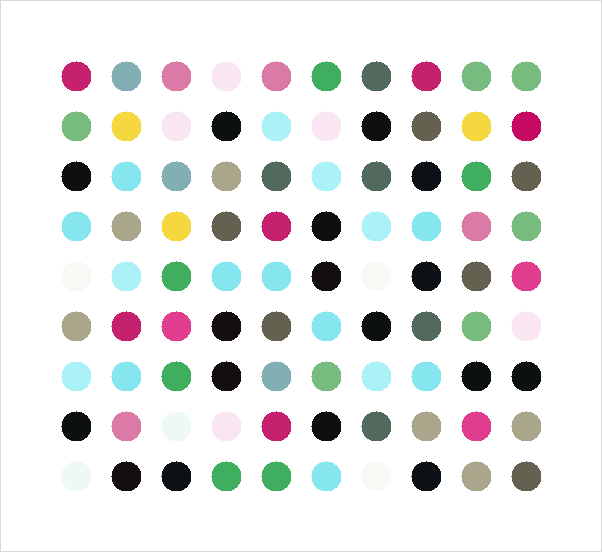
I had the basic functionality down, but wanted to do some cleanup. After running it over and over, and having to navigate to a directory with pictures each time, I asked it to change the file open and save to default to the user’s home folder. I also asked it to only look for image files, to avoid errors from other file types. I also had it resize the image down to center and fit the dots better.
I couldn’t solve the dialogue box option. I tried to, It added a short delay on the save, but that just reulted in a saved image of the things behind the drawing. I tried to get it to position the save dialog outside of the window, but the code there didn’t seem to actually DO anything.
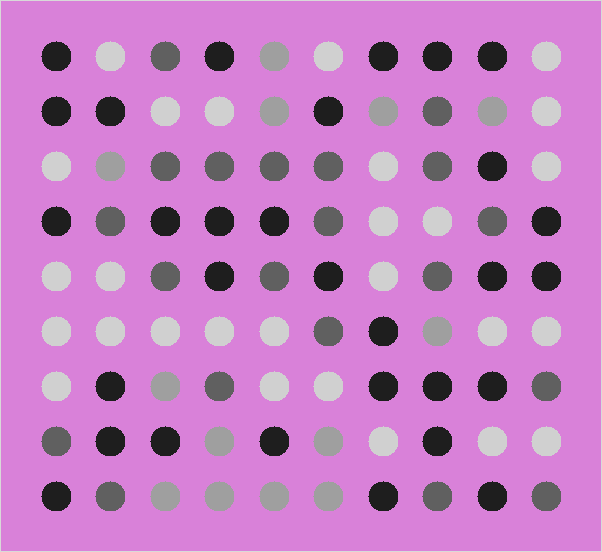
I also added a few last-minute features. One, is a way to update the background color. It had actually had this feature originally, but I asked it to remove it, because at the time, I didn’t want it.
I also had it add some boxes that allow for selecting how many rows and columns will be drawn. I may look into having it draw larger canvases or maybe things that are not dots in the future. It’s pretty functional as it is though. Well, at least as functional as a program that makes dot images can be.
Anyway, I’ll make a GitHub Repository probably, but for now, the full updated code is below. Also, it turns out I can share my Perplexity chat, so you can also see the full chat here.
## pip install colorgram.py

import turtle
import colorgram
from tkinter import *
from tkinter import filedialog
from tkinter import colorchooser
from random import choice
from PIL import ImageGrab
import os

class TurtleApp:
    def __init__(self, root):
        self.root = root
        self.root.title("Turtle Graphics with Image Open and Save")

        self.canvas_width = 600
        self.canvas_height = 550

        self.canvas = Canvas(root, width=self.canvas_width, height=self.canvas_height)
        self.canvas.pack()

        self.screen = turtle.TurtleScreen(self.canvas)
        self.screen.colormode(255)
        self.screen.bgcolor("white")

        self.pen = turtle.RawTurtle(self.screen)
        self.pen.pensize(5)
        self.pen.hideturtle()

        self.file_path = None
        self.color_choices = [(193, 137, 150), (128, 74, 88), (22, 28, 47), (59, 32, 48), (219, 210, 206),
                              (184, 161, 155), (17, 11, 11), (174, 101, 116), (217, 179, 189), (148, 152, 159),
                              (94, 47, 60), (93, 104, 114), (227, 201, 206), (154, 159, 156), (122, 83, 78),
                              (209, 183, 180), (203, 206, 202), (164, 109, 105), (81, 95, 91), (59, 60, 74)]

        self.rows = 9
        self.columns = 10

        self.create_widgets()

    def create_widgets(self):
        button_frame = Frame(self.root)
        button_frame.pack(side=BOTTOM, fill=X)

        open_button = Button(button_frame, text="Open Image", command=self.open_file)
        open_button.pack(side=LEFT, padx=5, pady=5)

        draw_button = Button(button_frame, text="Draw Dots", command=self.draw_dots)
        draw_button.pack(side=LEFT, padx=5, pady=5)

        save_button = Button(button_frame, text="Export Canvas", command=self.save_canvas)
        save_button.pack(side=LEFT, padx=5, pady=5)

        bg_color_button = Button(button_frame, text="Change Background", command=self.change_background_color)
        bg_color_button.pack(side=LEFT, padx=5, pady=5)

        exit_button = Button(button_frame, text="Exit", command=self.exit_app)
        exit_button.pack(side=LEFT, padx=5, pady=5)

        # Add row and column input
        row_label = Label(button_frame, text="Rows:")
        row_label.pack(side=LEFT, padx=5, pady=5)
        self.row_entry = Entry(button_frame, width=5)
        self.row_entry.insert(0, str(self.rows))
        self.row_entry.pack(side=LEFT, padx=5, pady=5)

        col_label = Label(button_frame, text="Columns:")
        col_label.pack(side=LEFT, padx=5, pady=5)
        self.col_entry = Entry(button_frame, width=5)
        self.col_entry.insert(0, str(self.columns))
        self.col_entry.pack(side=LEFT, padx=5, pady=5)

    def open_file(self):
        # Get the user's home directory
        home_dir = os.path.expanduser("~")

        self.file_path = filedialog.askopenfilename(
            initialdir=home_dir,  # Set initial directory to user's home folder
            filetypes=[
                ("Image files", "*.png *.jpg *.jpeg *.gif *.bmp"),
                ("PNG files", "*.png"),
                ("JPEG files", "*.jpg *.jpeg"),
                ("GIF files", "*.gif"),
                ("BMP files", "*.bmp")
            ]
        )
        if self.file_path:
            print(f"Image selected: {self.file_path}")
            self.root.title(f"Turtle Graphics - {os.path.basename(self.file_path)}")
            self.extract_colors()

    def change_background_color(self):
        color = colorchooser.askcolor(title="Choose background color")
        if color[1]:  # color is in the format ((r, g, b), hexcode)
            self.screen.bgcolor(color[1])
            print(f"Background color changed to {color[1]}")

    def extract_colors(self):
        color_extracted = colorgram.extract(self.file_path, 20)
        self.color_choices = []
        for i in color_extracted:
            self.color_choices.append((i.rgb.r, i.rgb.g, i.rgb.b))
        print("Colors extracted from the image")

    def draw_dots(self):
        self.pen.clear()

        try:
            self.rows = int(self.row_entry.get())
            self.columns = int(self.col_entry.get())
        except ValueError:
            print("Invalid row or column value. Using default values.")

        self.pen.speed(100)
        self.pen.penup()
        self.pen.hideturtle()

        dot_size = 30
        spacing_x = self.canvas_width / (self.columns + 1)
        spacing_y = self.canvas_height / (self.rows + 1)
        start_x = -self.canvas_width / 2 + spacing_x
        start_y = self.canvas_height / 2 - spacing_y

        for y_coord in range(self.rows):
            for x_coord in range(self.columns):
                self.pen.setpos(start_x + x_coord * spacing_x, start_y - y_coord * spacing_y)
                self.pen.pencolor(choice(self.color_choices))
                self.pen.dot(dot_size)

    def save_canvas(self):
        # Get the main window's position and size
        window_x = self.root.winfo_x()
        window_y = self.root.winfo_y()
        window_width = self.root.winfo_width()

        # Calculate the position for the dialog box
        dialog_x = window_x + window_width + 10  # 10 pixels to the right of the main window
        dialog_y = window_y

        # Get the user's home directory
        home_dir = os.path.expanduser("~")

        # Open the save dialog at the calculated position
        self.root.update()  # Ensure the window size is updated
        save_path = filedialog.asksaveasfilename(
            parent=self.root,
            defaultextension=".png",
            filetypes=[("PNG files", "*.png"), ("JPEG files", "*.jpg *.jpeg")],
            initialdir=home_dir,  # Set initial directory to user's home folder
        )

        if save_path:
            # Move the dialog to the desired position
            self.root.geometry(f"+{dialog_x}+{dialog_y}")

            x0 = self.root.winfo_rootx() + self.canvas.winfo_x()
            y0 = self.root.winfo_rooty() + self.canvas.winfo_y()
            x1 = x0 + self.canvas.winfo_width()
            y1 = y0 + self.canvas.winfo_height()

            ImageGrab.grab(bbox=(x0, y0, x1, y1)).save(save_path)
            print(f"Canvas saved as {save_path}")

            # Reset the main window position
            self.root.geometry(f"+{window_x}+{window_y}")

    def exit_app(self):
        self.root.quit()
        self.root.destroy()

root = Tk()
app = TurtleApp(root)
root.mainloop()
Josh Miller aka “Ramen Junkie”. I write about my various hobbies here. Mostly coding, photography, and music. Sometimes I just write about life in general. I also post sometimes about toy collecting and video games at Lameazoid.com.