Linux

Linux Post Install Clean-Up

So, now that I’ve returned to Linux again, I’ve come across several sort of, clean-up tasks that needed to be completed to get things working fully.  A lot of my activities are, by design, machine agnostic.  That is to say, they run off “the cloud”, either through a service or something I am hosting.

One big one I use is One Drive.  I don’t NEED one drive running locally, but it’s convenient and nice to have.  Aside from just syncing and backing up all my writing through it, I also use it to do things like, sync blog graphics files and screen shots.  I’ve found this One Drive Linux Client, which seems promising, I’ve gotten it set up easily enough, but I have not quite worked out how to get it fully working with a selective sync.  I don’t need everything off my One Drive, and don’t have the drive space for that anyway.  So this one is pending a bit.

That hasn’t really slowed me down, I already also use GitHub for a lot of my writing as a secondary place with versioning, etc.  I made sure everything was up to date in Windows, then did a pull from the three remote repositories I care about, my Journal, my Digital Notes library, and my Web Clips library.  I made a few updates and made sure I had the workflow down for keeping things synced.  This also prompted the creation of a simple script to push everything at once.

#!/bin/bash  
git add -A  
git commit -m "Updated via Simple CLI Push"  
git push

I thought about adding the option to add a custom commit message, but these are all private repositories so I don’t really care about what the commit messages are. I also added this to the shell so I can just run it with “gitpush” from anywhere.

This also meant properly setting up SSH keys in Github, so I could actually pull the libraries. I also realized I would need to set up my SSH Keypairs for my web server space, which wasn’t hard but was mildly inconvenient because account based SSH is disabled. The simple solution was to reenable it using the Digital Ocean console, add the keys, then disable it again.

Probably the biggest hassle I had was getting the two NTFS partitions, one on the old primary Windows Drive, and a second on the same physical secondary drive as the system. I mostly use this drive for “working files”. Ebooks to read, monthly file dumps off my phone, programming projects, etc.

It’s just files.

I could manually mount both drives when I started, but any reboot would unmount them. I went out and looked up the fstab settings to use, and had no luck. In fact, I had the opposite of luck because at one point, I couldn’t mount the secondary storage drive at all in Linux. Only in Windows. I tried many options in both OSes, and finally just, backed everything up and wiped the partition in favor of a native ext4 format.

Since I had all this space now anyway, I remapped my /home/ folder to it, which is kind of good practice anyway, then copied everything from the old working files drive into a folder in my own home folder.

This ended up being a weird hassle too, because at one point I had “pre copied” the working files, before the migration, only to discover they had vanished when the /home/ folder was moved. I think what was happening, was they were not part of the encrypted blob, so the system simply, ignored them. So I had to unmount everything, reboot, which failed because now there are no user settings, drop to a recovery console, move the files OUT of the personal home folder, remount it all, then copy the files, again, from inside the OS, so they would receive the proper encryption and show up properly.

What a hassle, but it’s done.

The only real missing element here is that my copy of Affinity Photo is only licensed for Windows, so I’ll need to buy the Linux version. I don’t mind, I have been meaning to upgrade to version 2 anyway. I think Version 2 even has a new sytle liscence that is OS agnostic.

Another last one I’d like to do is automount the network shares from my NAS and file server on boot, if present. I don’t always use the laptop at home though, which means this could be weird when it can’t access them. But I also have an Open VPN tunnel to get to my home network, so there is probably a way to set it up in a way that connects through that always.

Linux, Again

So, I am back on Linux again. On my laptop at least. I never really STOPPED using Linux, I use it on Raspberry Pis and my Webserver and in the Windows Subsystem for Linux all the time.

Just for the record, I just went with boring Mint Linux.

But I have moved back to using it full time again on my laptop. I still have the Windows partition for now, but I seriously doubt I am ever going to go back to it again. And FWIW, I have previously used only Linux on laptops in the past. The concept is not at all alien to me.

I have wanted to make the switch back for a while but was a bit hobbled. I had been using an app to tether connectivity off my phone over USB. I could never get it to reliably work in Linux. I discovered recently that my cell plan now just includes regular WiFi based hotspotting, so I can just connect via WiFi when needed.

This was literally the only hurdle.

Another motivation though is the end of life for Windows 10 coming next year. I really feel like this is going to get pushed out because Windows 10 is really going strong still. But just in case, I need to get off of it.

Side note, Microsoft is really over estimating just how often people upgrade their PC hardware with their push of Windows 11 from 10. The blocking factors of the upgrade are extremely arbitrary and most of the PCs that can’t be updated to Windows 11, still function just fine for 90% of use cases for “regular people.”

Anyway, I plan to keep using my laptop for the foreseeable future. So moving to Linux is the best option.

I also want to use it as a bit of a test bed for migrating my project PC to Linux as well, mostly I have questions relating to Docker and the easiest solution will just be to test it.

Anyway, the migration itself was surprisingly smooth. Most of my workflow has been shifting to be very “floaty”. Almost all my writing for example, is Joplin and local files, which are in a private Github repository.

Joplin just worked, and then I set up Git and pulled the repository down. Visual Studio Code has a Linux option, I think it was even pre-installed I think. I already have been using it as a txt editor so I am familiar with the best ways to set things up.

The real missing piece is OneDrive syncing, but its something I can work around, especially since these folders already sync via my Synology.

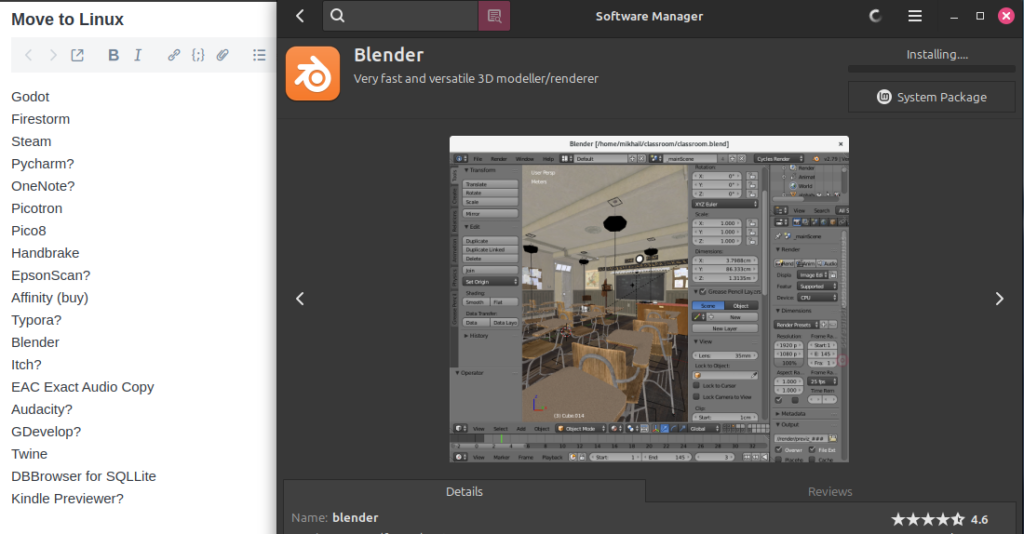
Most everything else I use on the Laptop was just a matter of making a list in Windows and then downloading them in Linux. Mostly I just use the thing for writing and for sorting image files off my phone.

Fixing Cron Not Executing

Recently I encountered an issue I hadn’t run into before. Specifically, my Cron Jobs were not running. Everything seemed correct and I could manually run the commands at the CLI. I’ve had some issue before with getting things to run because I wasn’t using the complete path for programs but this seemed to be something different.

The problem I found was that the root password needed to be changed. Running the following:

sudo  grep CRON /var/log/syslog

Would output a long list of the same issue repeating over and over.

May 27 10:30:01 Webserver CRON[12943]: Authentication token is no longer valid; new one required
May 27 10:39:01 Webserver CRON[12978]: Authentication token is no longer valid; new one required
May 27 10:39:01 Webserver CRON[12977]: Authentication token is no longer valid; new one required
May 27 10:40:01 Webserver CRON[13049]: Authentication token is no longer valid; new one required

When running the following command:

 sudo chage -l root

Would output something like:

Password expires               : never
Password inactive              : never
Account expires                : never

Which suggests the root password has never changed. So I ran the following command:

sudo passwd root

And set a new root password (which was the same as the old root password) and suddenly everything started working again. It felt like a really odd issue, especially considering I didn’t actually change the password, and as far as I could tell I had a root password. Plus the password wasn’t set to expire at all.

Anyway, I wrapped it off by doing an (optional) truncation of the system log. Since the file had become unwieldingly huge with the following.

sudo truncate -s 0 /var/log/syslog

Migrating Mail-In-A-Box to a New VPS

A few years ago, I started running my own mail server using Mail-In-A-Box. Four years or so actually, if the age of my old server was accurate. I have several different email addresses, mostly to better segment out content. I have done this with Reddit, and Twitter, and TT-RSS, and probably other things. In my Mail-In-A-Box I run email for 3 domains, two of mine, one for my wife’s. Overtime I may eventually migrate all of my email to it, at this point, I am a little worried about being blacklisted, so I mostly use it for secondary, receive only, email aggregation.

For a while I’ve been putting off migrating the system to a new VPS. It’s been running on Ubuntu 14.04 since it was created. Newer MiaB won’t run on 14.04 and I can’t distro update the machine. The only choice is to roll a new VPS and migrate the mail.

I use Digital Ocean for my online services, feel free to sign up with the link in the side bar if you want, I get a little kickback if you do. It’s easy to use and affordable. Plus in cases like this, I can spin up an extra VPS, then easily destroy it and spin up a new one, when I discover that MiaB only works up through 18.04, so 20.04, which I used initially, won’t work. Also having the extra server just means a temporary bump in my billing for the month.

The basic process for migrating Mail-In-A-Box is here, in the official documentation. I had a few hiccups along the way but I got them ironed out.

First step was creating the new machine. I mentioned above, I first made a 20.04 machine, but found that doesn’t work, so I killed that and made a new 18.04 machine. Before anything else, I did a few security based housecleaning tasks. The server was creating with Shared Keys log in set up, but it only had a root account. So I created a new user and made them a sudoer. I also copied the SSH keys from root to the user.

adduser Username
usermod -aG sudo Username
cp ~/.ssh /home/Username
chown Username:Username /home/Username/.ssh -R

Next step was to add the new user to the SSH users and secure up that access.

sudo pico /etc/ssh/sshd_config

Then edit:

#Port 22

To a custom port and change:

PermitRootLogin no

Finally add:

AllowUsers Username

Lastly restart the ssh server with sudo service sshd restart. Then test the connection using the regular user. If that works, then disconnect from the root session and continue on the regular user.

I was doing an upgrade but the fresh install guide is here. All I needed was the set up line really, which takes a minute to run but does an initial set up of Mail-in-a-Box.

curl -s https://mailinabox.email/setup.sh | sudo -E bash

The next part was the trickiest bit. I linked the migration article above but I ended up trying to simplify things a bit. On the old machine, I stopped the mailinabox service, so no new mail would come in, then ran the backup python script as described int he article above. I found it was easiest to just connect to the server using Filezilla using SSH FTP, which meant importing my keys to Filezilla. It’s in the settings under SFTP. Something to keep in mind if you set a custom port is you’ll need to add sftp:// before the IP address.

Things are a little tricky here, since root owns the backup folder. I ended up doing a sudo copy into my user home directory, then a chown on the folder to give my user account access to the folder. This meant Filezilla could see the folder and download it to my local machine. There are way to directly transfer between the new and old server, but between custom ports and SSH keys and permissions, I found it was easiest just to download to my local laptop. Afterwards, I connected with SFTP to the NEW server, and pushed the backup folder to the new server. You need the whole folder with the “secret_key” text file and the encrypted folder and files. Basically, this is all the settings and emails.

Next step was to ssh into the New Server, go to the freshly uploaded backup directory, and import the old files, as described in the link. This is two commands run, separately.

export PASSPHRASE=$(cat secret_key.txt)

sudo -E duplicity restore --force file:///home/Username/backup/encrypted /home/user-data/

This takes a minute to run. The next step listed is to rerun the mailinabox set up with “sudo mailinabox”.

I had trouble here. Nginx would not restart. After sound troubleshooting I found it was an issue with SSL. Basically what seemed to happen was the restore, pulled the old SSL certs. Or maybe it was looking for the old SSL certs. Whatever the case, the fix was this process.

rm -rf /home/user-data/ssl/*

The fix was to delete the SSL certificates. then run “sudo mailinabox”. Everything started up. I verified I could log into the control panel and the mailbox using the UP address of the new server. I verified that all my custom DNS records existed, these are needed since the Glue Records point to the Mail-In-A-Box machine but because I host my websites on a separate machine, I have to have DNS records set up appropriately.

One thing I noticed was the SSL Certificates seemed to be wrong, which meant things worked, but would cause annoying security messages. I am not sure if this was related to deleting the certs above, or just that it was still looking for the old IP address. Whatever the case, I did a manual update with certbox for my MiaB Subdomain using

sudo certbot certonly --force-renewal -d Subdomain.Domain.comHere

Another minor issue I ran into, doing this needs to drop a file either in the webroot folder, or spin up a temporary web server to host it’s own file. I couldn’t find the webroot for the custom MiaB set up (it was not /var/www/html) so I temporarily ran “sudo service nginx stop”, then ran the above certbox command, using a temporary webserver option, then “sudo service nginx start” to restart Nginx. NGinx had to be stopped since otherwise it is using Port 80, and the temporary server can’t start to runt he certificate verification process.

Another note, I am not sure if the –force-renewal option is needed above. It didn’t throw out any errors and it fixed the issue, so I left it.

The final step was to go to my Domain Registrar and update the name servers and Glue Records to point to the new Server IP. After a short bit of waiting, eventually the mail server URL connected to the admin and web consoles. I did some test send and receive of emails between my server and gmail to verify everything was working properly. One nice bit, the newer MiaB has a different interface for Roundcube webmail, so I could easily tell if I was going to the new or old server.

Once everything was satisfactory, i went back to Digital Ocean and powered down the old server. If everything is still working in a few days, I will destroy the old server, so I don’t have to keep paying upkeep on it. One thing to keep in mind, both the old and new servers require a specific hostname, so they will be named the same, so double check that you are powering down and deleting the correct server. some easy ways to verify are IP address, or server age. The old server is several years old but the new server is several days old.

CHIP – the $8 Computer

CHIPS!I just want to start here by saying CHIP is kind of a shitty name for a computer thing, there is no effective way to do any sort of search for “Chip computer” since “computer chip” has been a thing for eternity and gives the same results. This thing really needs a re-branding or something.

I’m also not entirely sure it’s still an $8 computer, It looks like they are charging $9 now on their website, and there is shipping costs involved.

Anyway, I’ve received two of these cheap computers from my Kickstarter contribution. I have a third one coming in 4-6 months that will include a VGA adapter. For some reason all of the peripherals are delayed. I wanted to get a December release CHIP and they offered the option to buy more once the Kickstarter ended, so I ended up with two.

CHIP is essentially a micro computer in the vein of the Raspberry Pi, though it’s more like a Pi Zero than the larger models. The main advantage the CHIP has over the Pi Zero is that it has built in WiFi and Bluetooth.

I’m not entirely sure what I want to do with these yet, though I have some ideas. They are almost as cheap as my Arduino clones (probably cheaper once I add WiFi to an Arduino), and they have a slightly more versatile interface since it’s running Debian Linux. It would be really simple to add a basic web server to this device.

The board itself seems sturdy enough. It comes in a plastic cradle that covers the bottom and three of the 4 ports are on one end which is convenient. There is a normal USB port, a micro USB for power, and a headphone style jack that has an A/V breakout cable to hook it to a monitor and speakers. The molex style battery connector is on the opposite end. The base set up only has composite output for video, the breakout cable gives you a standard Red, Yellow, White set of hook ups.

CHIP Desktop

I hooked both of my CHIPS to a TV so I could easily connect each to the WiFi in my house. Once they are online the video isn’t really necessary since I can SSH to them over the network using Putty.

On a side note, the default SSH log in information is username: root, password: chip .

I have not done much else with it yet, but it’s a nifty little device. I have a vague idea of building a Podcast radio for my car out of one with some push button controls but I have not checked if there is a CLI based podcatcher available, or even a CLI based audio player I could tie push button commands to.