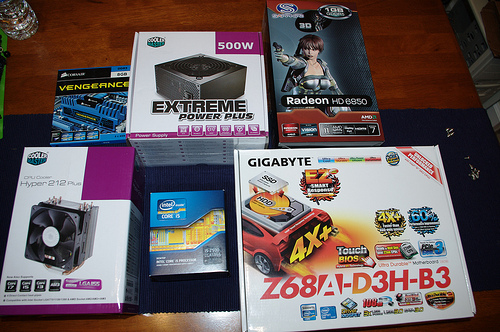
I got a stack of boxes last Thursday, somewhat previously discussed.
I already owned the case. It’s this one here. It’s basic, holds a shitload of hard drives, and has several huge quiet 120mm fans. I also already had a 1TB SATA drive to use.
It’s been a while since I have built a PC, but, in general, it’s pretty simple. The hard part is picking out the components really, which obviously, I’ve already done. He was not around for the build but my son asked if I thought I would be done putting my computer together within a few months. He seemed surprised when I told him it would take maybe an hour, once I had all of the parts.
The only real key is making sure the heat sink on the processor makes good contact and works, since otherwise, you’re liable to burn up an expensive component.
The place to start is the Motherboard. Here it is, removed from the box and placed on its static bag.
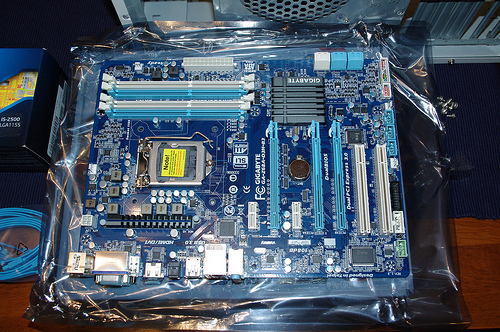
This part is essentially the central nervous system of the computer. It connects all of the other parts together and lets them communicate. It does a few other things but at it’s core, that’s what it does. The Motherboard can’t do math for crap though, which is why the next step is to add the Processor, which more or less only does math… very very quickly.
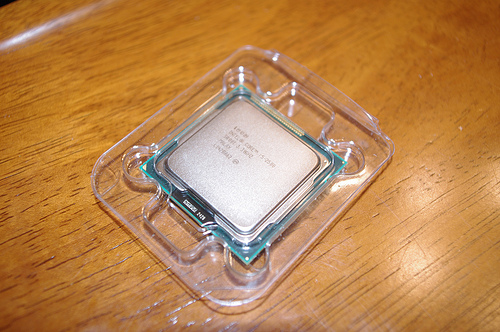
It’s small, maybe an inch and a half square. This one runs at I believe 3.3 Ghz, with 4 cores, which essentially means it does 3.3 Billion calculations per second and can do four calculations at a time. This chip costs more than any other individual component in this computer. Because it works hard and runs everything, it also gets hot quickly. Which is why the next step is to add the heat sink.
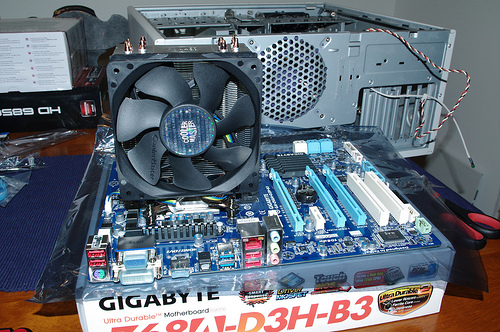
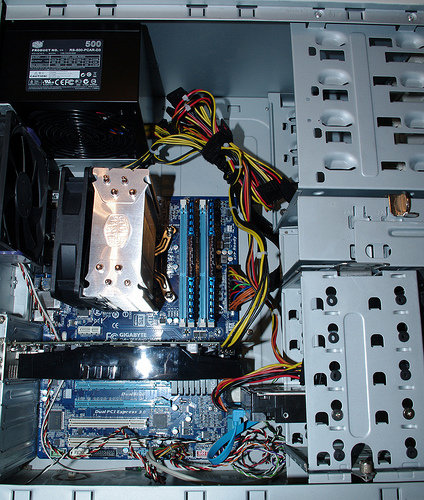
Ok, so a little story on this humongous heatsink and fan. The last time i bought a processor, it did not include a heatsink of it’s own. Heatsinks, personally, a pretty generic and unless you’re overclocking the CPU, you really don’t need much. So I threw the “Number one selling CPU Heatsink on Amazon that was only like $20 anyway” on my order. The pictures on Amazon make it look like a standard chunk of metal that sits on the CPU with the fan on top.
Turns out the chip came with a heatsink and fan. It also turns out that the one I bought was like four times larger than expected. I decided that since it was cheap, I may aw well use it rather than return it.
Hence, gigantic heat sink. Fortunately, the case I’m using is pretty large.
The last step before bolting the Motherboard assembly into the case is to stick the RAM in. It’s nothing particularly exciting other than I had to consult the manual to figure out the optimal slot placement.
After the board is in the case, the power supply can be strapped in as well. The manual suggested putting the PS in first but my experience has been that often the PS obstructs access to the Mother Board. It didn’t in this case (pun intended) but I waited anyway. I also stuck the hard drive into the drive bay and reinserted it.
While the view is still relatively clear, I also wired in all of the front panel controls and lights. Just a side note, I ended up putting all of these in reverse, which meant opening the case later and flipping them all over. No biggie.
Finally, the Graphics card is inserted.
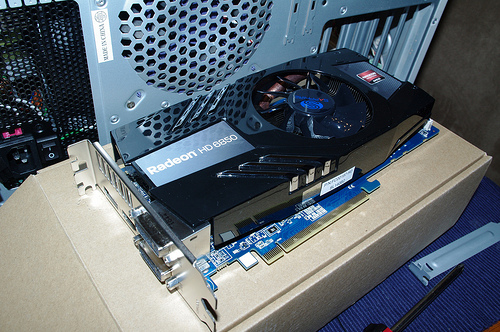
The desire to upgrade the GPU was a heavy driver in my decision to build a PC to begin with. This one can be expanded to a second card using some ATI technology that I forget the name of if I want to add a second one. It’s huge and pretty impressive to look at.
Finally, everything is assembled and it’s time to power things up.
Aside from the flipped button leads, I also had a bit of a worry when turning it on with the cooling. The PS fan doesn’t power up unless it’s needed, so it didn’t immediately spring to life as expected. This wasn’t helped by rear fan, which it turns out is dead. I’ve since bought a replacement for it though I have not installed it yet.
I also ran into a slight snag when I went to install the OS. I don’t own any SATA CD/DVD/BluRay/Disc drives. Fortunately, I have a USB DVD drive for my netbook, which functioned just fine for this use.
I also had to wait a day for my Monitor to come in and later realized I don’t own a second USB Keyboard or Mouse (no PS/2 Ports).
It’s been running just fine for several days now.
I can run all of my games on super uber graphics mode with no stutter or slow downs. It boots up very quickly, despite the non SSD hard drive. Basically, it’s everything it’s supposed to be.
Josh Miller aka “Ramen Junkie”. I write about my various hobbies here. Mostly coding, photography, and music. Sometimes I just write about life in general. I also post sometimes about toy collecting and video games at Lameazoid.com.
[…] also serves as a print server for all of the other computers. The second Desktop, Squall, I built recently, is in the office, I use it primarily for […]
[…] building my home office PC, I ended up gathering a few more monitors second hand and eventually had a triple monitor set up at […]
[…] a handful of drives for a total storage of 4 GB, mostly filled with games. I built this machine almost 7 years ago. It’s nothing particularly special, and I have bumped up the RAM since then considerably. […]
[…] for my computers. The old workflow consisted of my Windows 10 Desktop, Squall, that I originally put together back in 2012. It still runs everything perfectly fine, since 2012, I’ve bumped up the RAM quite a bit, […]